- Home
- Forums
- Ride Reports
- MotoBikes
- Restorations
- Wrenching
- 1963 BMW R69s
- 1969 BMW R60/2
- 1978 Yamaha 125
- 1979 KZ1300
- 1979 Kz1300 - Bob's Beauty
- 1981 CBX SuperSport
- 1981 Kz1300 Model A3 - Chocolatie
- 1984 Ford F250 XL
- 1987 ATK
- 1987 MowieMowie
- 1987 RotoTiller
- 1988 Honda Accord Lxi
- 1990 BMW RT100 - Barrie
- 1991 Harley Davidson FLHTCU
- 1992 Johnnie Deere
- 2000 YZ426
- 2002 Dodge Ram
- 2006 Carson RacerX Trailer
- 2006 Host Camper
- 2006 KrZy8
- 2007 Wabs
- 2012 KTM 690R
- 2013 Naomi - FJR 1300
- 2014-08-01 Air Compressor - Sears
- 2017 Kioti
- 2018 Toy Hauler
- 2020 Honda Fit
- 2021 Miscellaneous
- 2024 Log Splitter
- 2024 NeoDyne MC Lift
- 2050 test
- Lil Trlr
- Eats
- RIP
- PC Not
- Cages
- Test
- FJRF Best
- For Sale
Candy Butt Association
World's Wimpiest Riders
You are here
2024-04-10 Kz1300 Mech Water Pump Seal Replacement

Forums:
2024-04-10 Kz1300 Mech Water Pump Seal Replacement
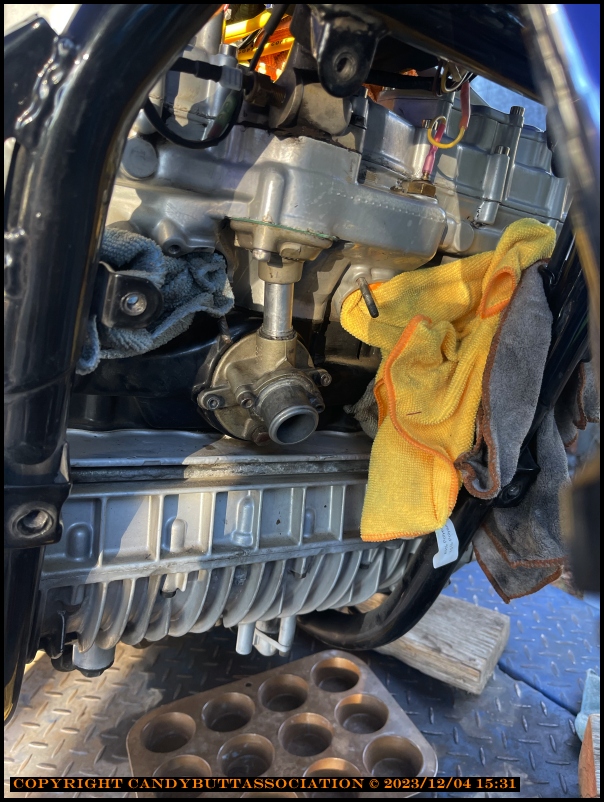
Time to screw the courage up and remove the mechanical seal.
Watched two good videos
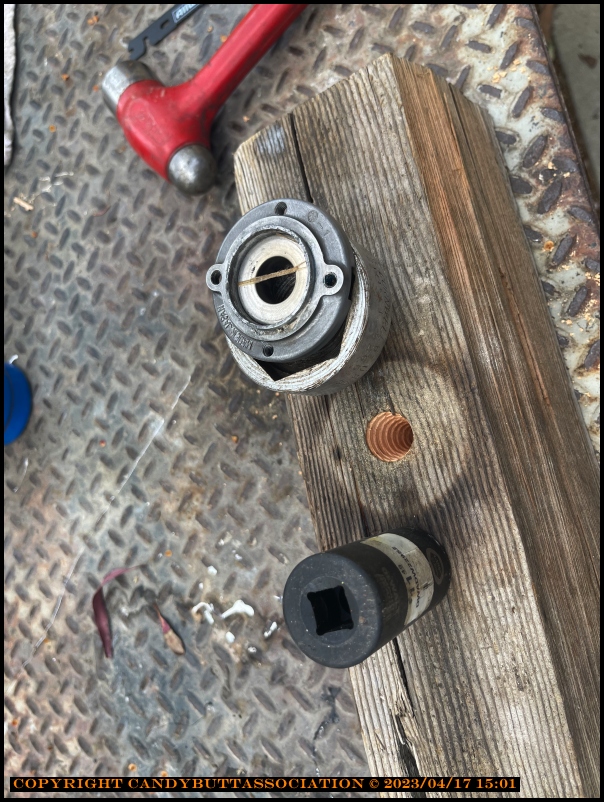
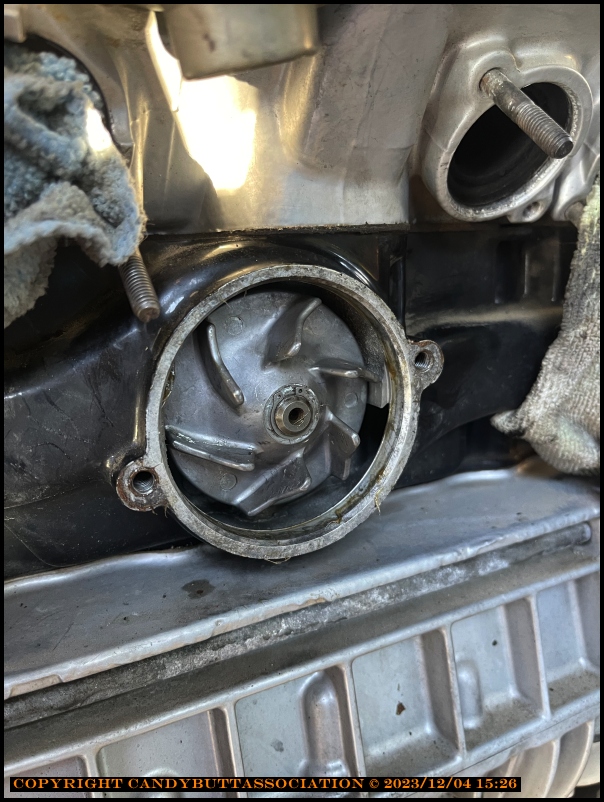
This has been apart before as evidenced by the plier gouge marks...
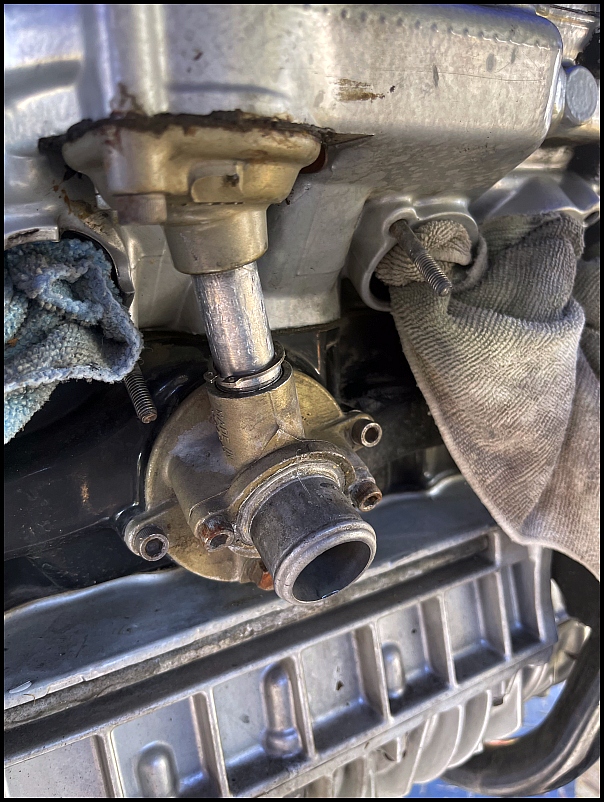
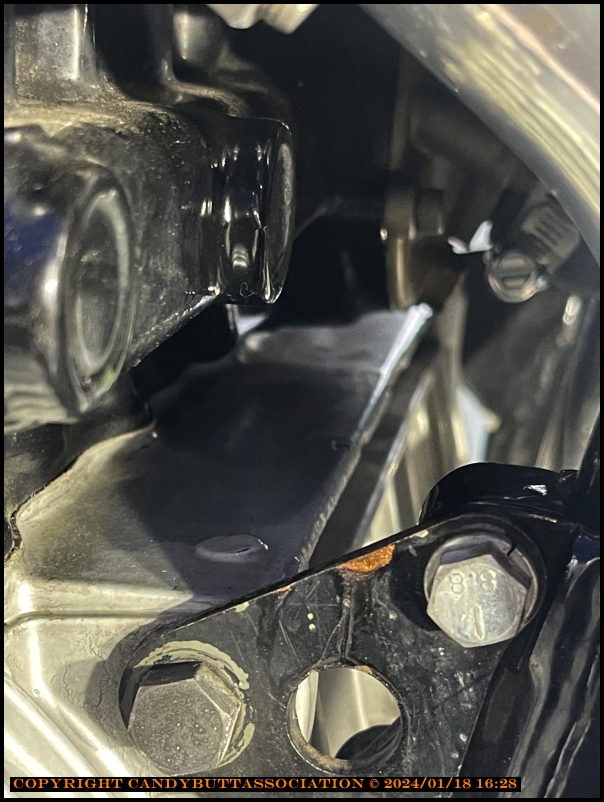
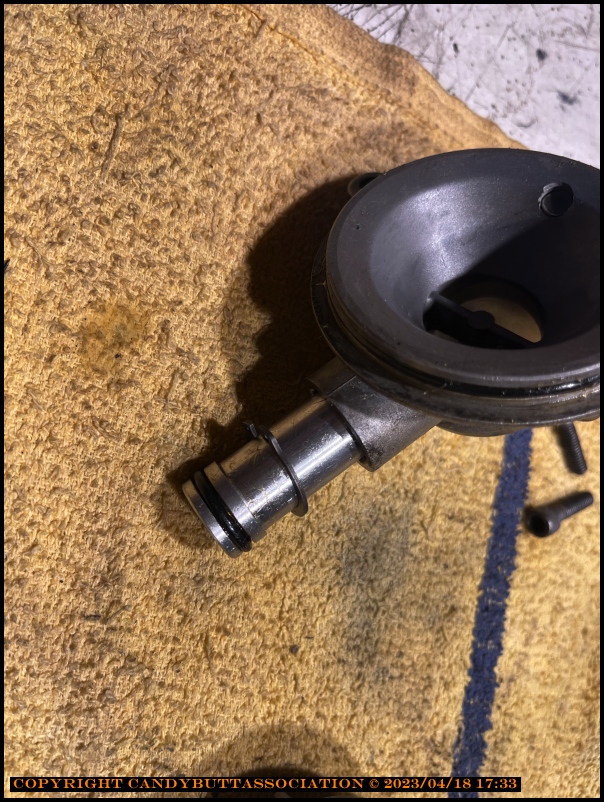
The transfer tube is supposed to press up far enough to allow removal of seal housing, leaving temp stat in place. No way on this one?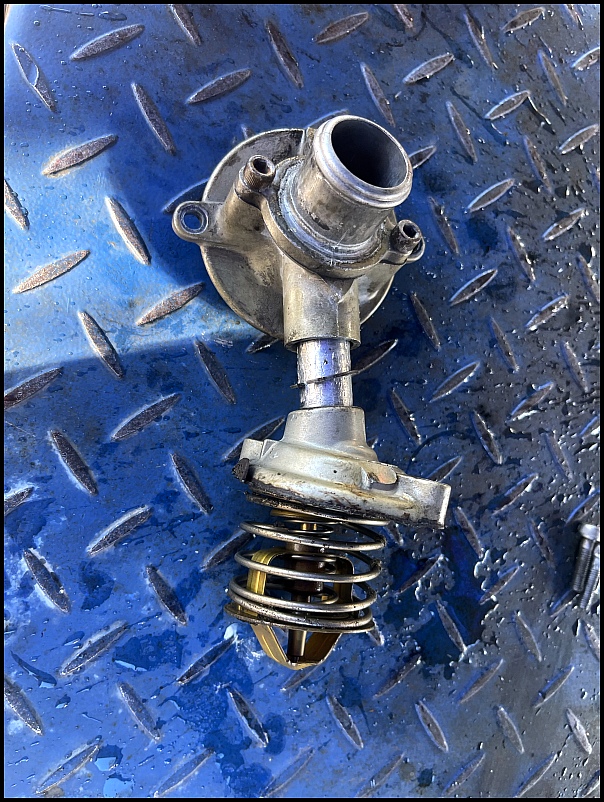
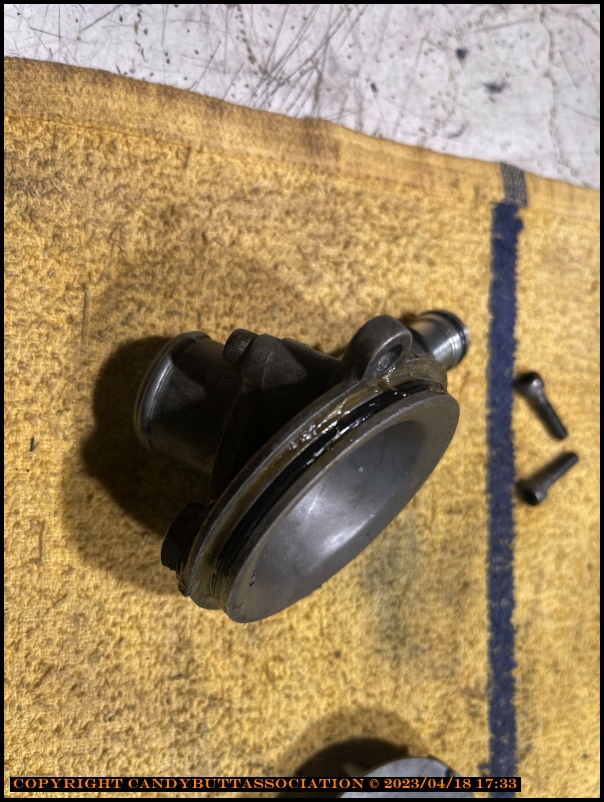
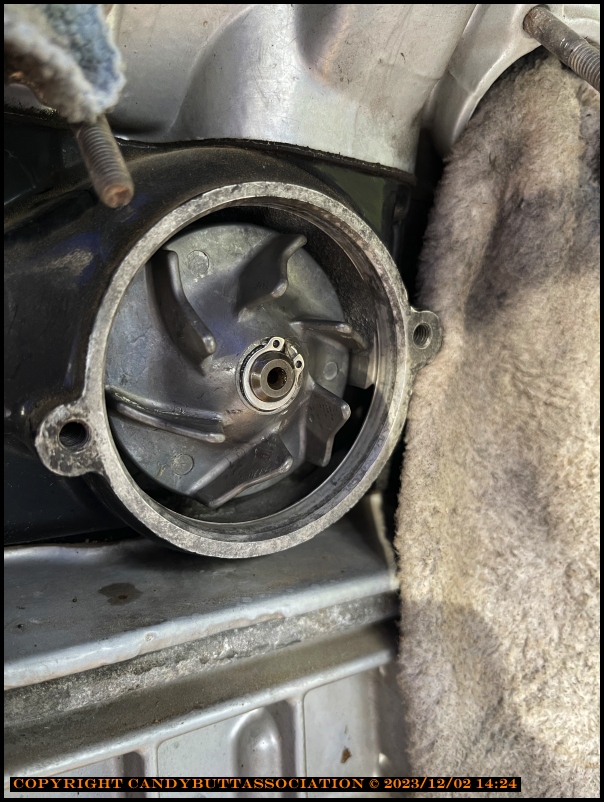
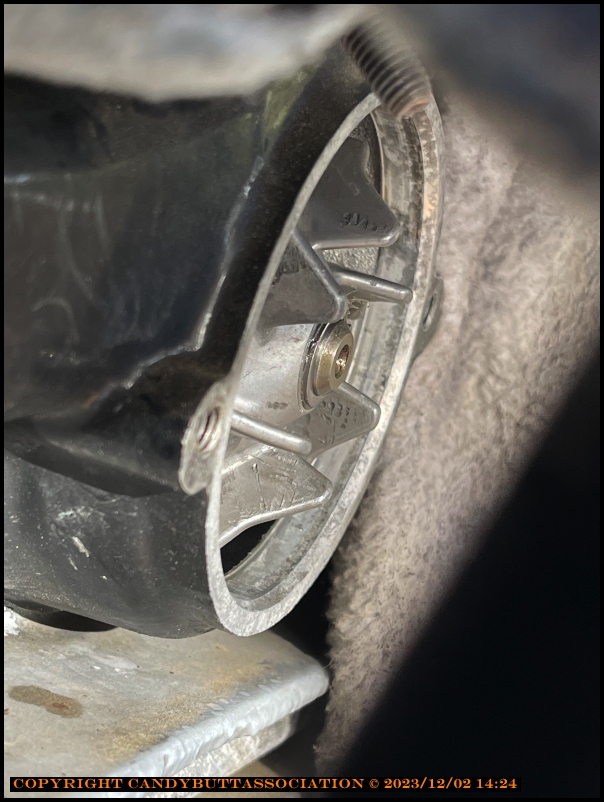
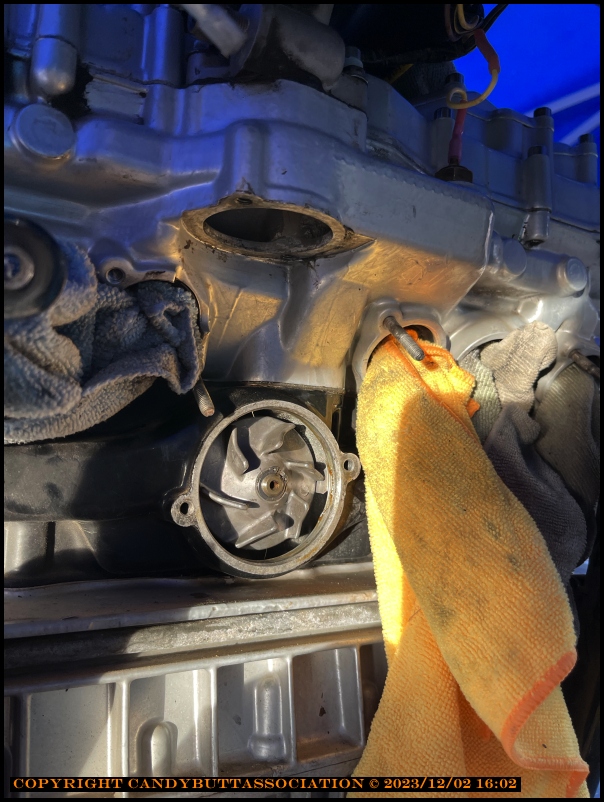
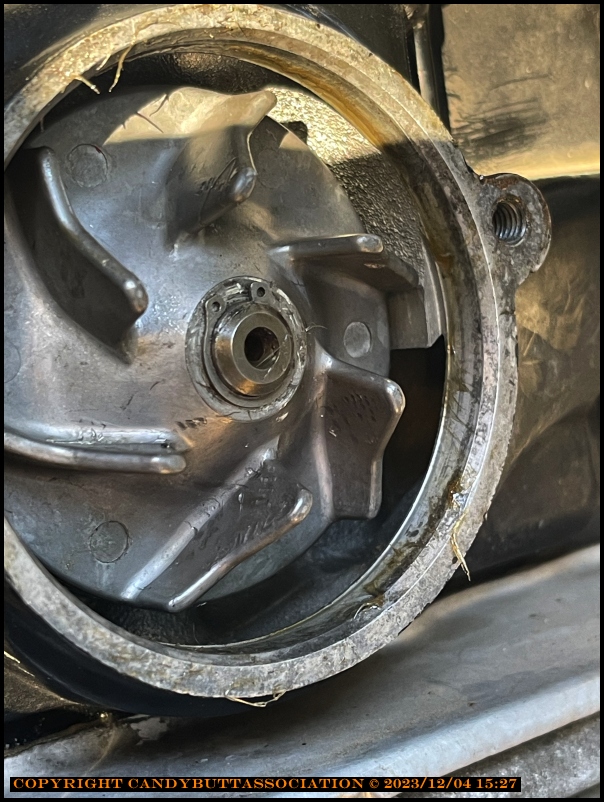
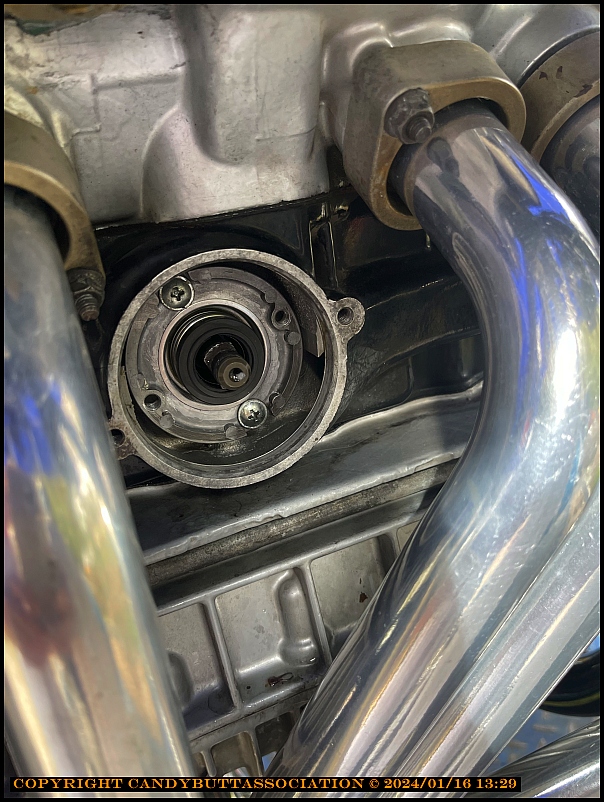
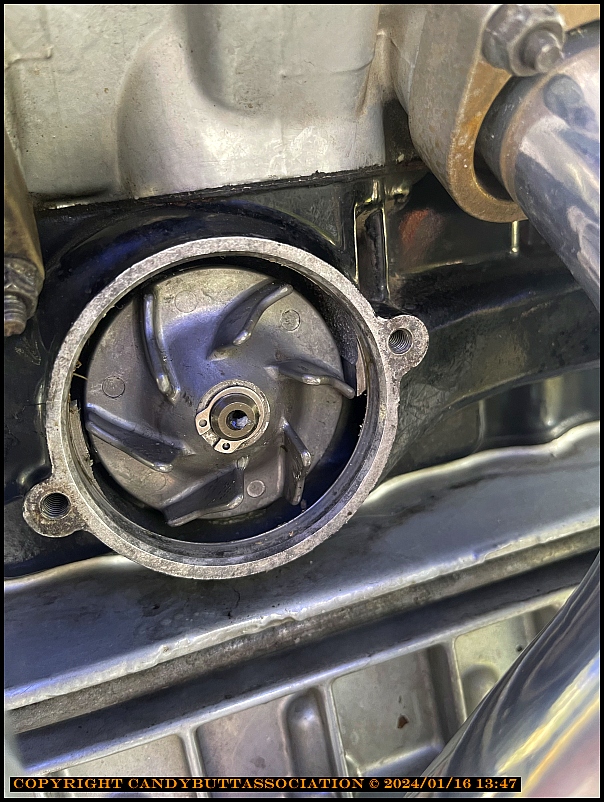
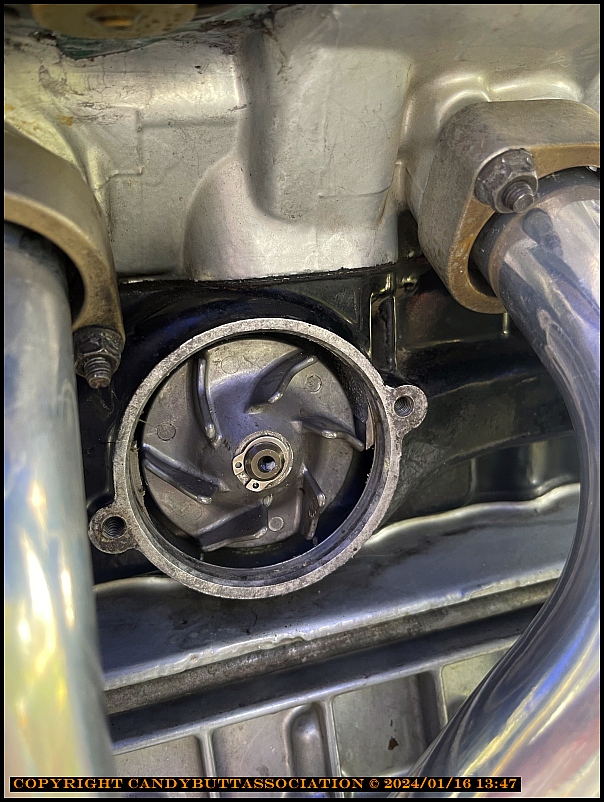
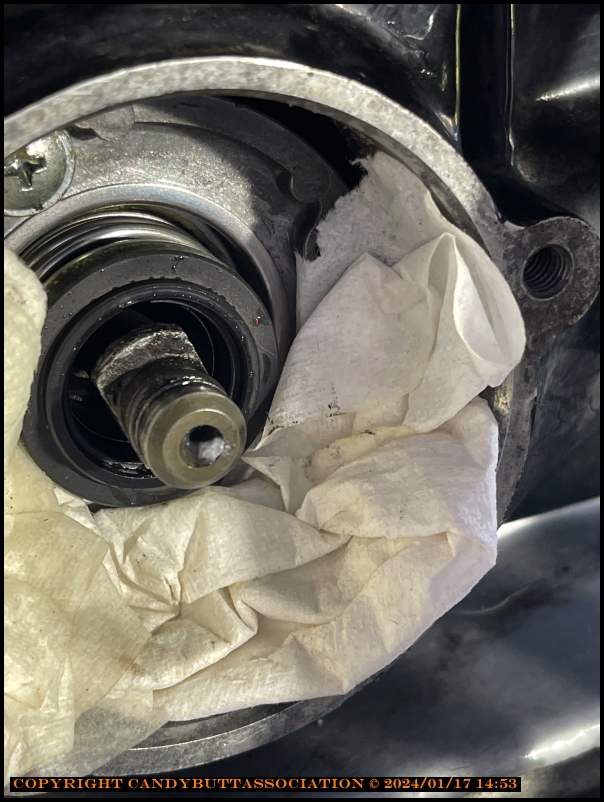
Meet Mr. Impeller. Before removing circlip, stuffed rags everywhere to prevent 'ah shit' moment.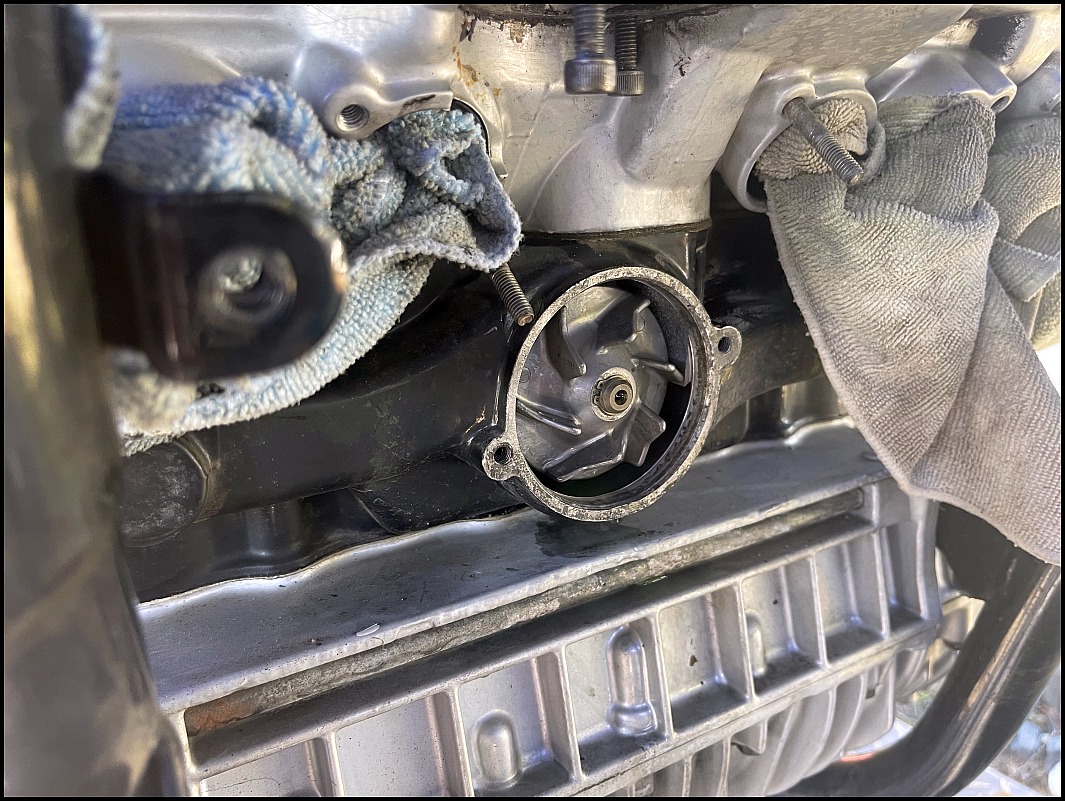
Impeller is not a press fit. Mechanical seal spring keeps it front loaded to circlip.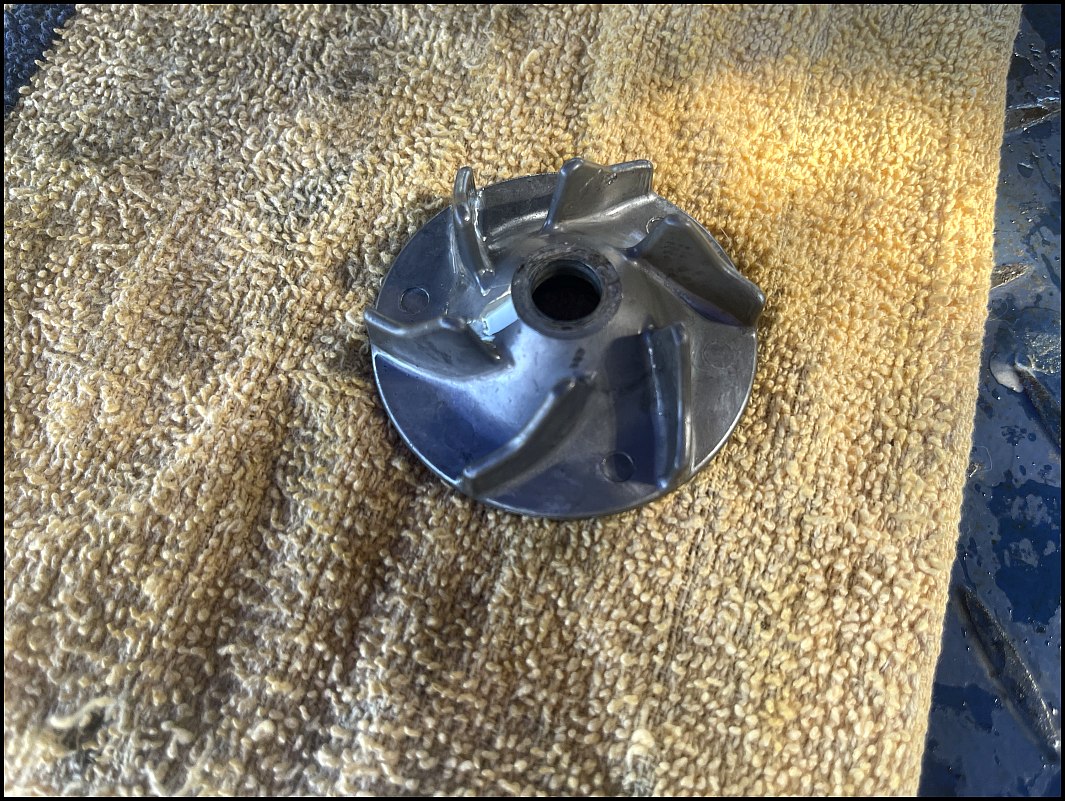
Can't help but to think a feller with a good 3d printer could improve on this..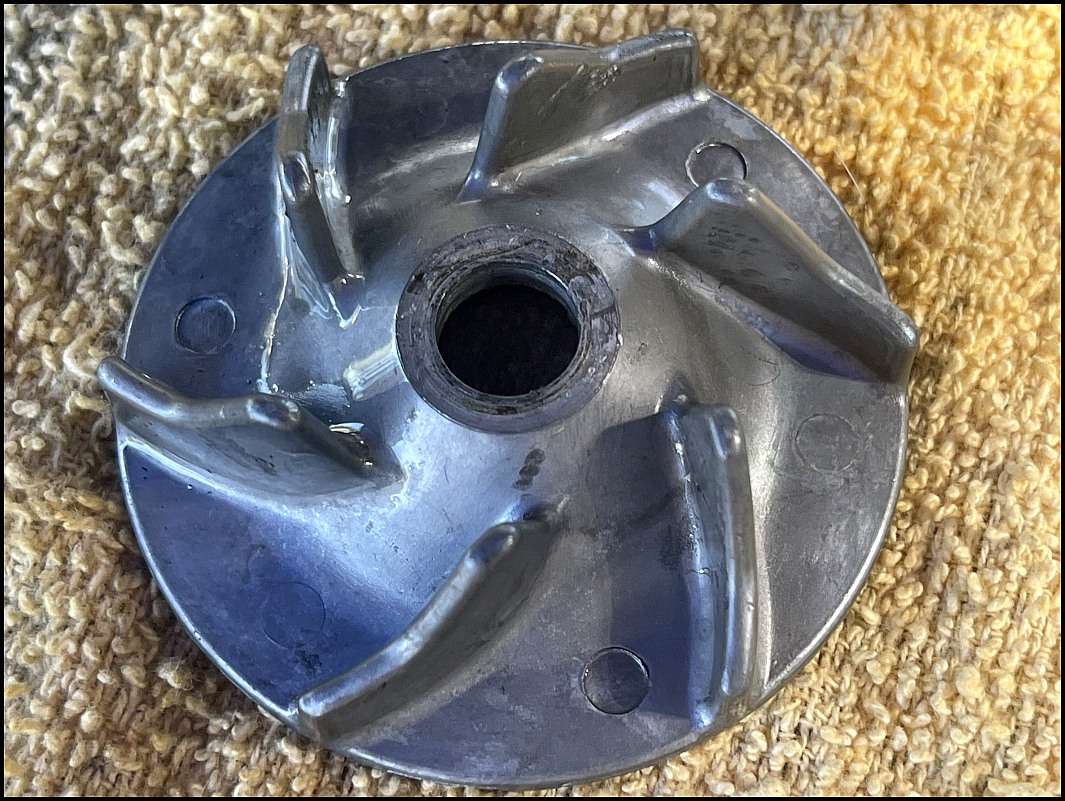
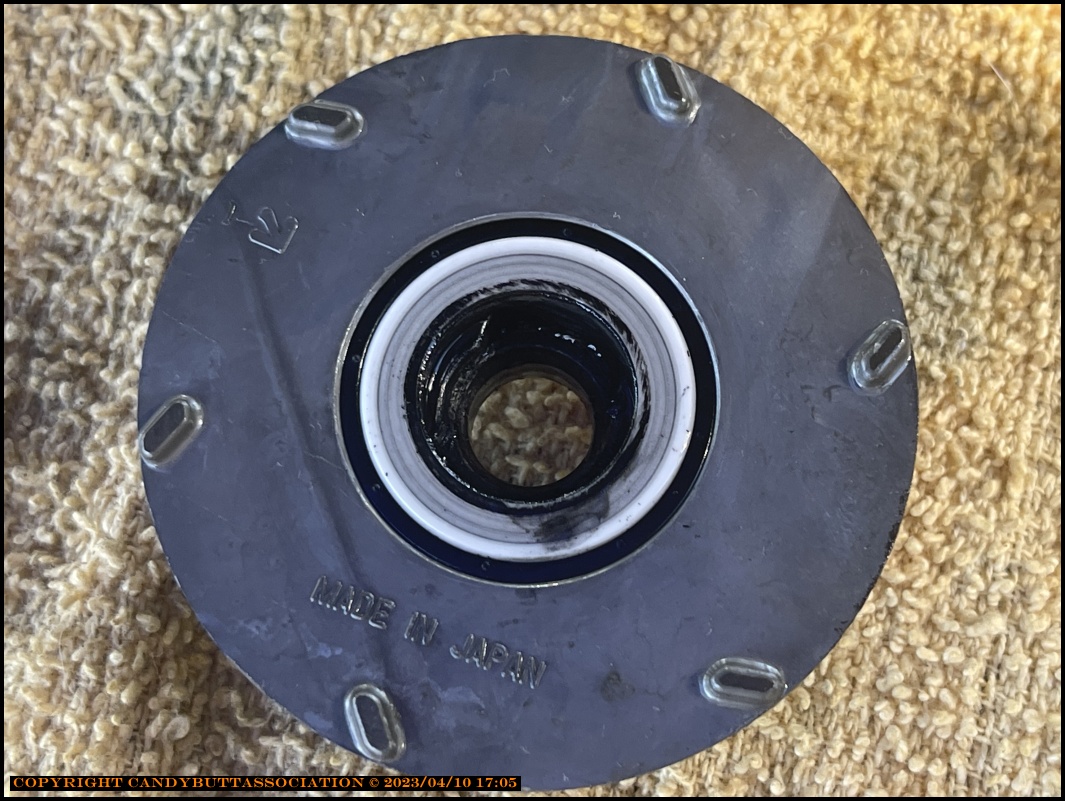
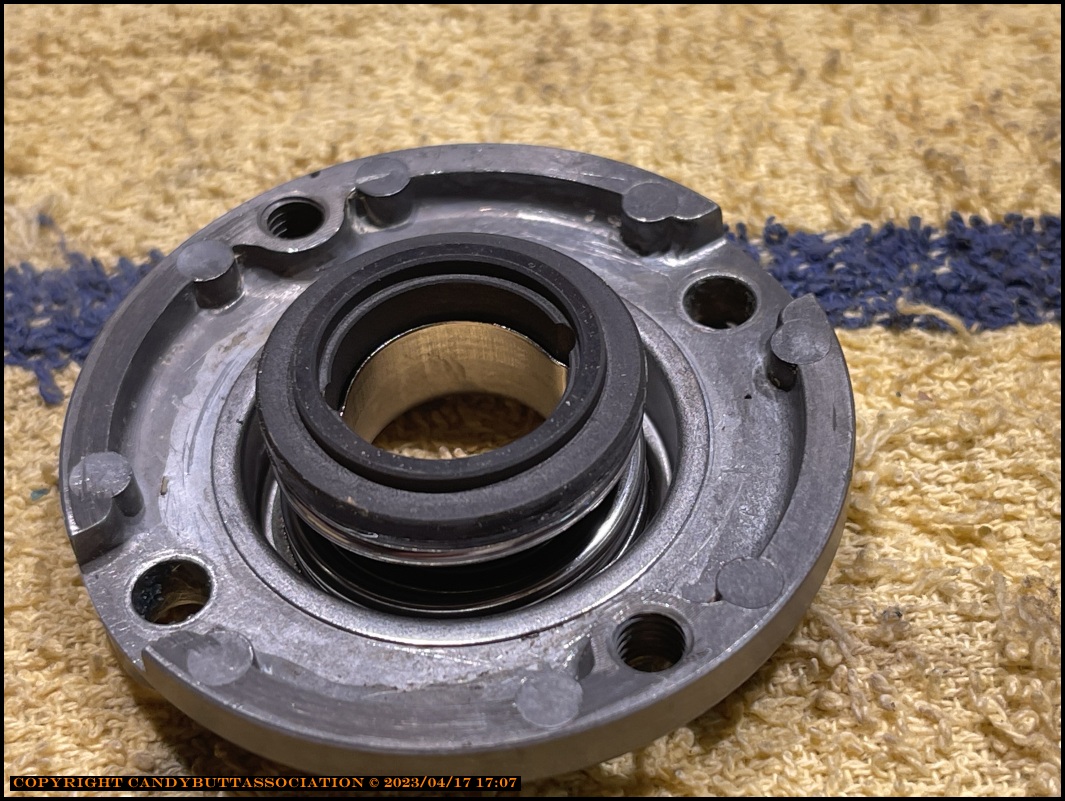
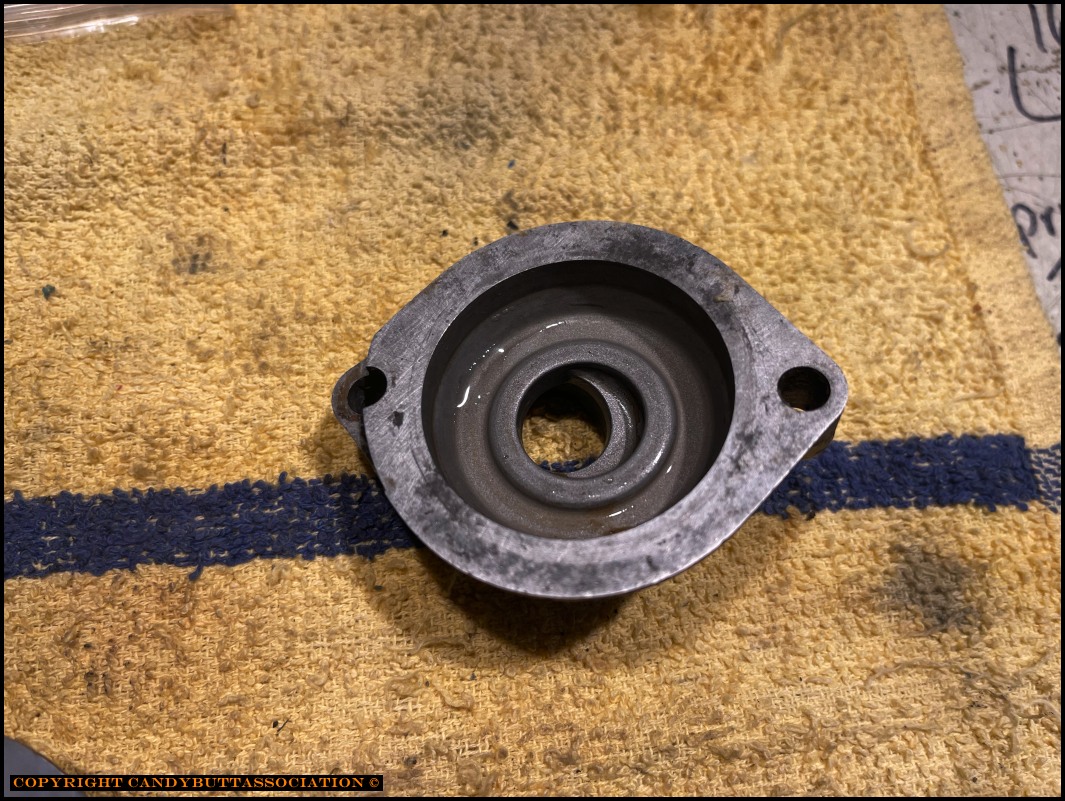
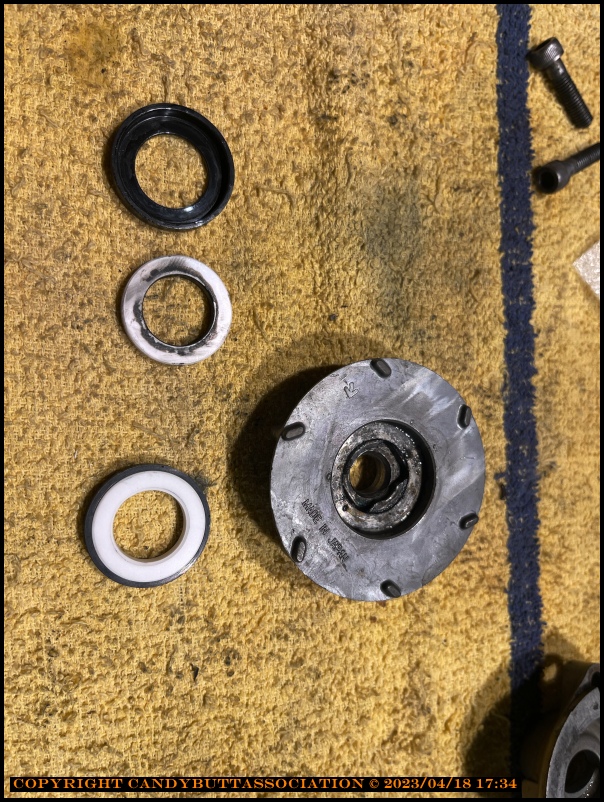
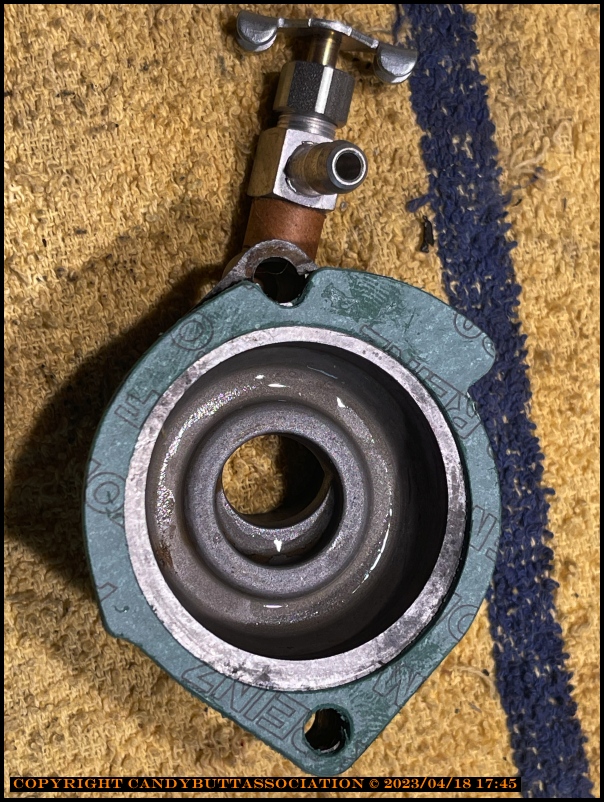
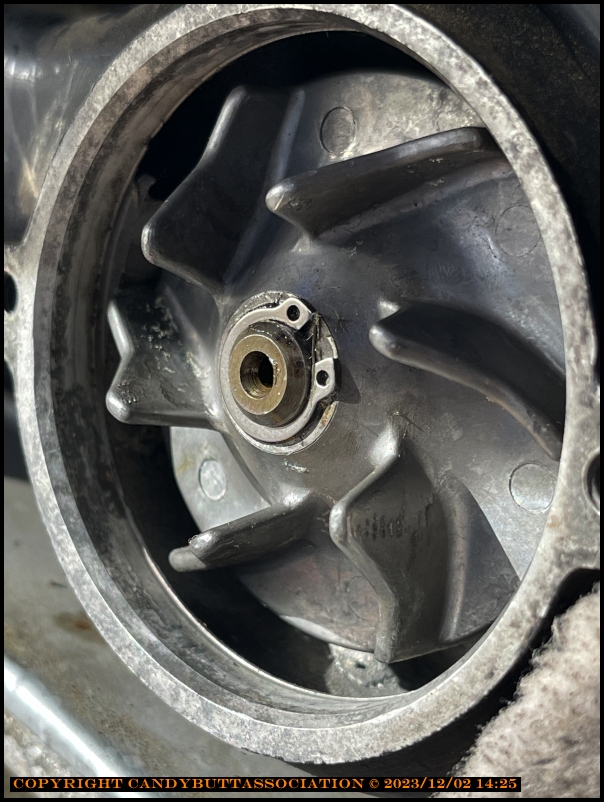
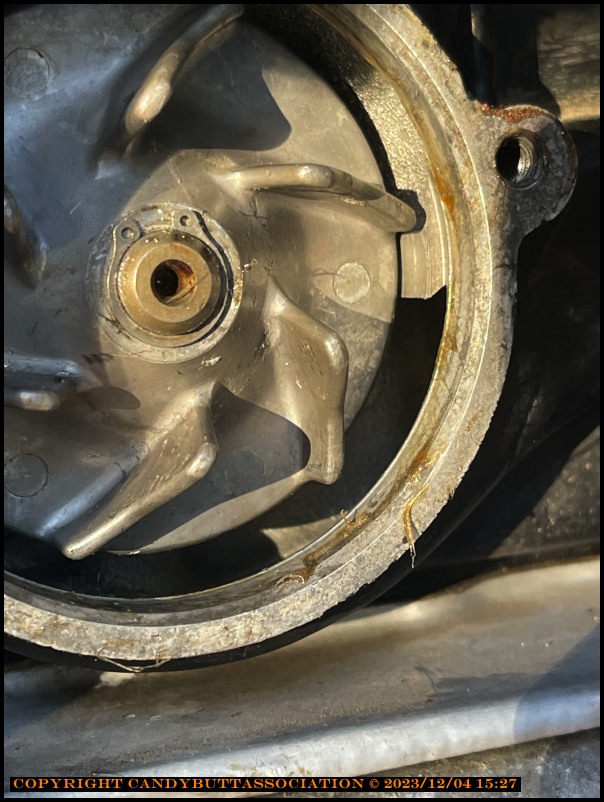
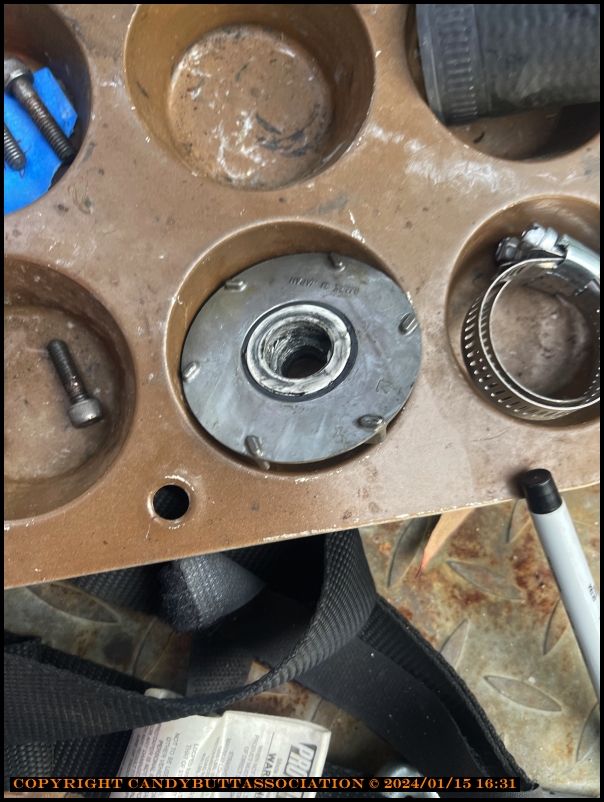
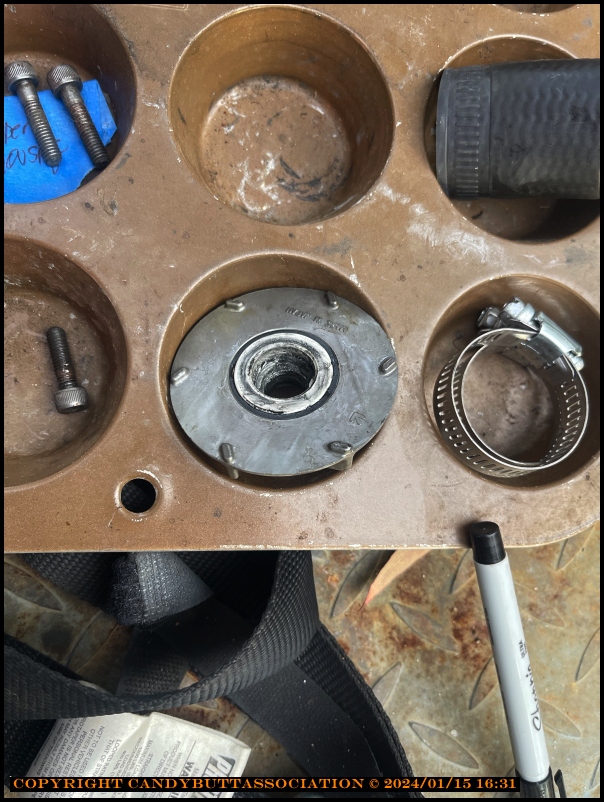
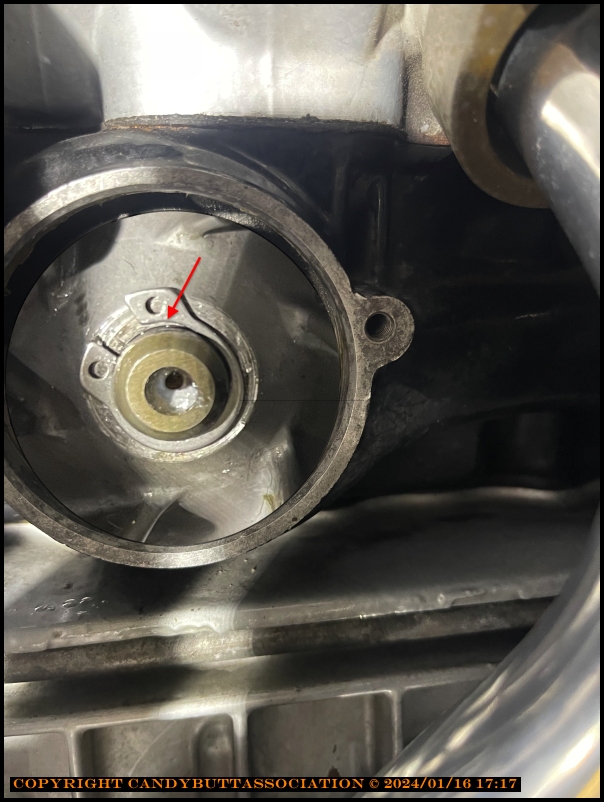
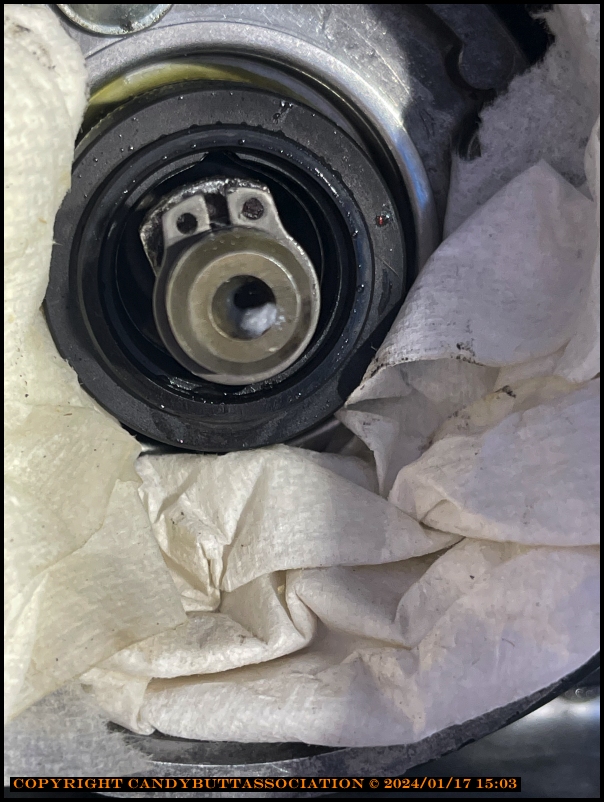
One half of the mechanical seal.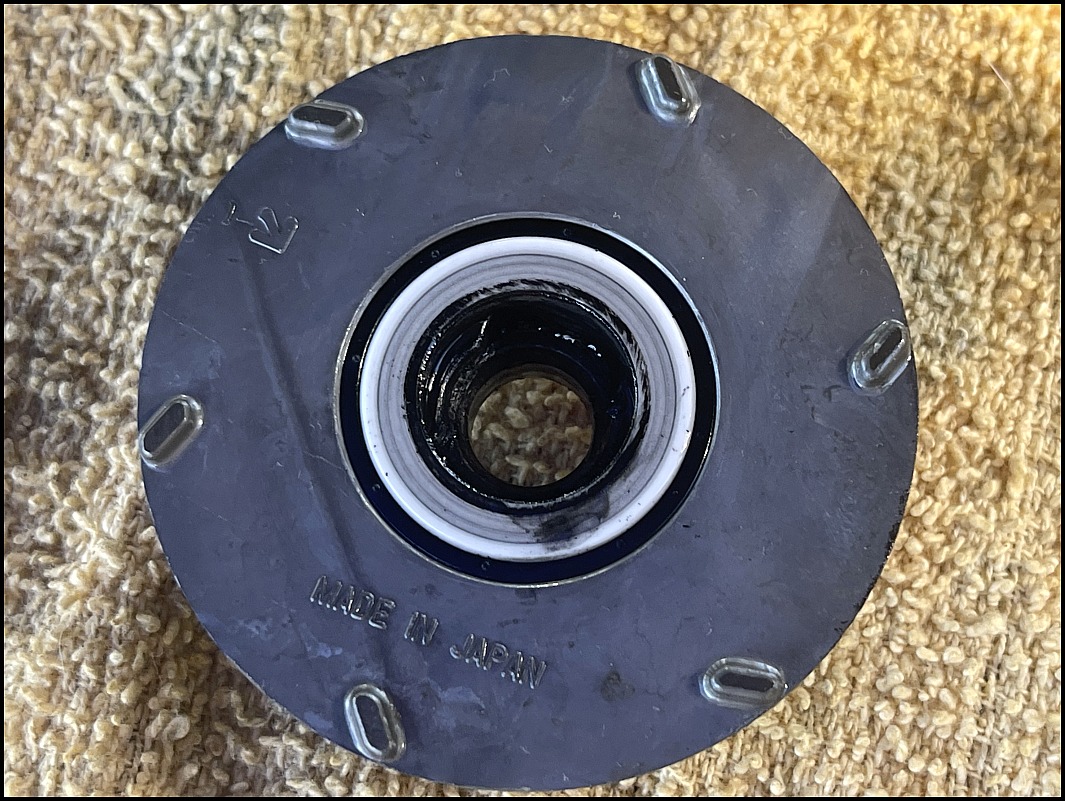
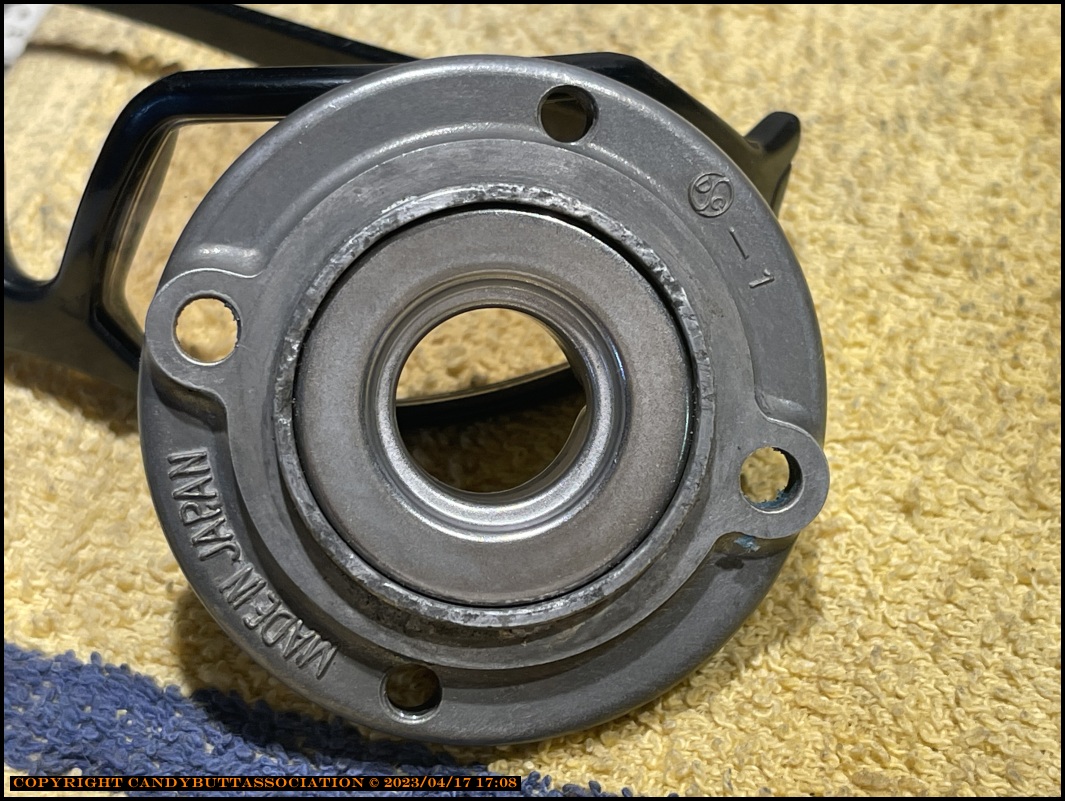
The other half, still in place. Didn't realize it was NOT necessary to remove the backing plate for seal removal. Both screws were in there tight, my JIS hand held driver would not loosen so had to use impact
screwdriver and hammer. Two problems there. 1) not much 'swing' room for hammer, front fender... 2) I don't have JIS bits for the impact.. Got both out, but will need replacement.
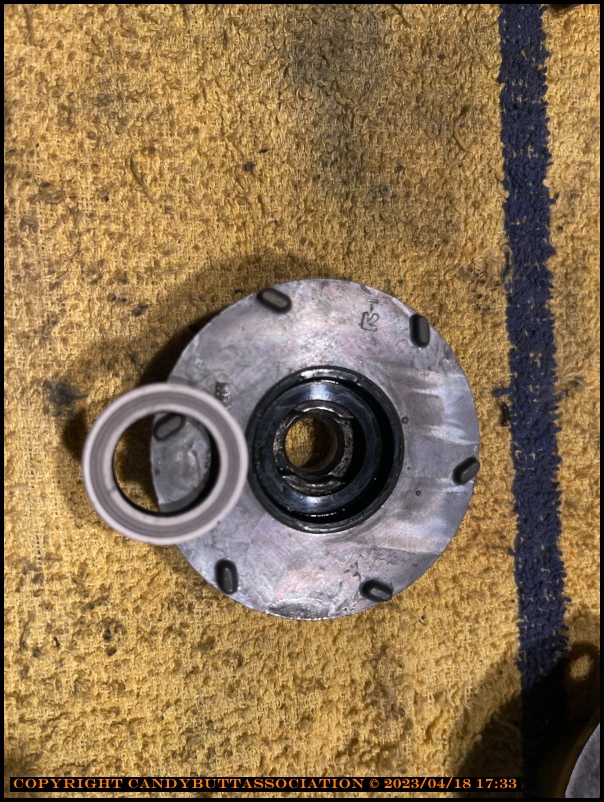
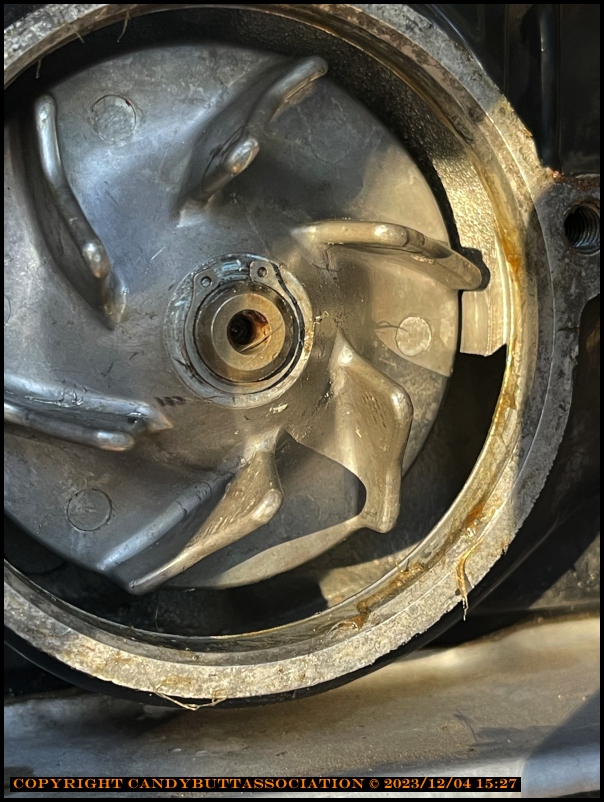
Orientation pic. The non-sealing side faces engine block.
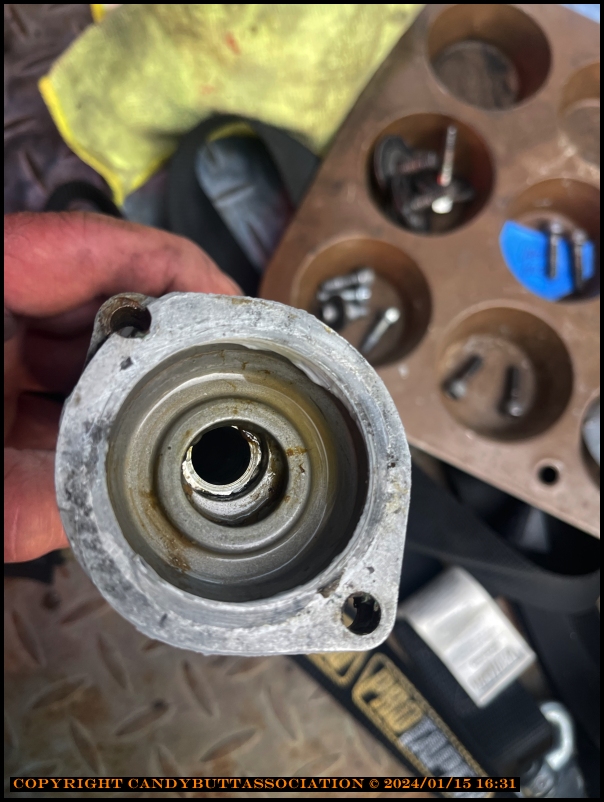
Close up pic.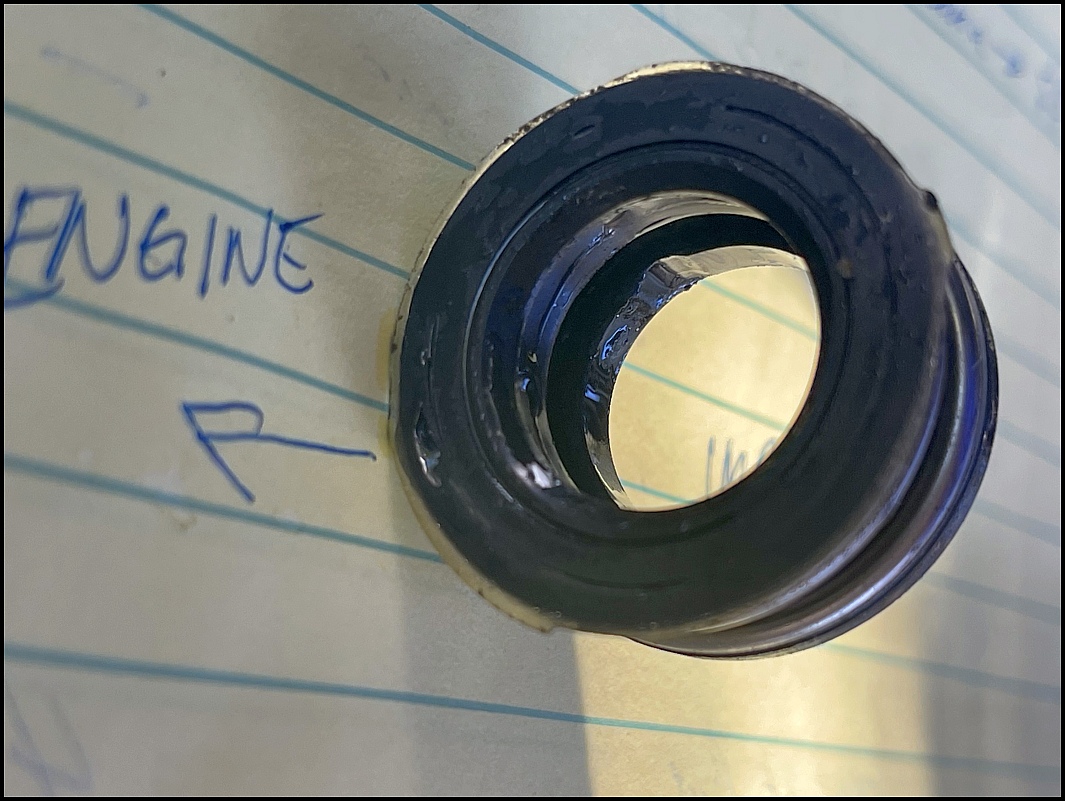
1/2 of mechanical seal, faces impeller.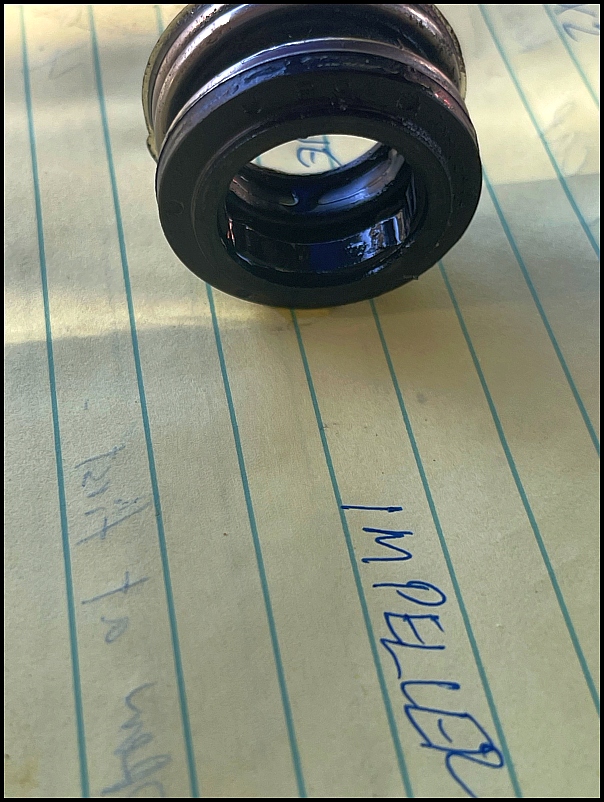
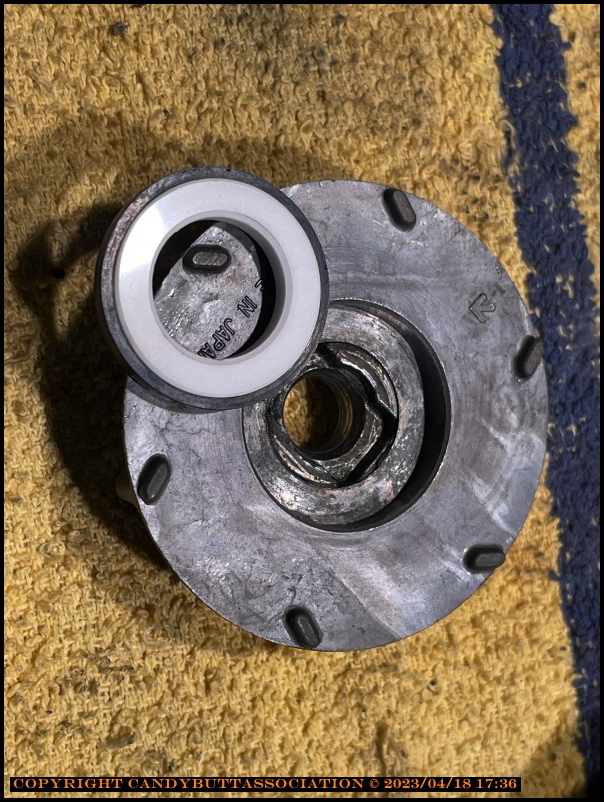
Interesting pic.
Not sure if this debri was from engine rebuild 'sloppiness' or from Radiator No Leak stuff I used when foolish me decided the water leak on front of engine under seal housing was found.
I had trouble with overheating under I did a serious engine flush using garden hose..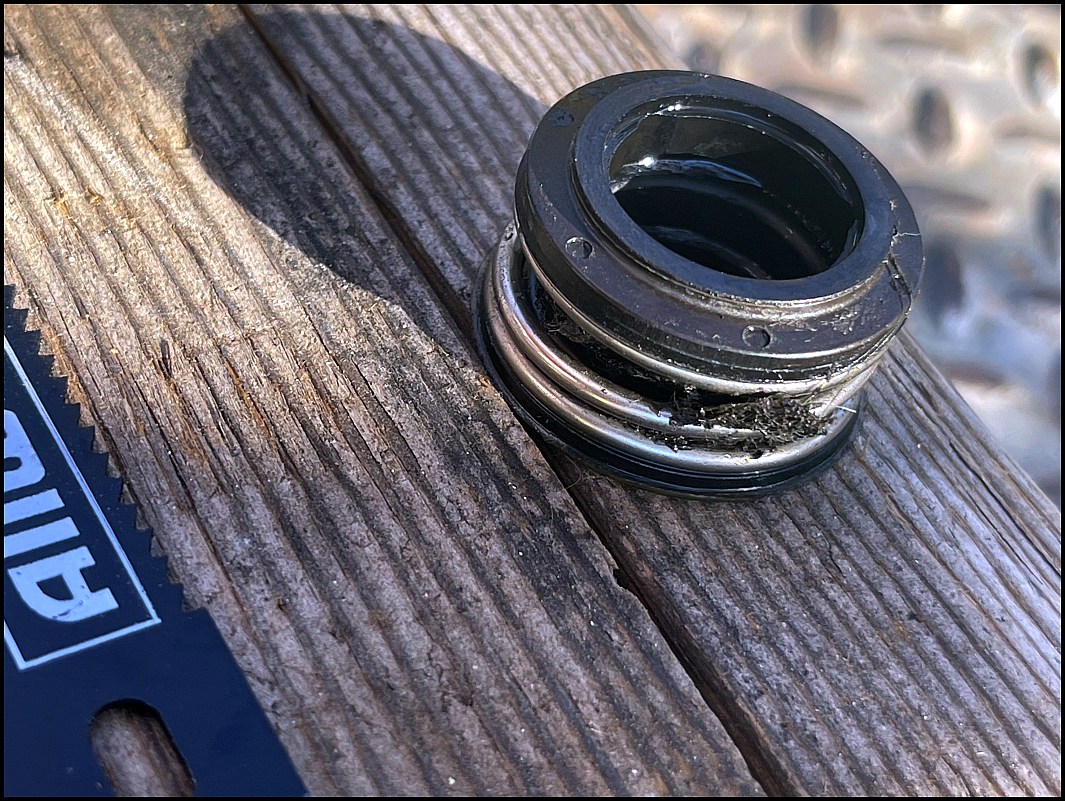
Theme by Danetsoft and Danang Probo Sayekti inspired by Maksimer
2023-04-16 Kz1300 Water Pump Mech Seal Measurements
2023-04-16 Kz1300 Water Pump Mech Seal Measurements
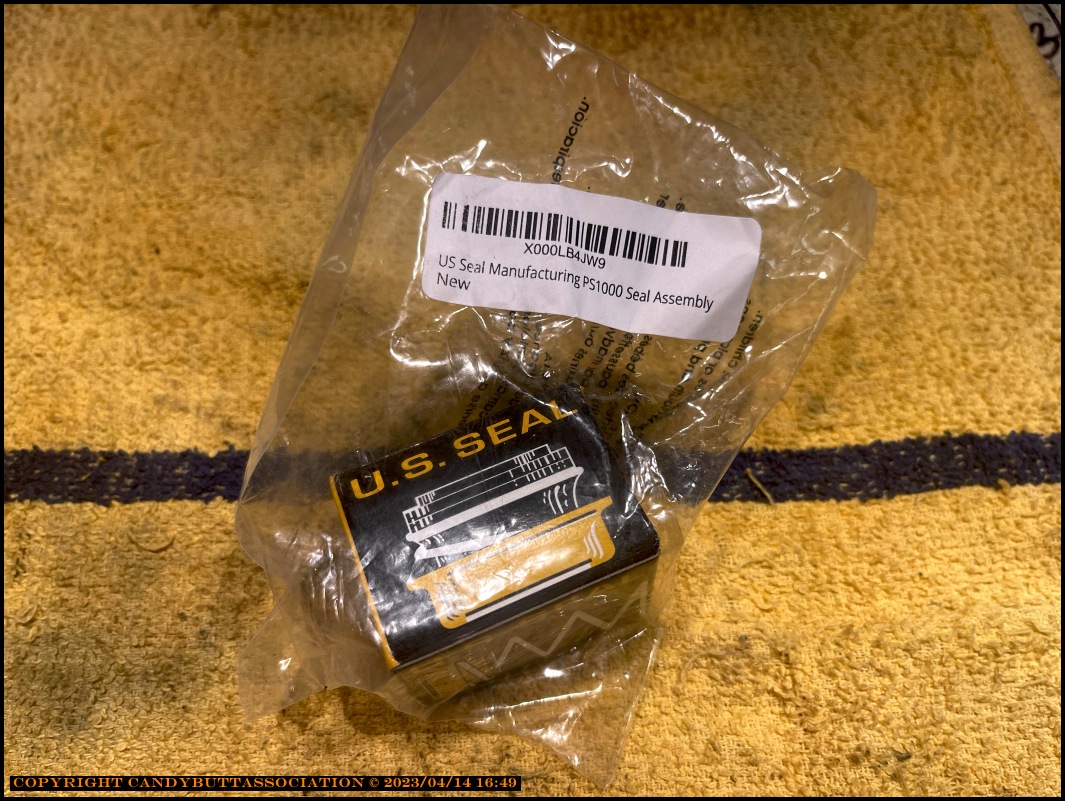
Found a possible replacement from Amazon for the 1979 KZ1300 A1 water pump mechanical seal.
Short of long, it won't work.
x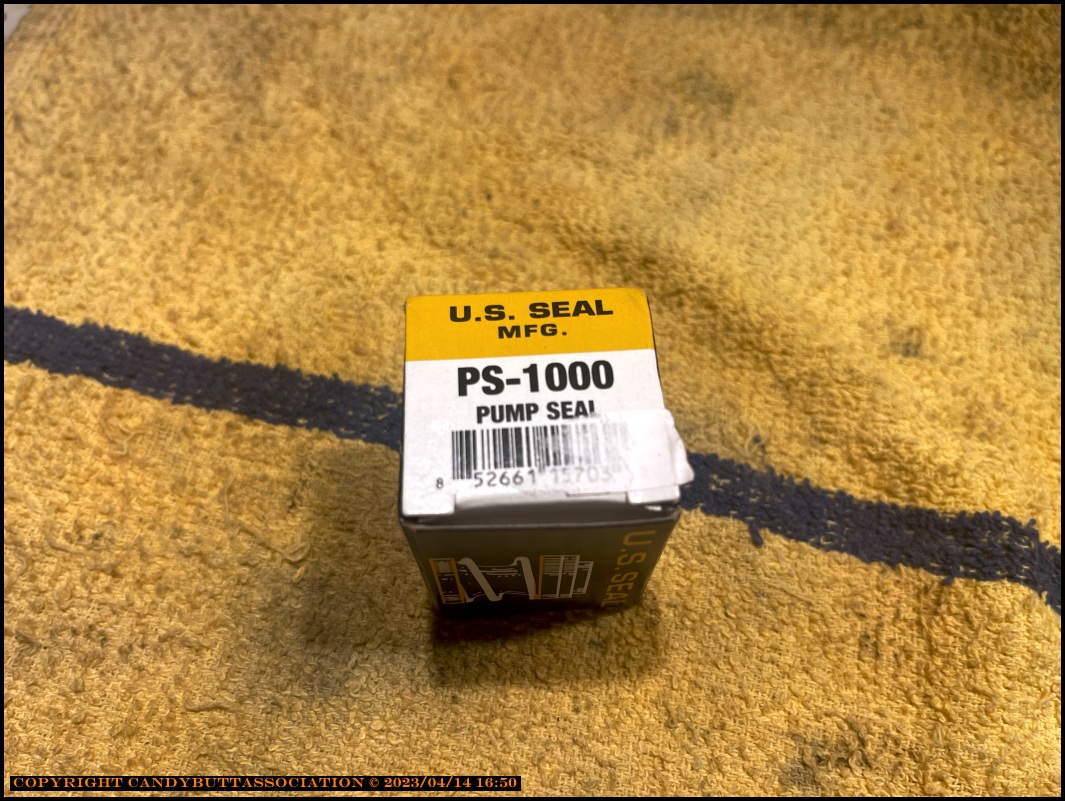
x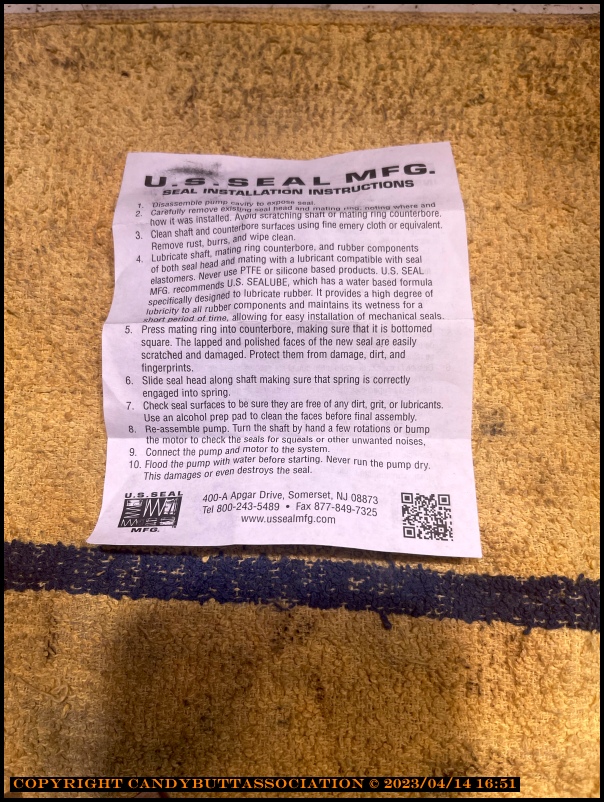
x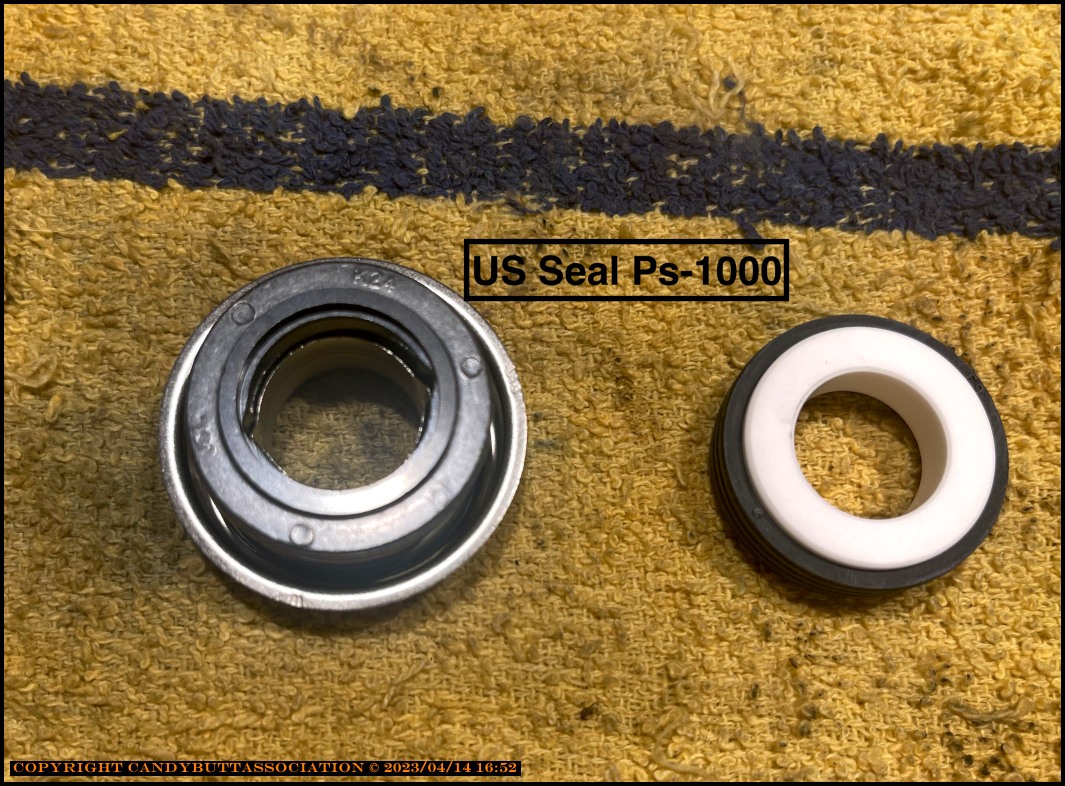
x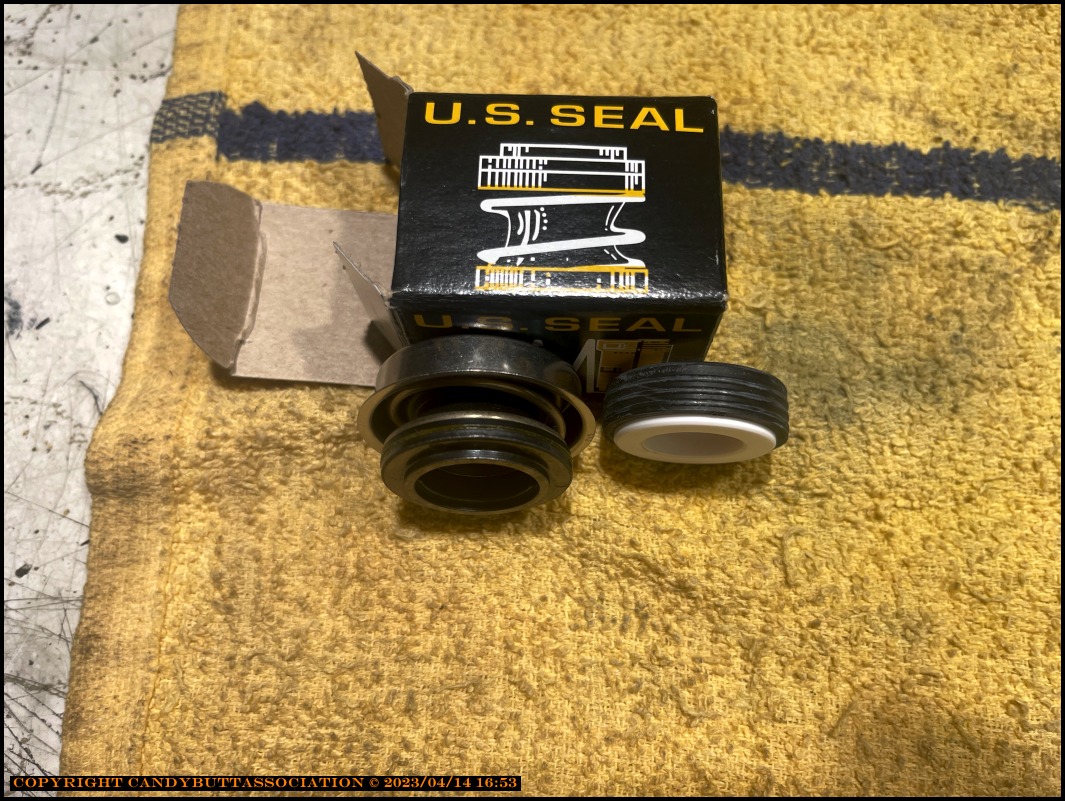
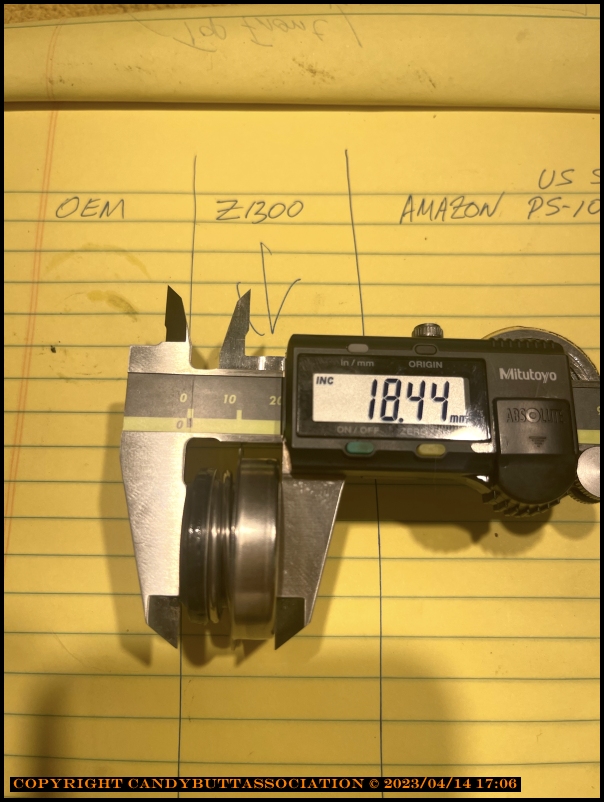
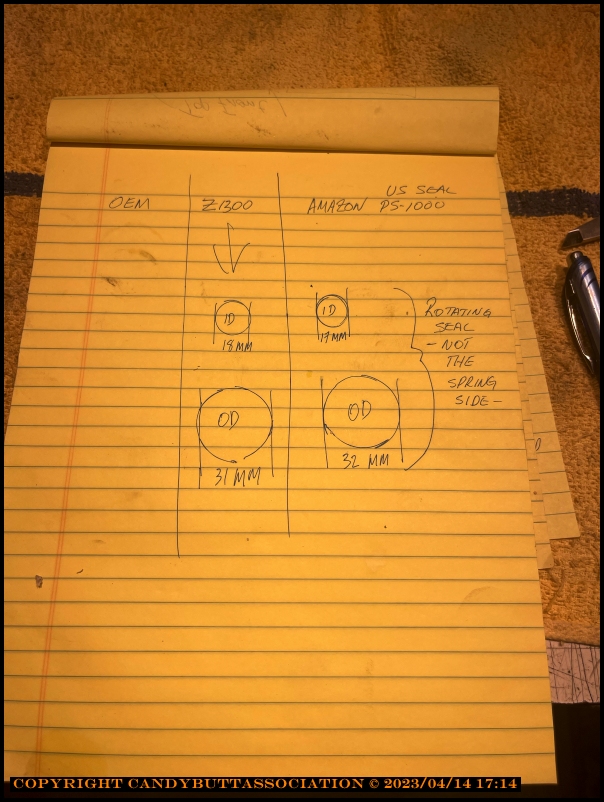
Some measurements.
x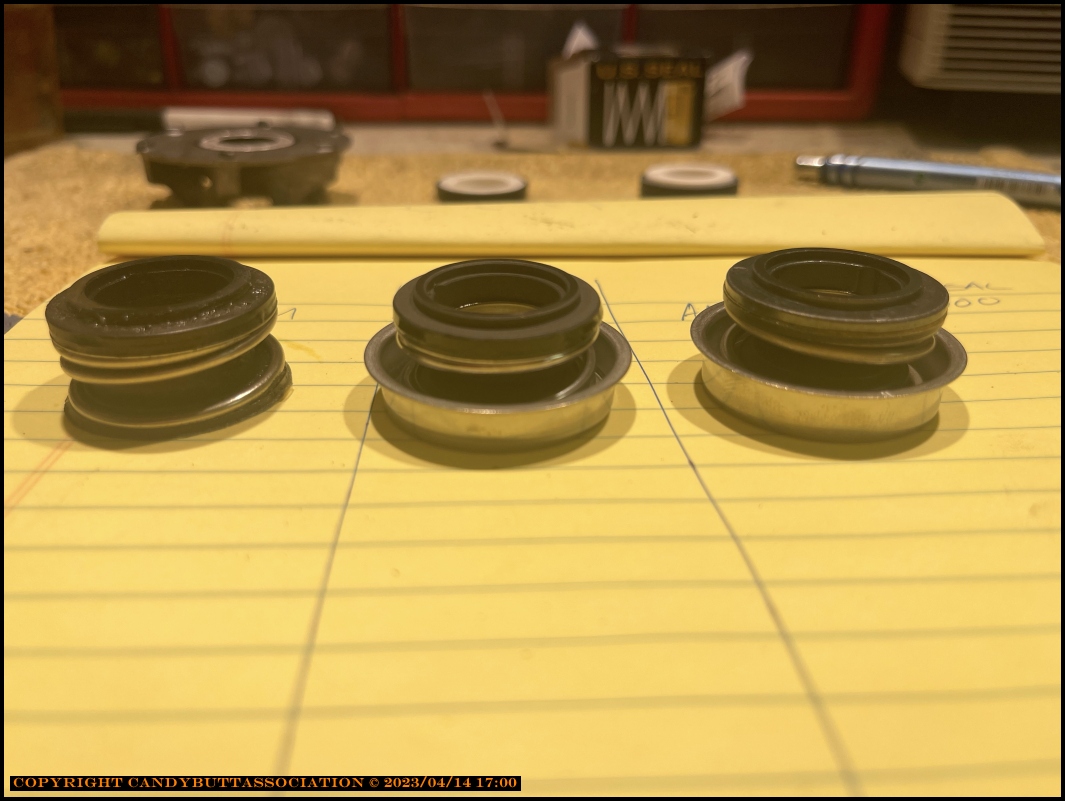
x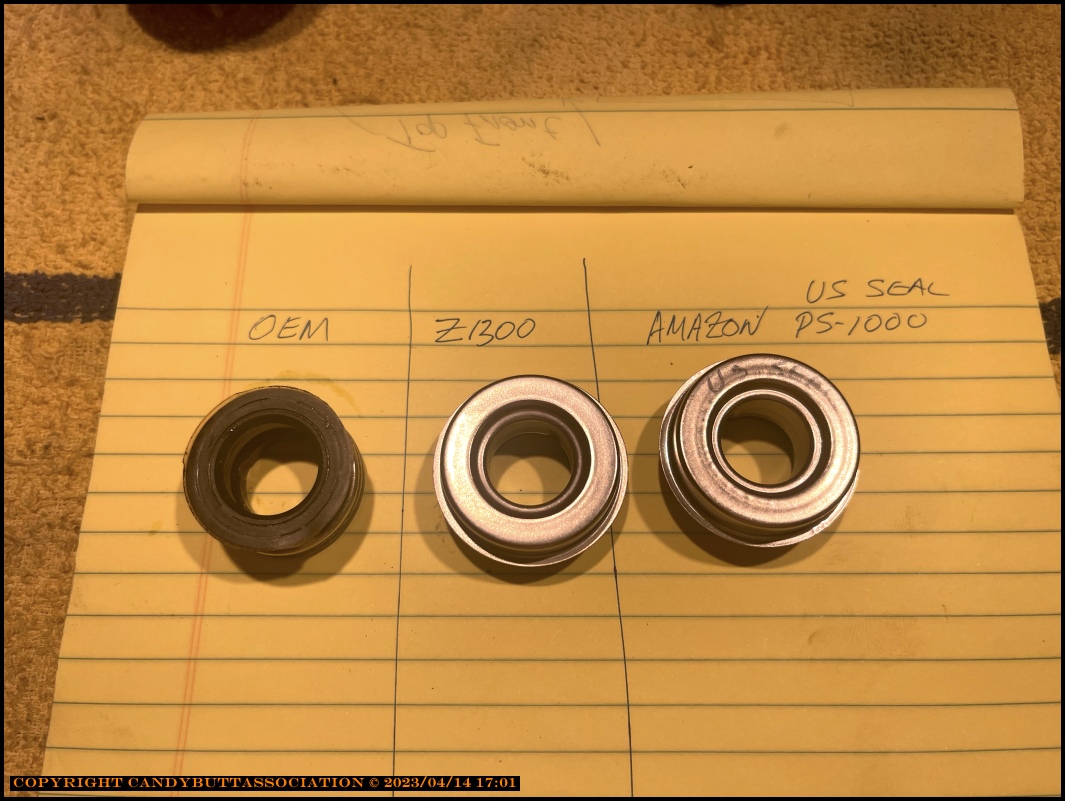
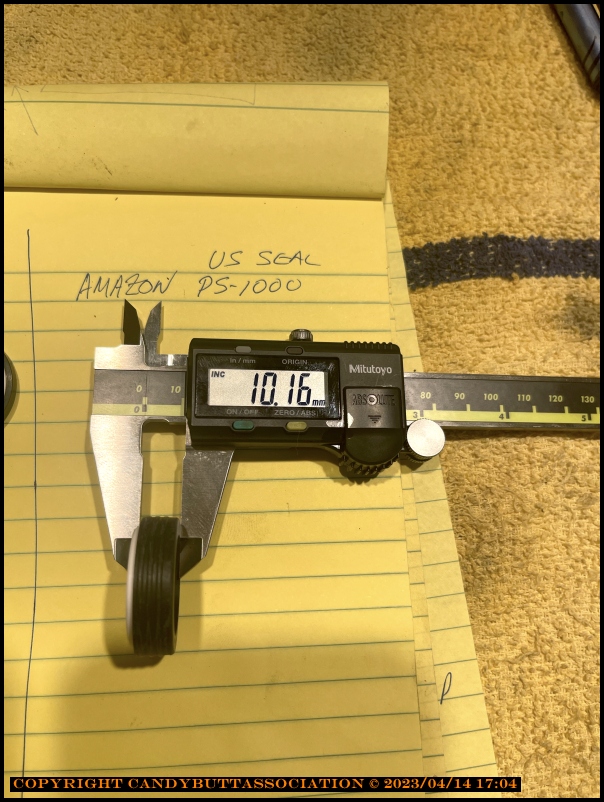
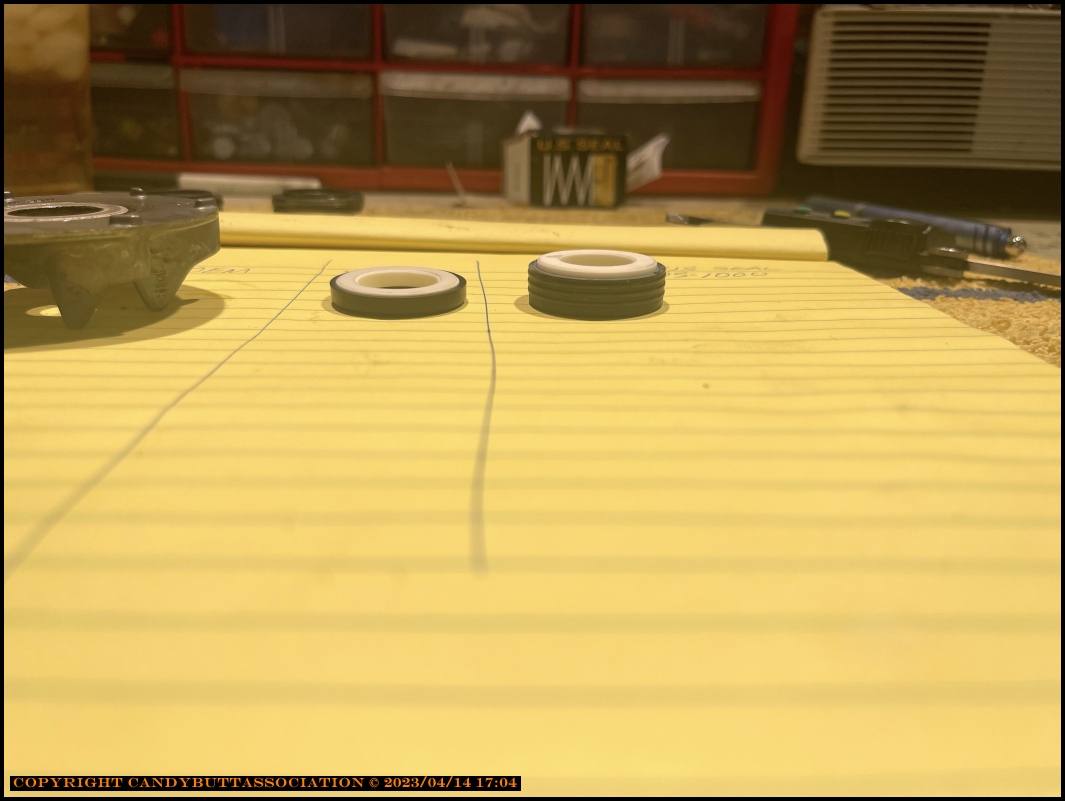
The PS-1000 rotating seal is thicker in diameter.
Amazon Seal on RHS, taller.
OEM at 5.13mm.
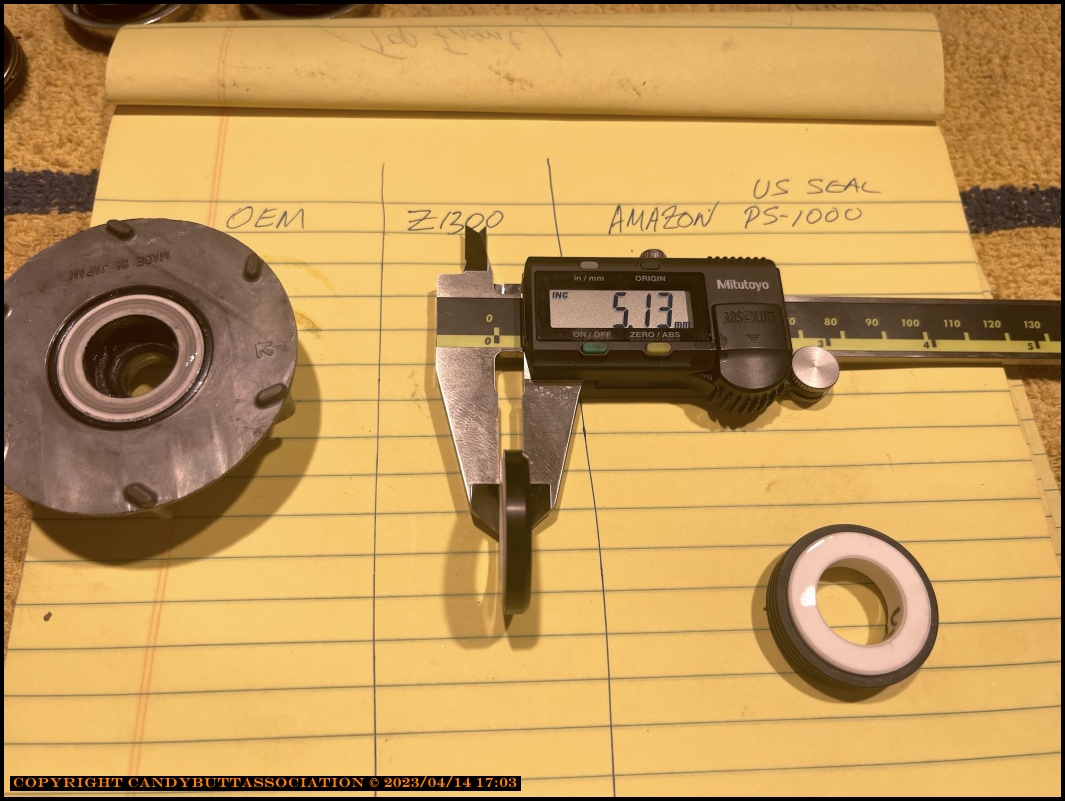
PS-1000 at 2x that, 10.16mm.
Oh well.
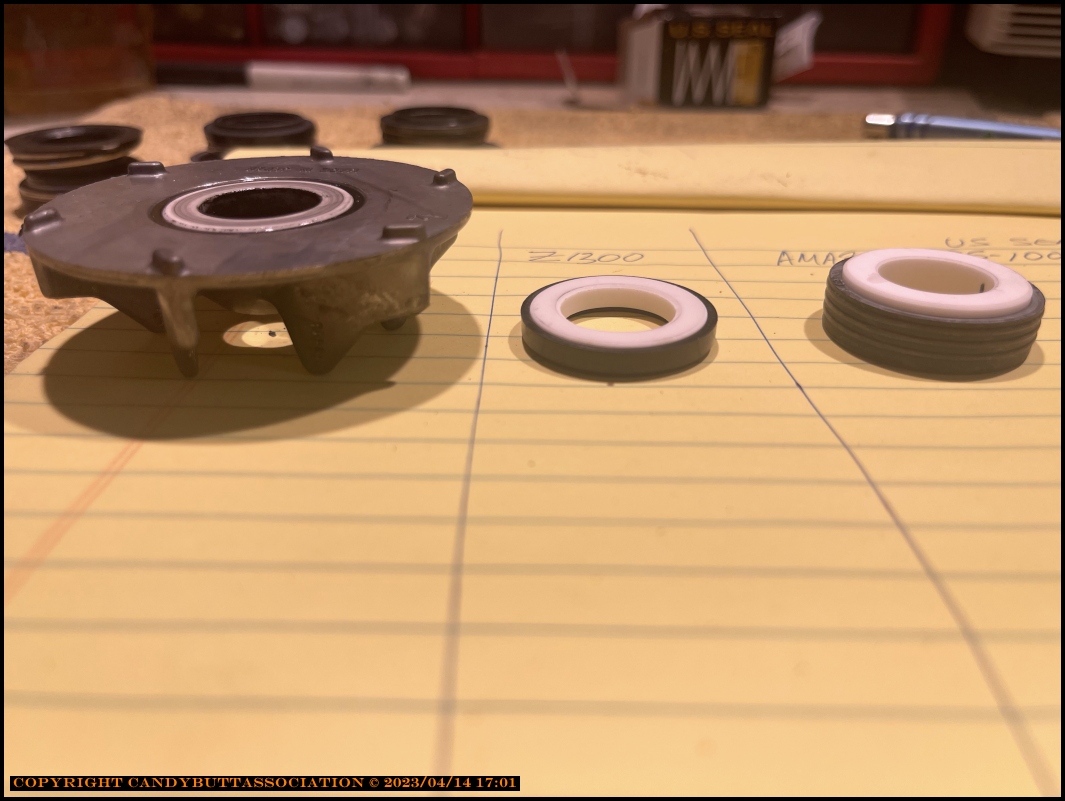
Slight difference here too, although it might have been measurement error due to spring compression from dial caliper.
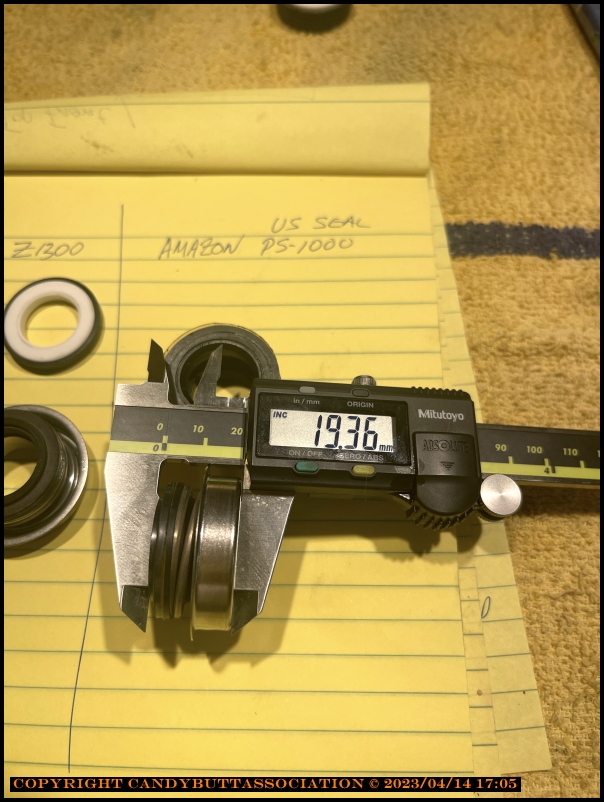
The spring on the Z1300.de unit is stiffer than the PS-1000 US Seal.
More measurements. Kawboy, these measurements are +/- .2 micro inches! :)
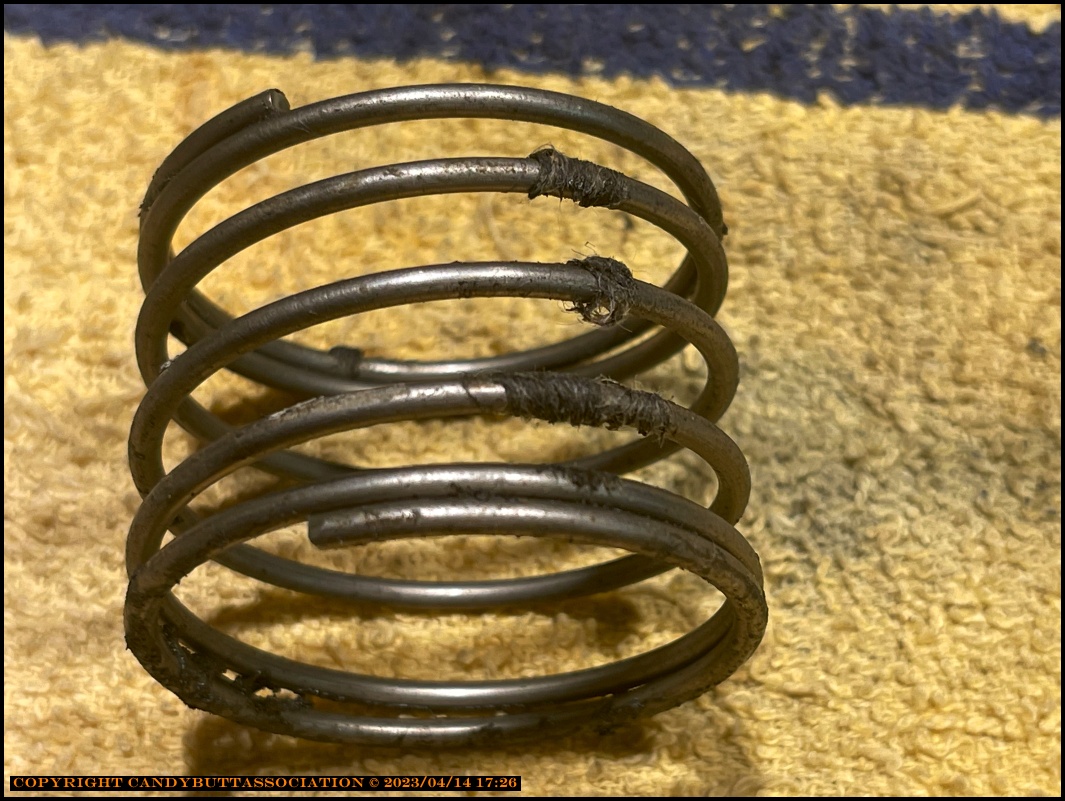
Thermostat spring. Notice the yuck. Pretty sure it's from the radiator stop leak I foolishly put in when I thought it was leaking.
x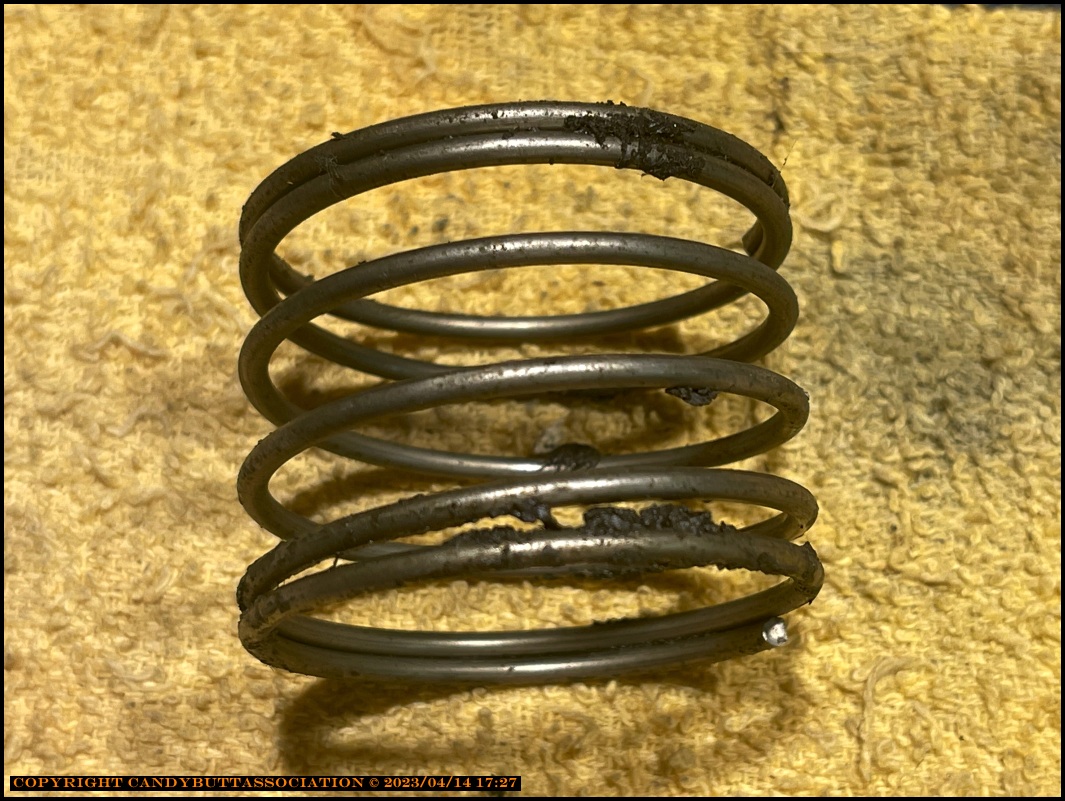
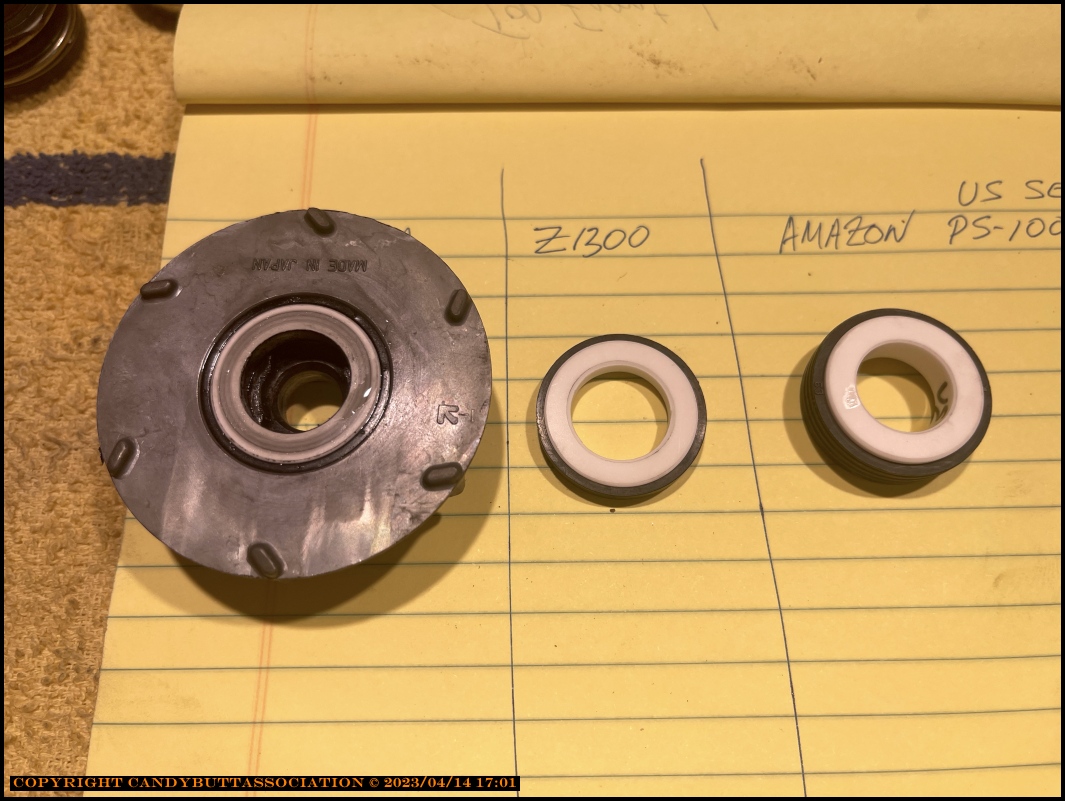
Notice the yuck on the sealing lip... no wonder it was leaking.
Another view of the grooves in the surface.
Well, this attempt failed. Only cost me 10 bucks, so worth the while.
2023-04-17 Water pump seal housing stuck in engine block
2023-04-17
Water Pump Seal Housing Assembly Stuck in Block
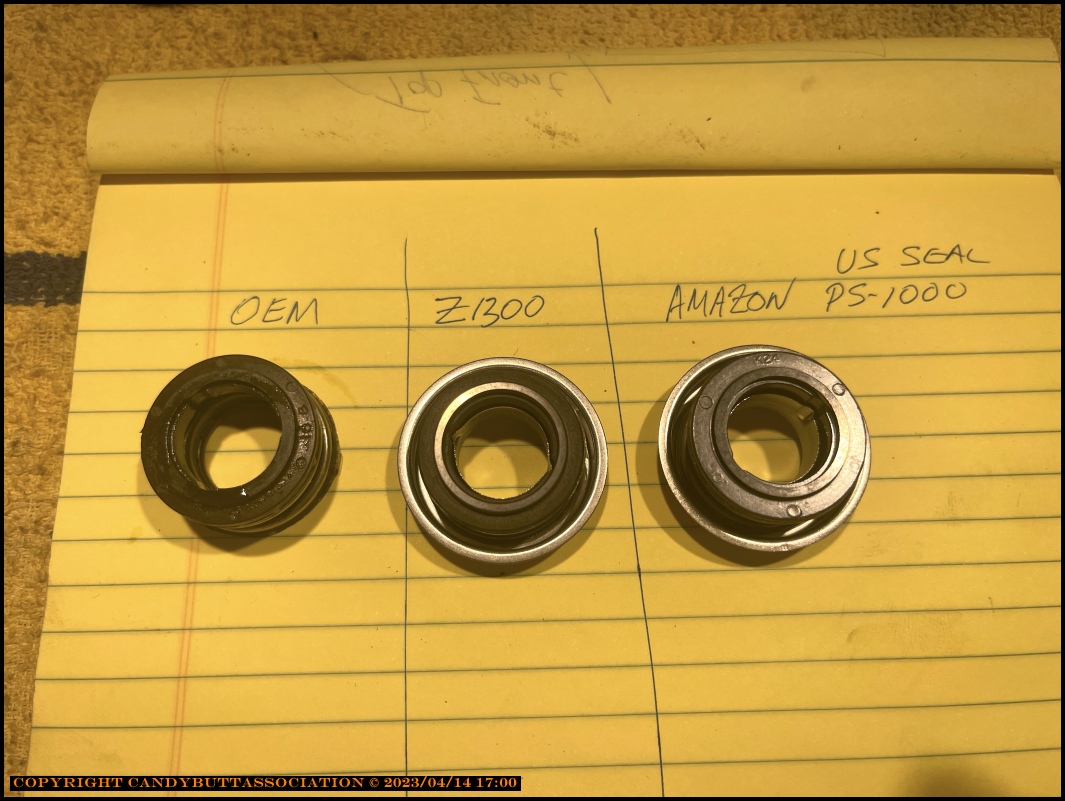
Red arrows say it all. Lower left arrow is the metal housing that remained in block.
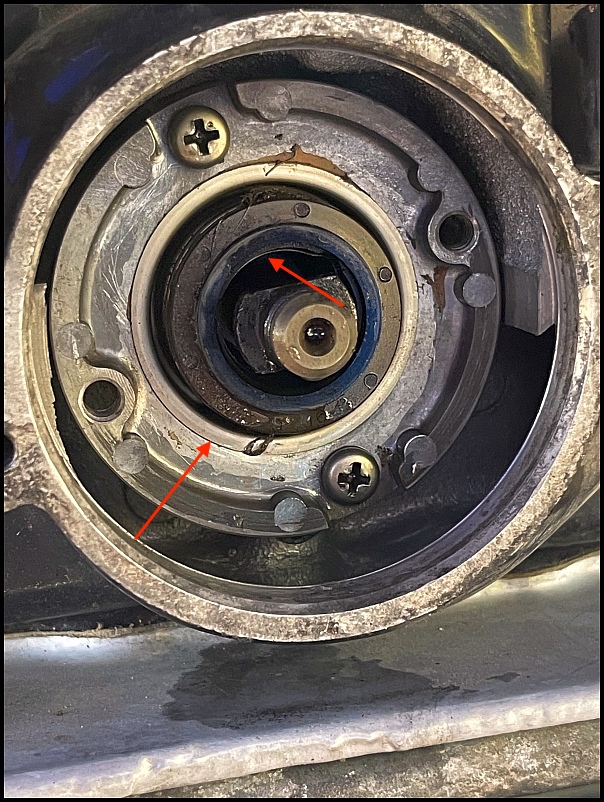
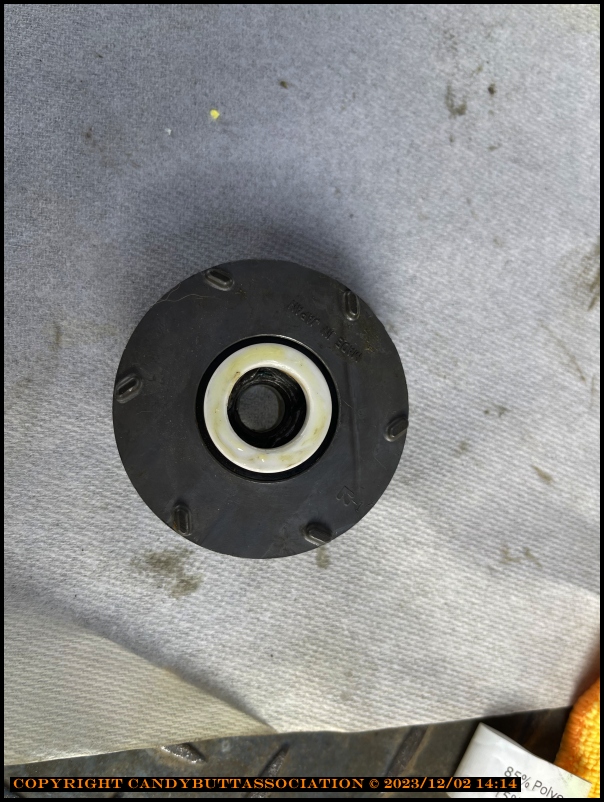
It should have come out as one piece, with the spring and sealing component.
Should look like the center and rhs units, with metal 'cup' surrounding the spring.

2023-04-17 Mechancal Seal - Read the Fucking Manual!
I have a bad habit of thinking I know how to do sh#t. Then I followup up by overthinking what I think I know when in reality I don't know sh*t!
Soooo, remembering my favorite nuclear procedure writers mantra, RTFM!
x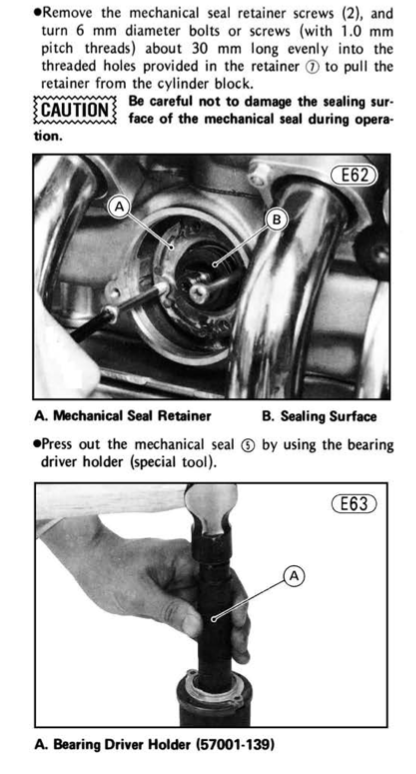
2024-04-17 Kz1300 Mech Seal Install
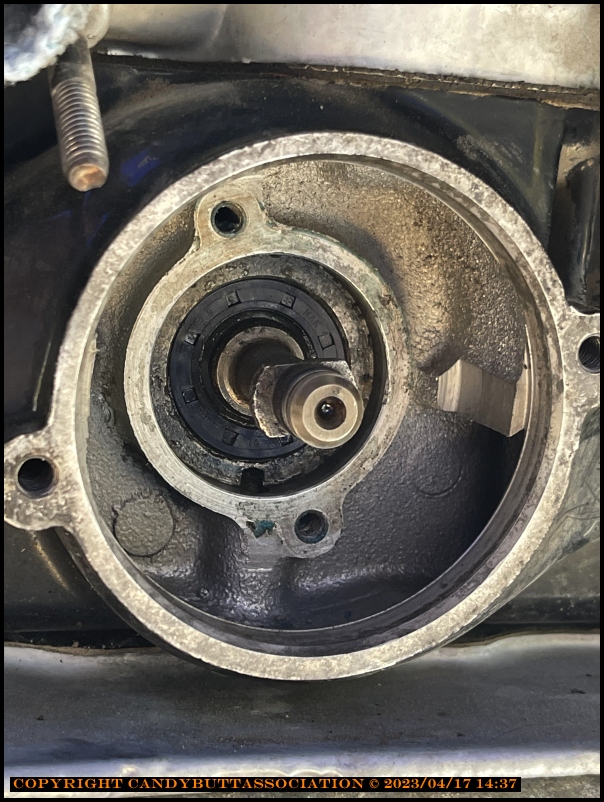
Progress today! After RTFM, discovered the backing plate assembly is removeable.
Bought a couple of bolts w' big heads then pulled the assembly out. EzPz when you know how!
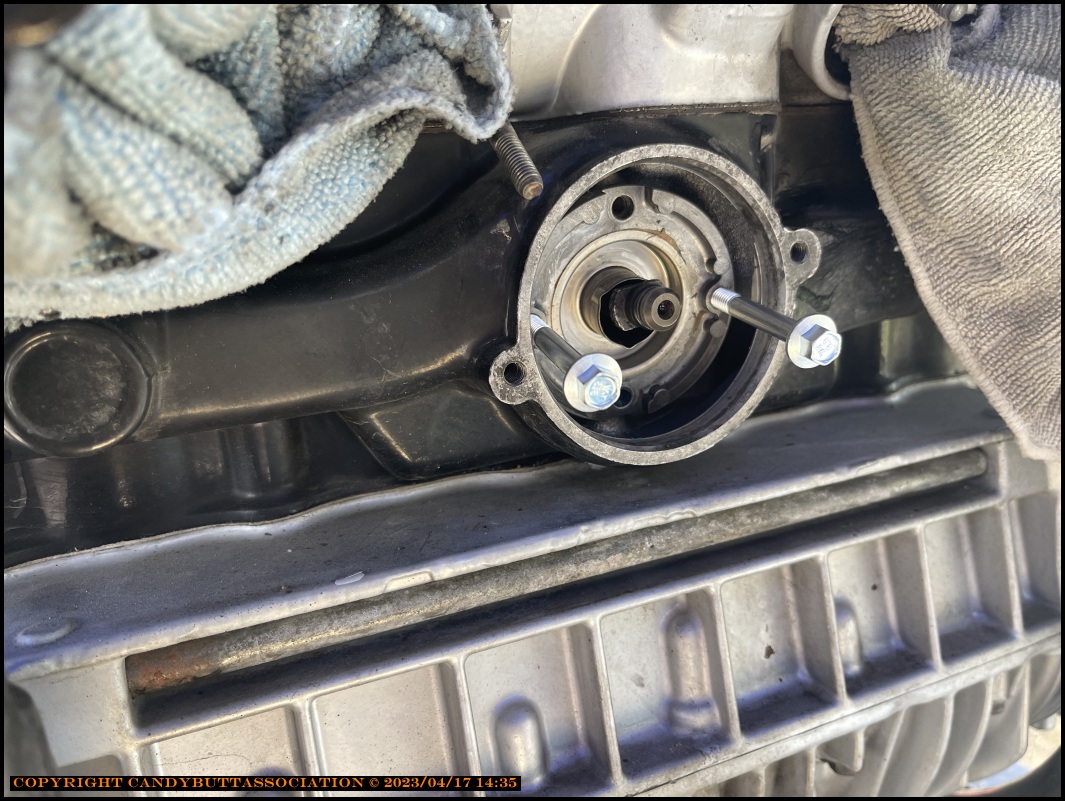
x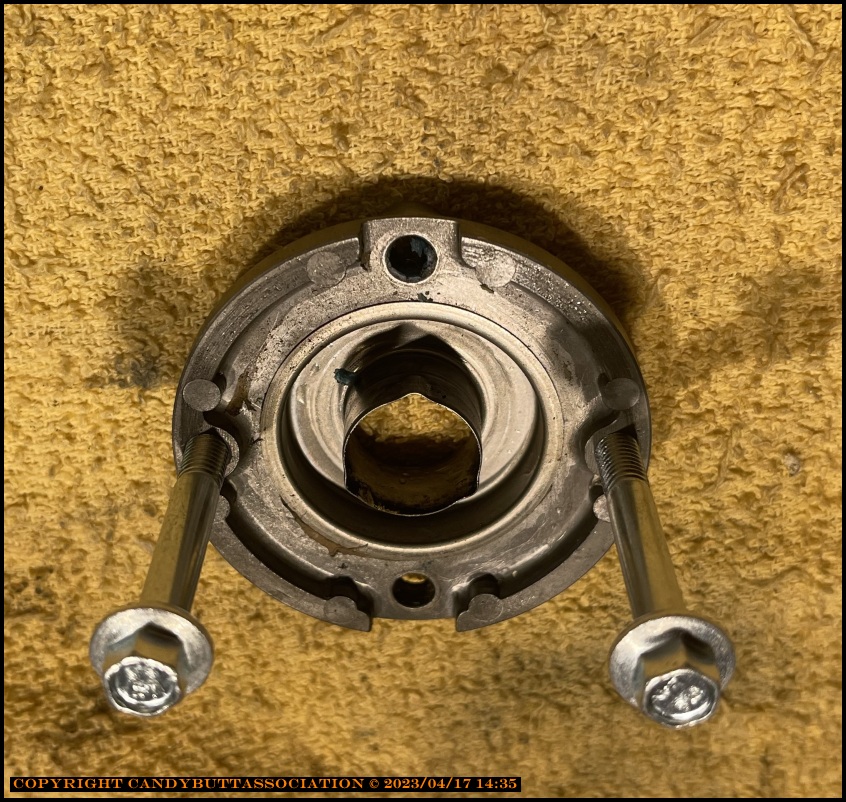
Some muck. Wish I'd never used stop-leak.

x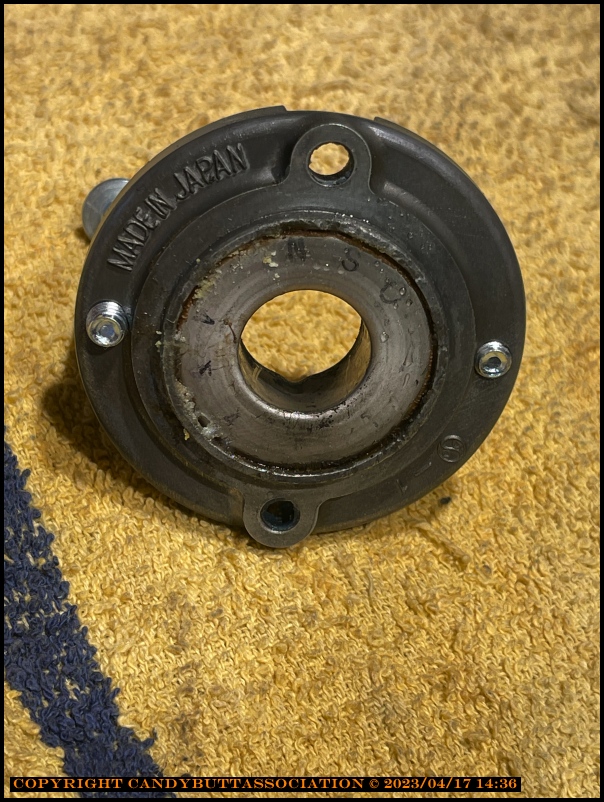
The oil seal is sealing.. Going to leave it alone.
Drilled a hole to allow clearance, then pressed the seal housing out..
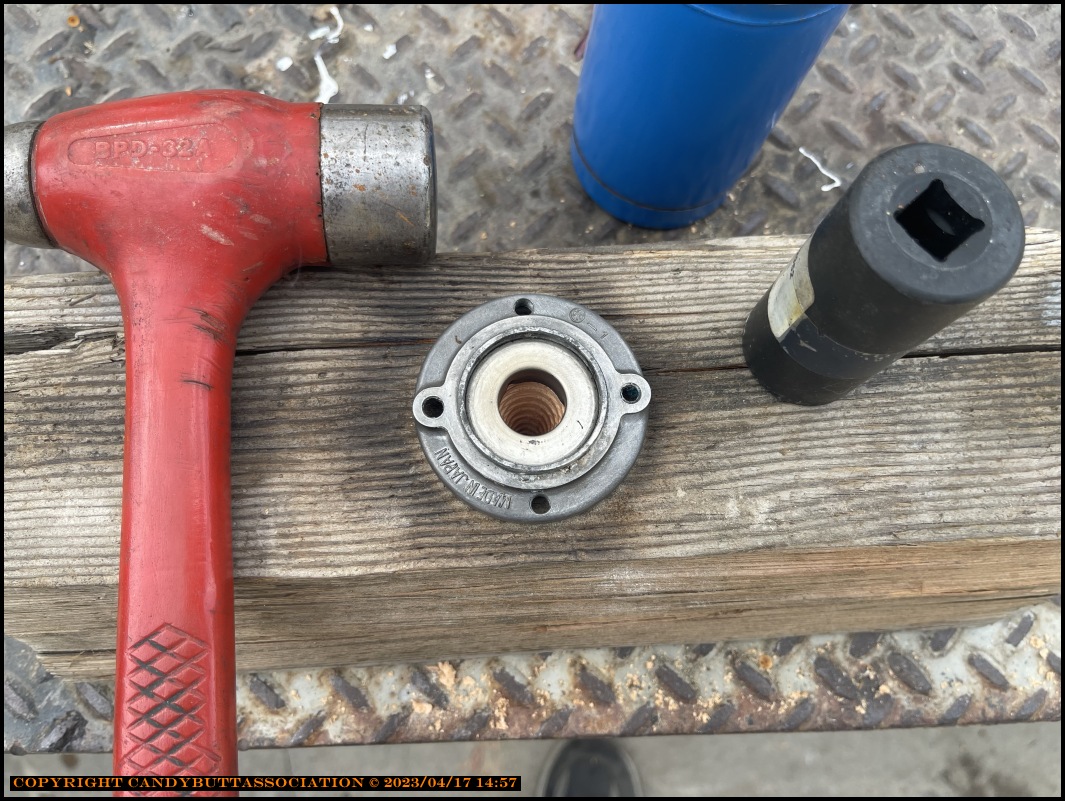
Almost 1/2 way out here, but is hitting the wood.
Almost.

Used a couple of sockets. It worked.
x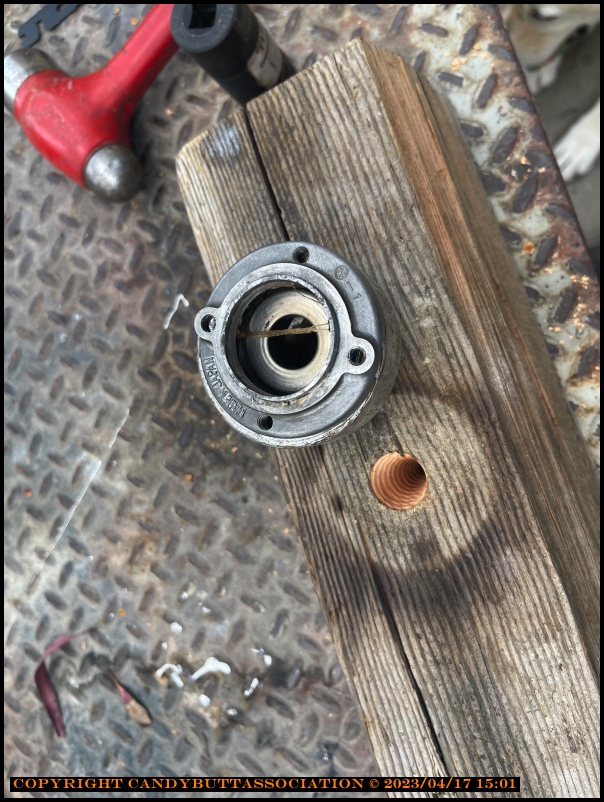
Put inner piece in freezer for an hour, heated aluminum outer piece to 325F in oven.
Tapped into place using hammer and special Kawasaki fitment tool <socket>.
All done!
2023-04-18 Kz1300 Water Pump Reassembly
2023-04-18 Kz1300 Water Pump Reassembly
Gasket removed. Plastic 'razor' blade is cat's meow.
Old rotating seal removed. It was easily pried out.
x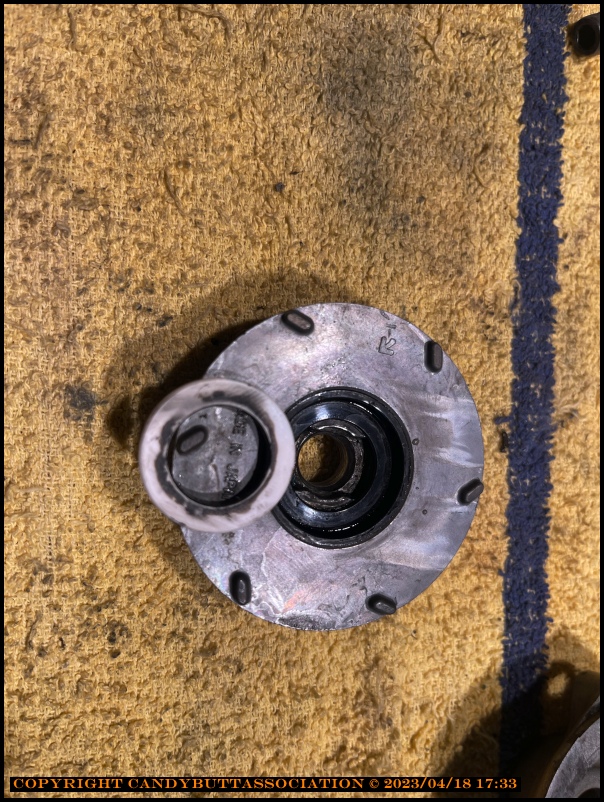
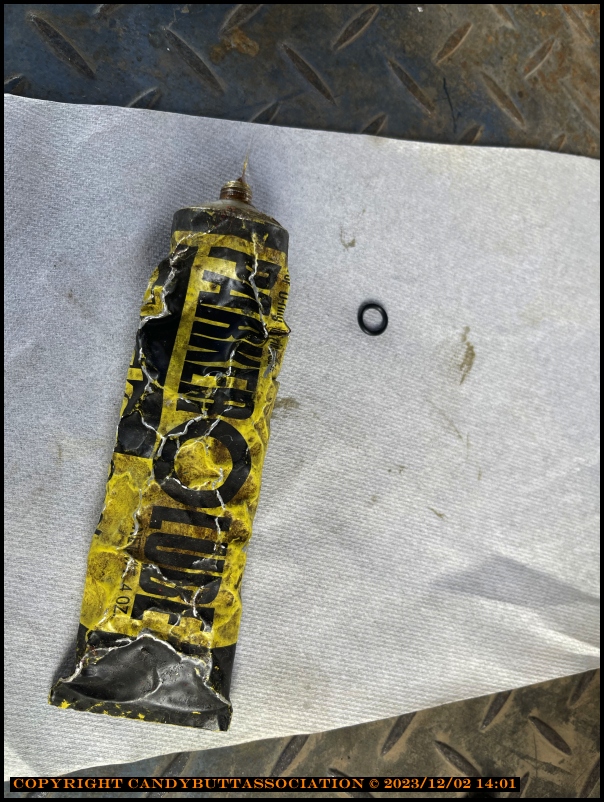
Cleaned O-Ring landing. Parker O-Ring grease. New O-Ring from z1300.de
New transfer tube, circlip, o-ring. From z1300.de
OEM seal (top two pieces) are supposed to be on piece, like bottom pic.
All clean ready for install. Took care to keep acidic fingers from sealing surface (white area).
x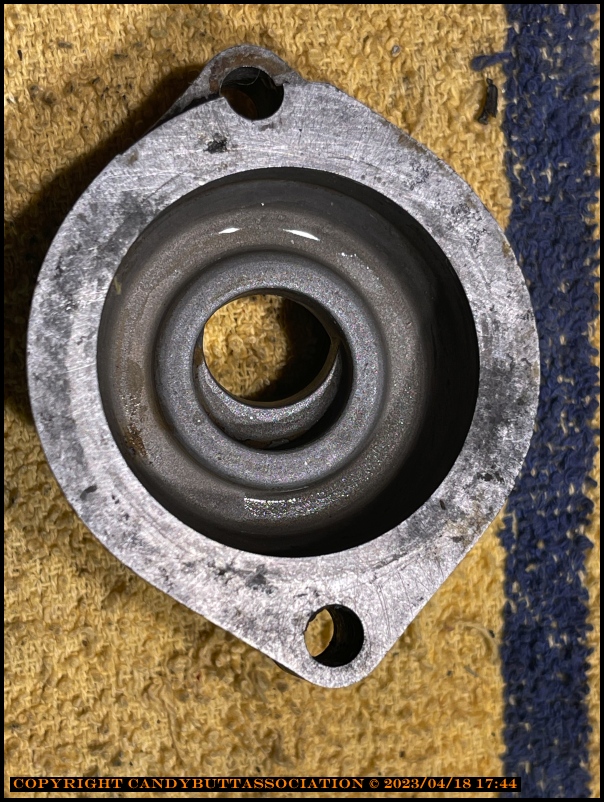
Gasket from z1300.de not 'purrrfect' but will work.
2023-12-02 Thinking About Getting Work done..
edit
8 months later, sigh, ready to hit it again. Good thing I took lots o' pics. Reviewed previous work while at breakfast.. Now to go home and get something done..
New O-Ring from https://www.z1300.de
Fits water pump shaft.
Cleaned both surfaces with lacquer thinner and clean rag.
Lightly coated with Lubriplate 'cream' for initial start-up.
Impeller installed. New circlip too. Used a wedge to keep impeller 'seated enabling access to circlip groove.
Triple checked circlip seating as correct.
.
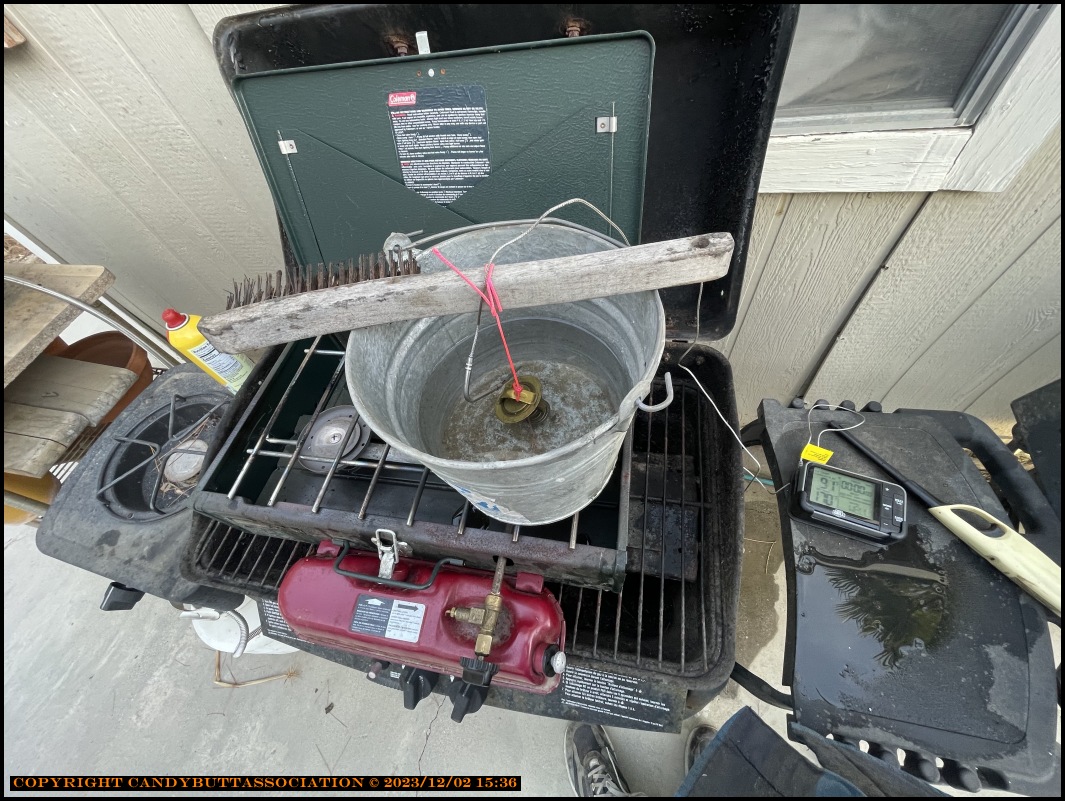
Thermostat tested prior to install.
Crude, but good enough.
Starts to open ~185, full open at ~195F.
Cleaned up gasket surfaces.

Posted on KZ1300.com about best method to install...
Thermostat first, then pump cover. Vice-Versa? As an assembly?
This isn't final assembly.. just a mock up.
No replies yet on KZ1300. What a bunch of slackers! :)
2023-12-03 Water Pump Final Install
2023-12-03 Water Pump Final Install
Answered my own question.
First install the T-Stat and housing.
Then fit the lower water pump housing.
To difficult to stack the T-Stat, Spring into the hole and then start the M6' allen heads.
Ready to mount.
Lubed all o-rings, new gasket, fresh RTV.

Tried and tried to position the tube by hand.. Nope.
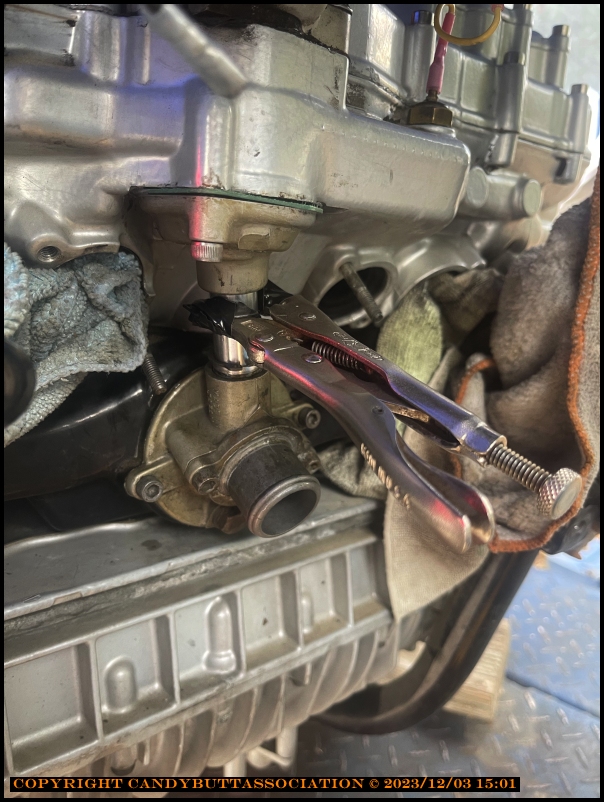
Hated to.. but covered teeth with tape and had it.
Proudly made in the USA!
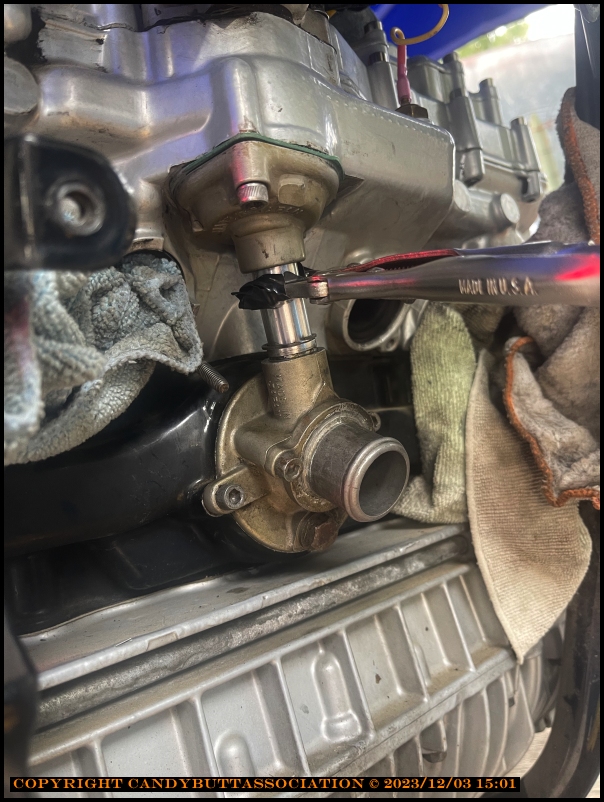
Was hoping to leave not a mark.
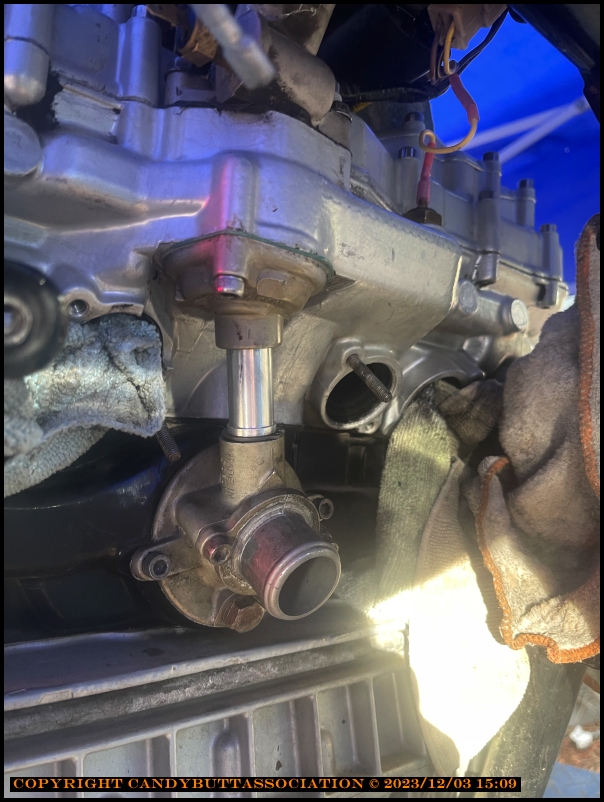
Left one. Oh well. It's hidden..
Hopefully it doesn't leak....
2023-12-04 Oh Shit - Kawboy corrects me
Lubriplate on the seal face? No, no, no. The rule of thumb is to lubricate moving parts in a component with either the lubricant that lubricates the moving item when the machine is running which in this case is the coolant in the system. Static o rings can be lubricated with o ring lube for installation and it's a must. If you don't lubricate the o ring, as it's installed, it deforms and it needs the lubrication to allow the o ring to naturalize in the groove after being squeezed in to position.
Thermostat and housing first since you need the room to install the thermostat, gasket , spring and housing and hold in position while you install the 2 screws.
water pump to follow and ensure that you install the tube in the housing and leave the circlip loose up the tube until after the housing is tightened down, then slip the tube up into the thermostat housing and install the circlip.
(and all of this is detailed in the FSM page 62, 63 including the requirement to lubricate the seal face with coolant)
This is the pic straight from the FSM and cropped / exploded for better viewing . This what it should look like. Note the inner edges of the ears are parallel to each other.Sometimes what I've seen happen if the shaft is soft, as the circlip is being installed it can cut a slight burr on the edge of the circlip groove and fold it inwards then leaving the circlip not fully engaged in the shaft. If that clip pops off, the impeller will drive itself in to the housing cover, and you'll be on the side of the road calling for a tow truck.
2023-12-04 Soft Pliers - who knew?
2023-12-04 Kz Water PP Final-Final Install
2023-12-04 Kz Water Final Final Pp Install
Found a 'soft-jaw' plier at Home Depot. 18 USD.
Never knew they existed!
Bought a bunch of metric circlips too.
Hopefully one will be correct size.
Ended up using stock OEM <used> part.
Inspected it, not sprung, out of shape, etc.
Good to Go.
Gotta admint, KawBoy was right. This one fits as it should.
The brown goo is Parker O-Ring grease.
Think I've over done it with pics here..
Hopefully there it is. The final-final for real final installation?
Thanks again to KB for the thoughtful advice and help!
2023-12-19 Water Pump - Total Failure
Well, sadly, honestly, I must admit the final outcome is total and complete failure.
Next morning, post radiator re-fill, wetness and drops at lower hose clamp, block side. Attempted to take pics and video, but it didn't really show much. Well crap. Also water from weep hole. Sigh. Sigh. Sigh. Leak is about 1 big drop every 2 minutes. Enough to soak lift top and drip off lift onto concrete.
2 days later, it's all dry. Why? Did enough water drip out that head pressure is now inadequate for it to leak? Maybe the hose finally conformed to the nipple?
It's hard to tell where the leak is.. There's a 14mm bolt head at pump bottom, front side. It appears to have a copper washer. Let's start there. Nope, ain't gonna happen. It won't budge, and if it does, certainly damage will occur. Best to leave enough alone.
Let's reposition hose clamp, re-tighten clamp. Drain the expensive Evans coolant, add straight distilled water for testing purposes.
Let's start the gurl. Huh, what's the click click click only noise from start solenoid? Check battery connections, clean, retighten. Click Click. Battery resting voltage 12.8 Vdc. Load test battery using my super-duper load testing device. (2 H4 bulbs wired for lo/hi beam). Battery is solid.
Handlebar start button? Disassemble, split the clam shells. It's close to dark now, no lights. Spray some DeOxit into switch internals.
Whirrrr Whirrr, no click click click. Well, most of the time. Improvement. Not yet good, but good enough for now.
Remove plugs. Connect plugs to sparking wires, ground plugs.
Let's spin the engine in 15 second bursts, checking for good spark, develop oil pressure before combusting fossil fuel, let the water pp seal spin a few rev's.
Fetch tank, drain old fuel, add fresh juice, install tank. Hmmm, Motion Pro fuel hose is brittle but it will work for now. Bike has sat for > 9 months now, under a cover, on an outside lift.
Install tank, connect fuel hose, turn Pingle on. Let's start her up.
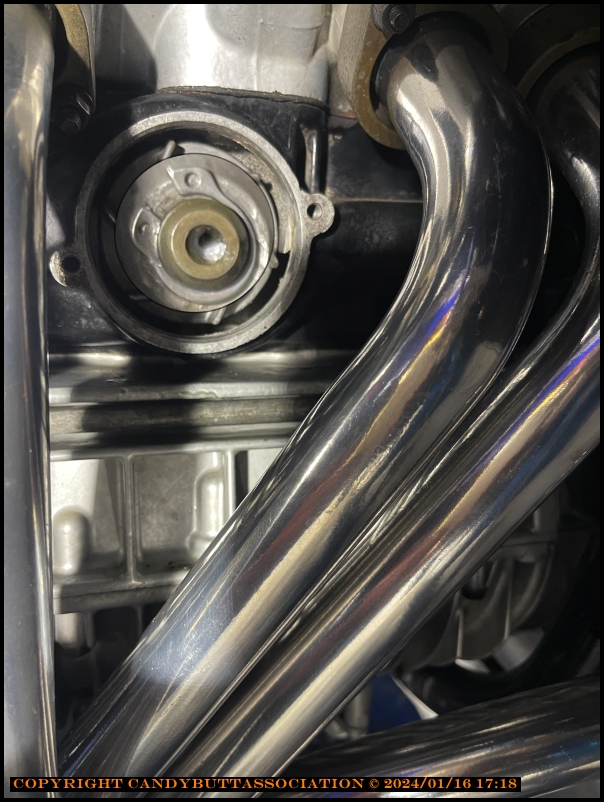
Wait! First wipe CermaKote headers down with lacquer thinner to remove any oily fingerprints. Don't want the prints to etch in after heat.
Vroom Vroom! She starts right up and sounds better than ever. Happy happy that ignition coil wiring is correct.
Run for about 3 minutes, raise bike, and ACCK.
The weep hole is weeping like a big dog. Much more than the old seal. Sigh. Lower hose clamps are dry.
"If I could just get it back to where I first started, I'll be happy" is running through my cranium scareabellium.
Then I notice a LOT of water dripping down radiator RHS and onto bike frame. Well shit. F@#k Me.
It's dark now, starting to rain. Secure the work area, put tail between legs, go back to house, defeated. Have not yet followed up.
Sooo, KawBoy expressed technical displeasure with me applying a light coat of Lubriplate cream on seal surfaces. I'm sure KB isn't not at all surprised with the results.
I also recall reading another thread where KB said there were 6 leak paths with this design. Will find and read again, apply new knowledge.
Read on the Aussie part site (from Bucko's thread IIRC?) that sealant should be installed on the metal OD that presses into the block?
Read on another post that some have had issues with 'pattern' seals as compared to OEM.. that maybe the manufacturing is off, slightly?
Is it possible that running straight water for leak detection purposes isn't the hot idea? That perhaps 50/50 EG/Water mix has greater density, less leakage?
My next plan is to order two new seals.. One from Germany, one from Aussie land, compare the two, then try again.
Sigh.
I guess not all we do results in success.
Yep. Right now I feel gut punched, but I'll persevere to persevere.
D
2024-01-15 Mech Water PP Seal Again
It leaked.
Here we go again, I need to fire my tech <me>.
Worse yet, when I removed the housing, the water pump impeller circlip was missing.
Yep.
Not there. Kawboy from KZ1300.com had mentioned that circlip #1 looked to be incorrect.
I sourced another and installed it.
Sidenote: After she was buttoned up, several days later, found a circlip closely resembling the size and shape, laying on the outodoor concrete pad.
WTFO? I had several, purchased at local hardware store.. Did this one escape?
Picked it up, put in the circlip collection drawer.
Now this. Was it incorrectly installed? Did it jump out of the landing onto the concrete?
Do I have circlip somewhere in the water block now?
Lemons to Lemonade
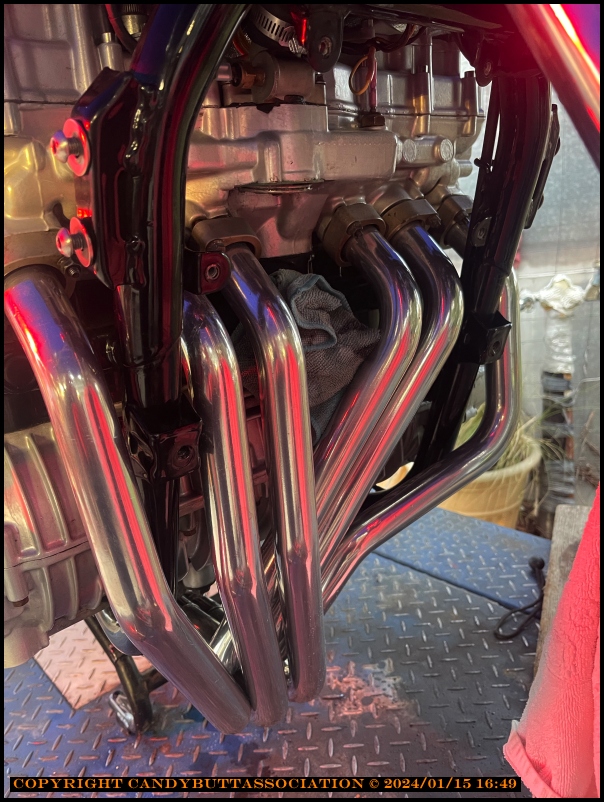
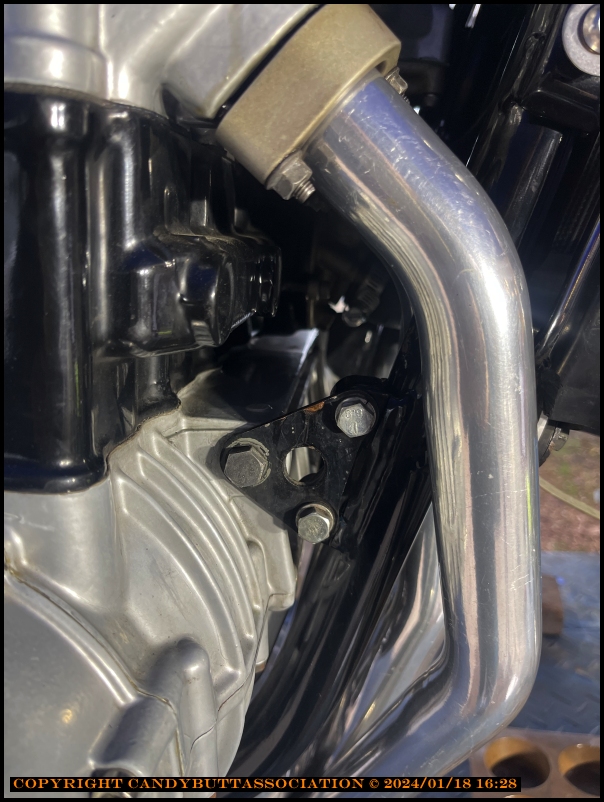
* Didn't have to remove exhaust headers.
* Gives me a chance to ensure header bolts are tight after about 5 minutes of run time.
* The bike ran cool, took longer than 'normal' to reach operating temp. Maybe the Cermakoat headers are working?
Here's the infamous LubriPlate. I'll clean it up and use coolant next time.
The manual says the transfer tube can be moved upward to facilitate housing removal.
I don't see how. It's bottomed out, and the tube was still slightly in housing.
Duh. Manual says to move it *down*.
I have a new seal, but hope to re-fit this one, this time using 3-Bond to seal the spring side seal half into the block.
Decided to stop for the day. Getting cold, I'm tired, cranky, and my hands hurt.
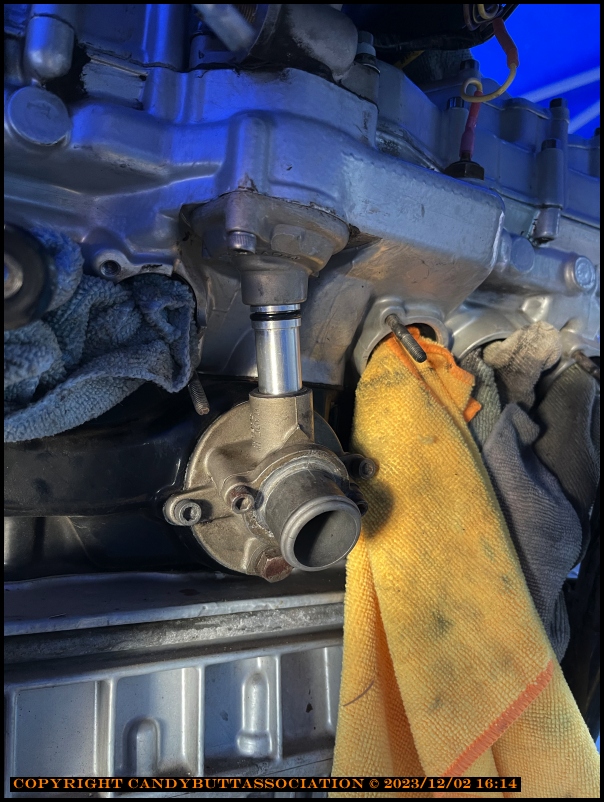
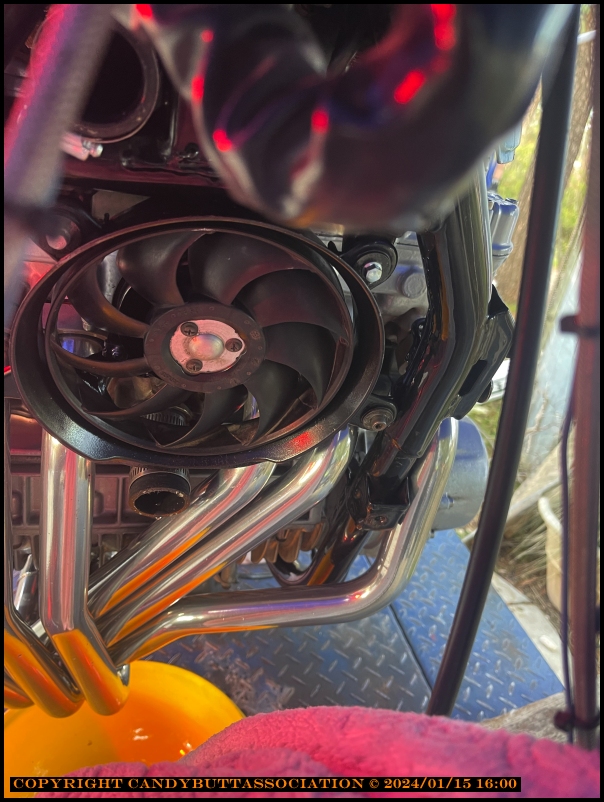
The nice red glow is from infrared lamps... Brr.
2024-01-16 Water PP Install - R2
After an appropriate ass-chewing from Kawboy at KZ1300.com, (You are your own worst enemy!) :)
decided to slow down and work it in afternoon daylight hours where the lighting is better.
Also, the day broke with sunshine and warmer temps and me with a new improved 'tude.
This time watched the videos listed earlier in the diatribe, RTFM, got a better pair of glasses...

With very arhtritic fingers, didn't trust myself to not launch the impeller shaft o-ring into never-never land...
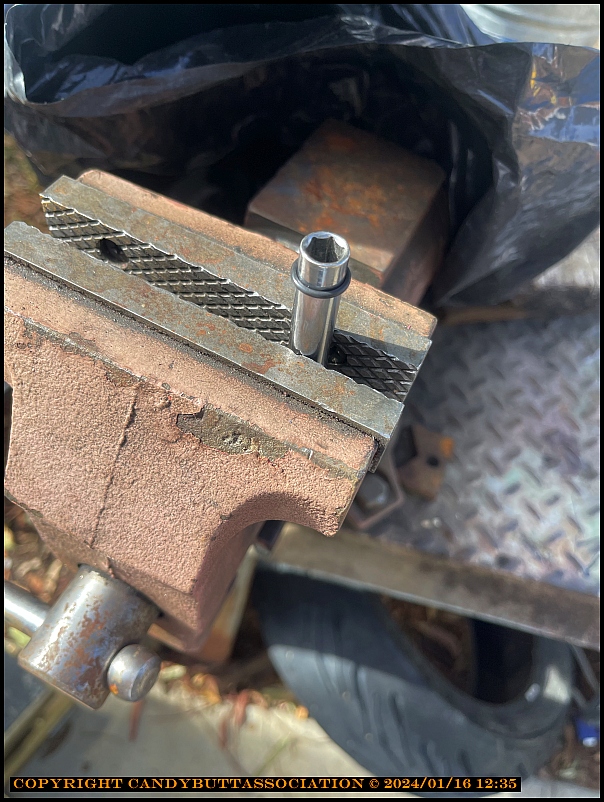
So found a long socket about the same OD as the shaft, then transferred it from socket to shaft.
Using lube of course. Things work better with lube. This worked GREAT.
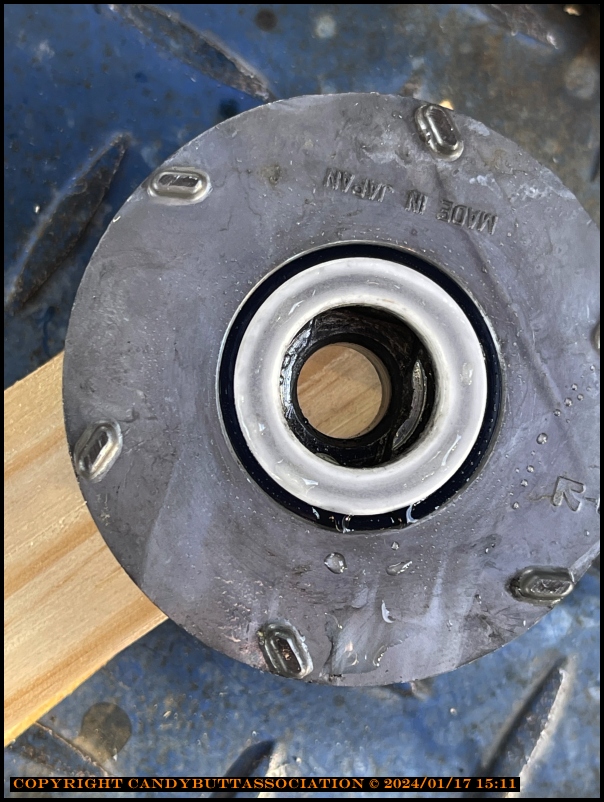
Unlike last time, applied 3-Bond to the machined surface just below "Made in Japan", after cleaning it up of course.
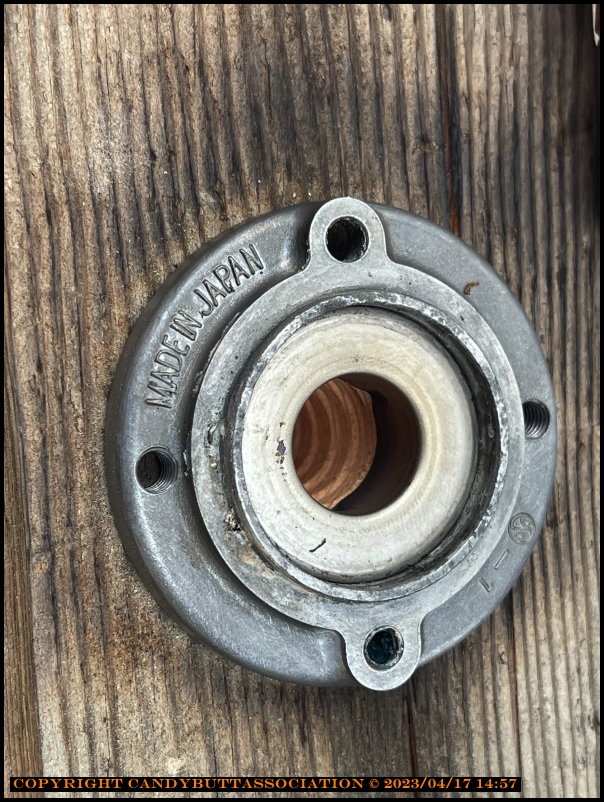
Applied 3-Bond to mating surface as well.
The other sealing surface is just outside of the oil seal. Cleaned it up and applied 3-Bond.

As my dimensional Metrology instructor said... "Clean, Clean Clean." So I did. Both mating surfaces,
then a squirt of coolant on both before impeller assembly. A cheap syringe from Amazon works good for this purpose.
SS circlip from Zed parts. Based upon previous KawBoy comments regarding proper seating, made sure it was properly fit.
Looking closer, I did not like it. Then I went to wiggle on the impeller, it wasn't engaged? Just spinning on shaft.
WTFO?
So removed it and looked closer.
I don't have pics, but the impeller back side has two machined recesses that mate to the shaft. The shoulder on mine is boogered up a bit..
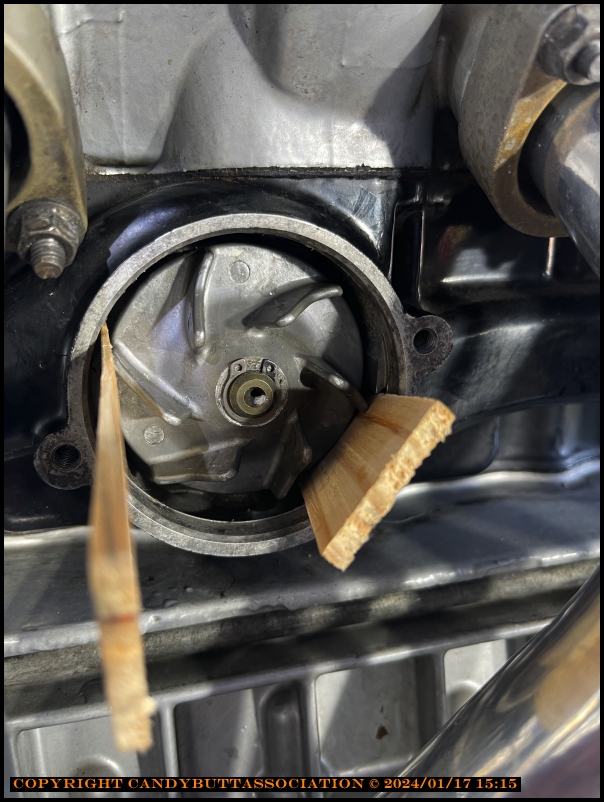
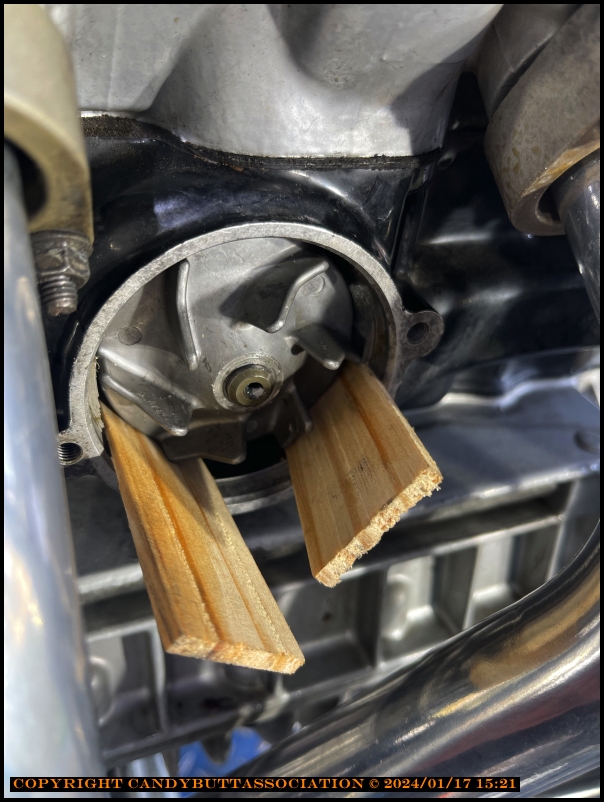
So cleaned it up best I could and reassembled. This time, made sure the tab and slot engagement was good and proper. Not easy for my hands
to push impeller against spring, then wedge it with wood wedges, AND get the circlip on.
If at first you don't...try again?
2024-01-16 Kz1300 Water PP Circlip Pics
Kawboy from KZ1300.com says...
"This is the new s.s. circlip installed on the shaft AND as far as I'm concerned the groove in the shaft is about .010" not deep enough in diameter. I can't spin the circlip on the shaft AND I will fix the depth of the groove before I finish this job. I've run across this kind of issue many times at the plant and I'm sharing my knowledge for your entertainment. Hopefully, people can benefit from what I try to explain. This "stuff" is not common knowledge and maybe only a few "tradesmen" would know the proper fitment of something as simple as a circlip. In nuclear and aircraft mechanics, we all know what happens when the small stuff is overlooked."
So took a closer look.
KB is right. Check this out.
Fortunately, nothing is buttoned up. Almost looks like the clip is 'sprung'. Will also check the groove like KB suggested.
I have jewlers files..
Thanks to KB for keeping me on my toes. Sometimes truth hurts, but if one learns and changes... then it's all good.
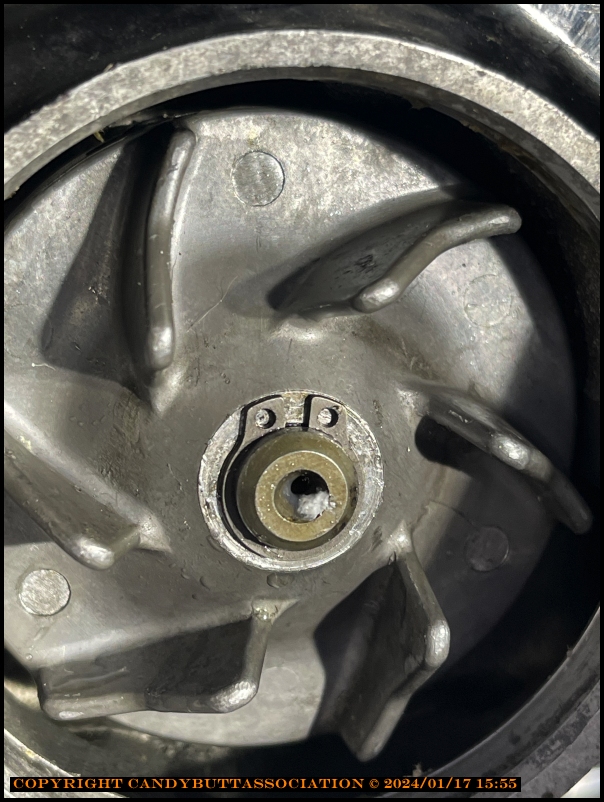
2024-01-17- Kz1300 Water Pp Circlip Done Right
2024-01-17- Kz1300 Water Pp Circlip Done Right
Gaining experience, knowldege, can be painful. You make mistakes. You damage stuff. It's the price, simple.
Having someone, uhh, 'guide' you in the process is invaluable. Thank You KB (Kawboy from kz1300.com) for that. Learned a long time ago that if someone is willing to coach you, someone who knows more than you do, then fricking listen up.
KB mentioned the circlip still did not look correct. He was right. Here's the SS circlip removed, deformed. KB said SS doesn't have the same 'rebound' ability as carbon steel, it's easy to over 'stretch'. But I was careful when installing. Just enough spread to clear shaft OD.
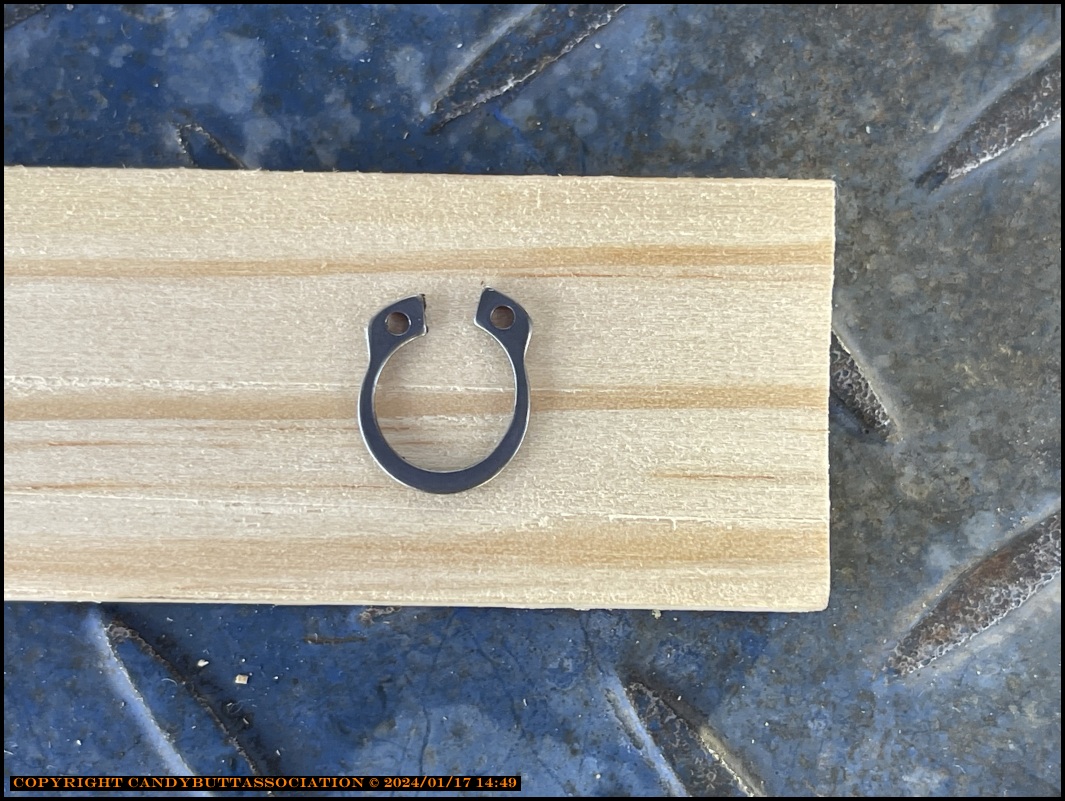
From Zed parts also purchased as CS clip..

Inspected the groove using a feeler gauge. It was clean, clear, no burrs around 360 degrees.
Installed the clip without impeller. Clearance between 'ears' installed and on bench was identical - 1.73 mm.
Yet when trying to install circlip with impeller on, the gap was much wider. Hmm.
Looked at impeller seating area. It got chewed up a bit after it spun free on shaft. Is this causing the impeller to not
seat fully on shaft, thus causing circlip to not seat?
As previoulsy stated, learning can cost.
Notice the circlip ear spread. Much more than with circlip installed w/o impeller. Not SAT.
What would KB do?
Tried installing impeller 180 degrees out. Maybe then it would 'seat' better allowing better circlip position.
Finally. Installed, the ears are now at 1.73 mm spread. The same as when circlip was installed sans impeller.
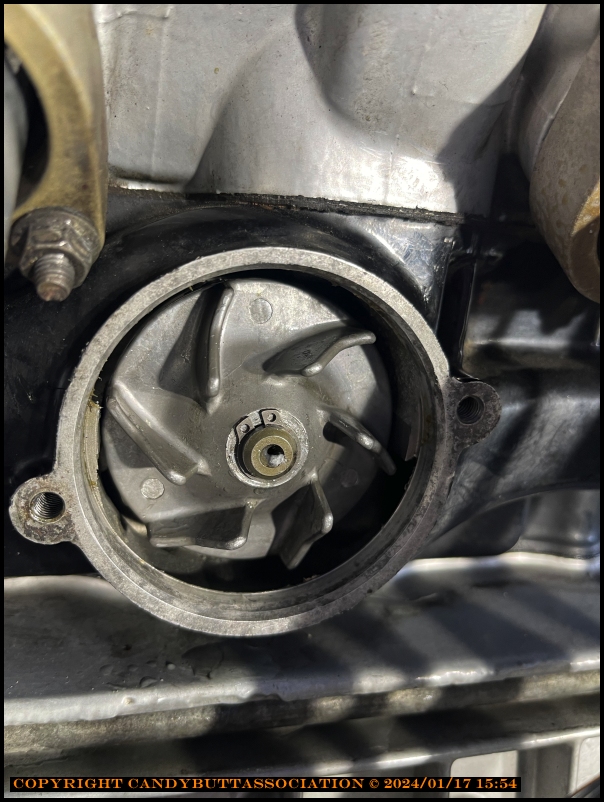
Oh happy day!
To put my ugly face out there..

BAF installed. (Big Assed Fan).
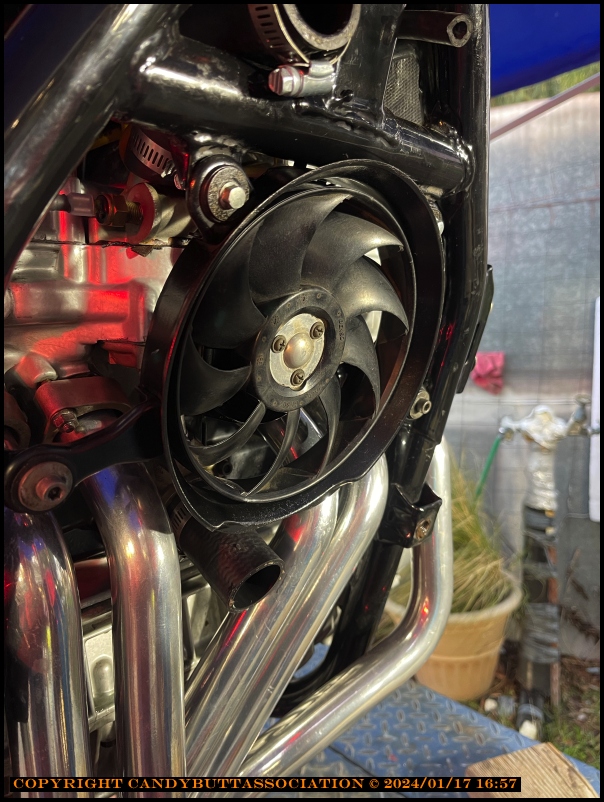
Got radiator hung too. But now, as you can tell, it's dark. Got 3 infrared heat lamps glowing, 2 LED lamps fired up.. And... it's time to quit. tired. back hurts. Call it good for now.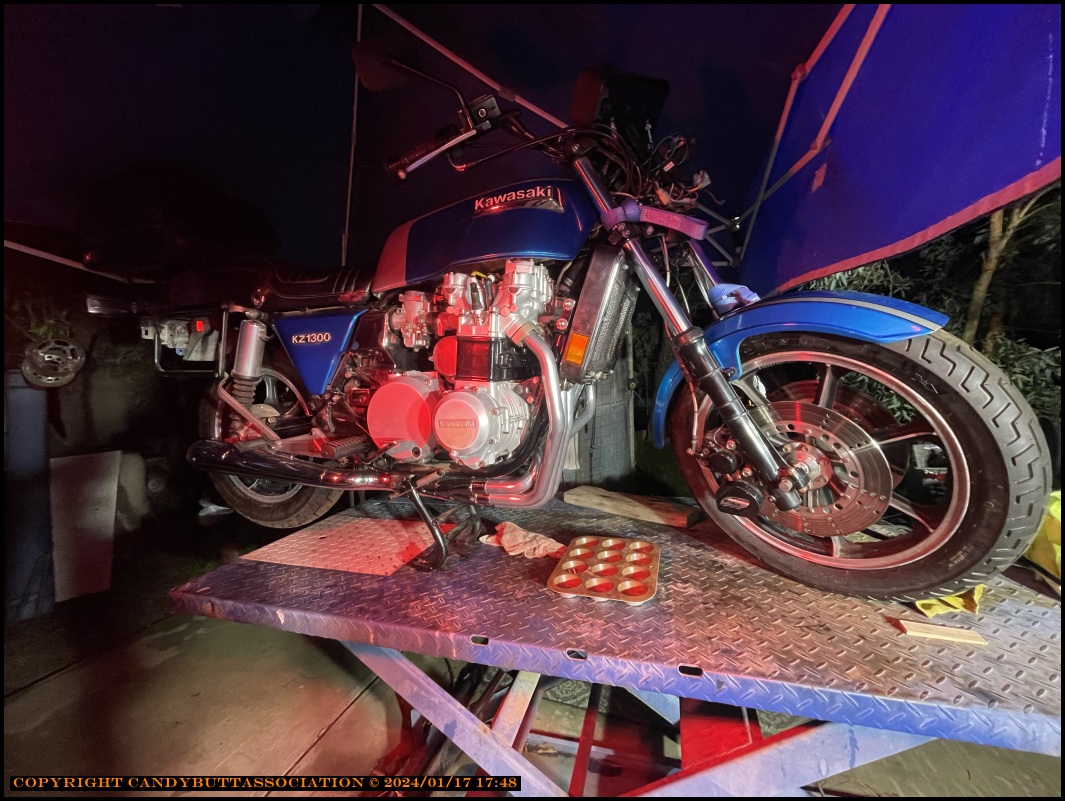
KB stated about working under adverse conditons leads to faulty work. I agree. The best I could do for now, before my shop is built... Added 2 big LED lights, found a better pair of glasses, added two more heat lamps. And wore a very nerdy head lamp. LOL.
On a serious note. Fully appreciate KB's honesty, advice, mentoring. I'm just a freaking hack trying to learn. When KB presents ideas, circlip charts, etc.. You bet I'm downloading and saving that info. Thank You KB.
Don
Forgot.. Measured the ZED circlip ID at 10.35 mm, .99 mm thick.
2023-01-18 Testing New Seal Installation Kz1300
2023-01-18 Testing New Seal Installation Kz1300
Left off last night with everything installed, just needed to tighten hose clamps, add water.
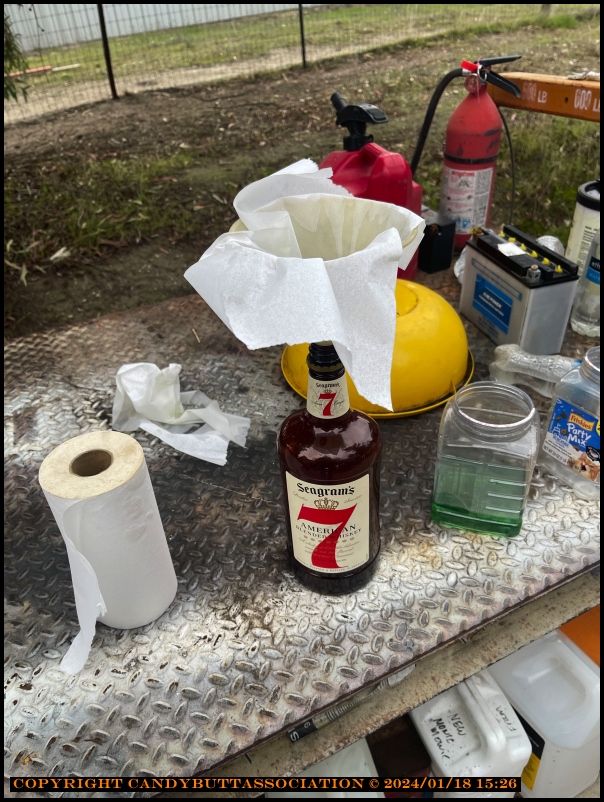
I always filtere re-used cooland. In this case, Evans.
No static leaks!
Or after about 5 minutes of running. See video below. Fingers crossed!