
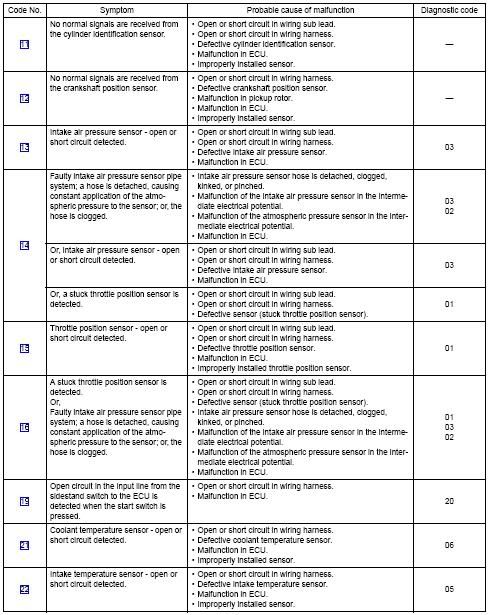
The five Gen I tables and eight Gen II tables below show the Code numbers and Diagnostic actions for the ECU. You will need the Factory Service Manual (FSM) to troubleshoot using these codes, there is additional code information in the FSM that is not placed here.
How To Access The Diagnostic Screen:
Place your FJR on the center stand, neutral, side stand up. This will let you test the side stand switch.
With the key off and the red Run switch ON, press and hold the "Select" and "Reset" buttons simultaneously and turn the key on (do not start, just ON), continue to hold the buttons until the display next to the fuel gauge says diAG (5-10 seconds). If someone has performed the Barbarian Jumper modification at the ECU connector the first screen will be CO for the CO offset adjustment, the diAG screen will be the next function.
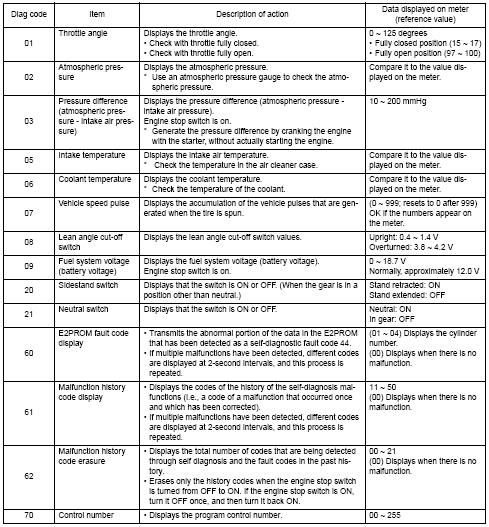
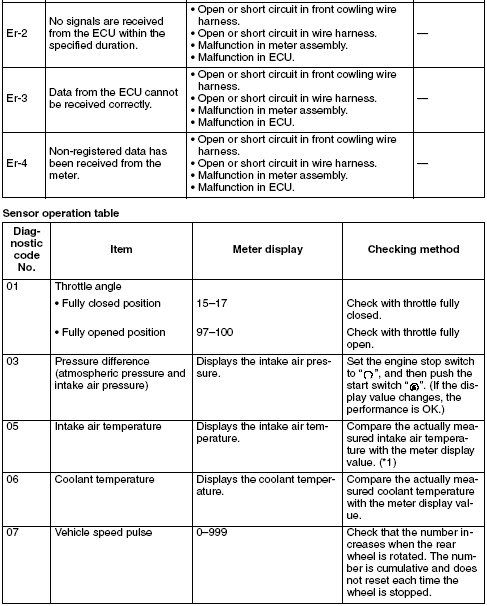
Release the two buttons. Now, press the "Select" and "Reset" buttons simultaneously again. After ~ 2 seconds the display should show dI:01 on top and a two digit number at the bottom. dI:01 is the diagnostic code number. The two digits at the bottom of the meter is the value for the diagnostic code number. Diagnostic Code dI:01 lets you look at the throttle position sensor (TPS) output. The TPS value is the two digits at the bottom of the display. Turning the throttle will change the bottom two digits. Normal is 15-17 with the throttle closed and 97 to 100 with the throttle wide open. This is an example of how the dI:xx top and bottom two digit data works.
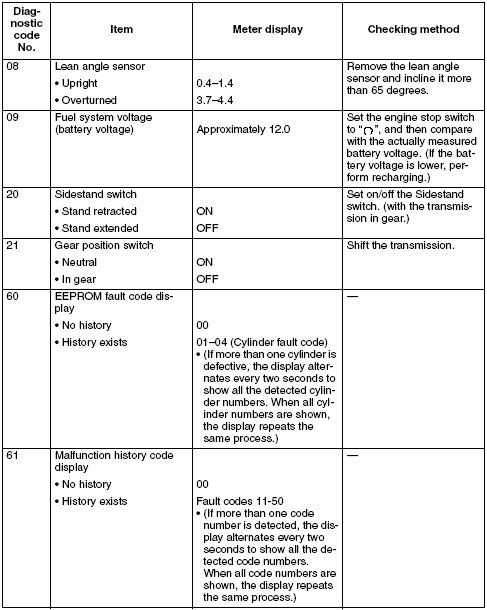
Press "Select" to increment the diAG sequence number and press "Reset" to decrement the diAG sequence number. At code dI:09 the fuel system voltage will be displayed and you should hear the fuel pump turn on. Expect to see roughly 11.7 to 12.4 displayed on the bottom, this is the battery voltage to the fuel pump. A reading like 00.1 would indicate a blown fuse or broken wire.
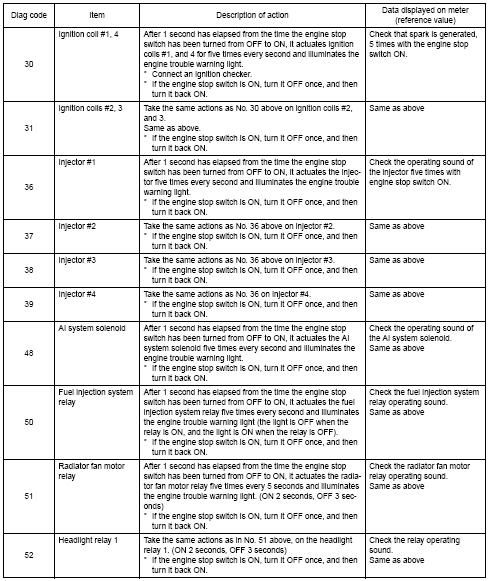
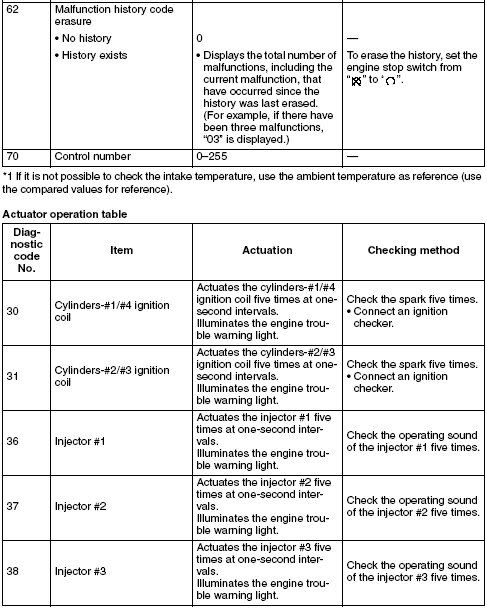
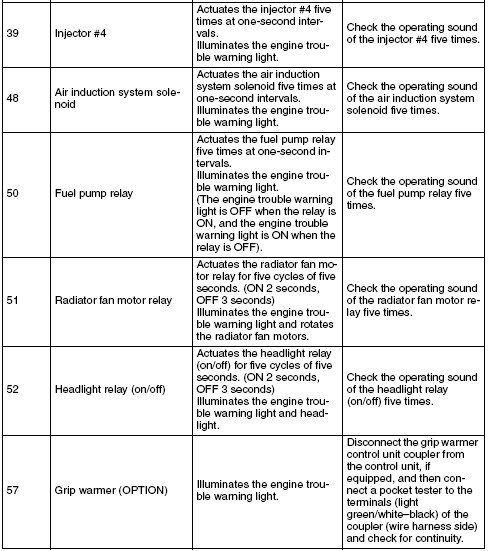
There are also 'Actuator' codes that let you turn on things like radiator fan relay and the fuel pump relay as well as firing the coils and injectors. The Actuator codes are enabled by switching the red Run/Stop switch on the handlebars Off then back On again.
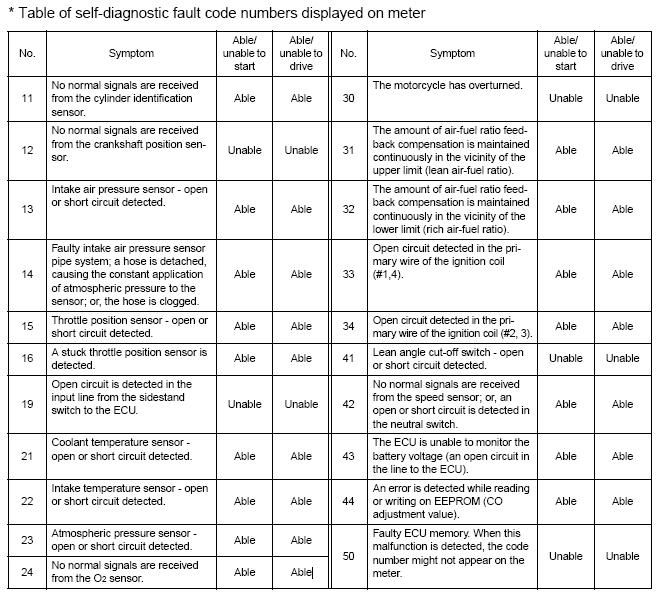
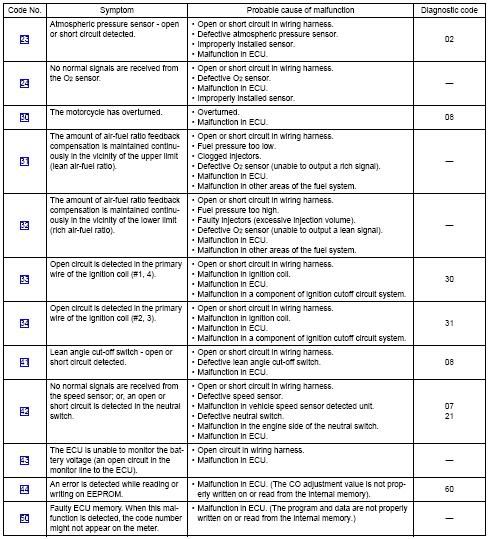
The following tables are Gen I Code Numbers, their value and action. The text size is squint to read and not intended to cover all the information about the codes. You will need the FSM to properly use these codes.
Gen I Codes:
===============================================================
================================================================
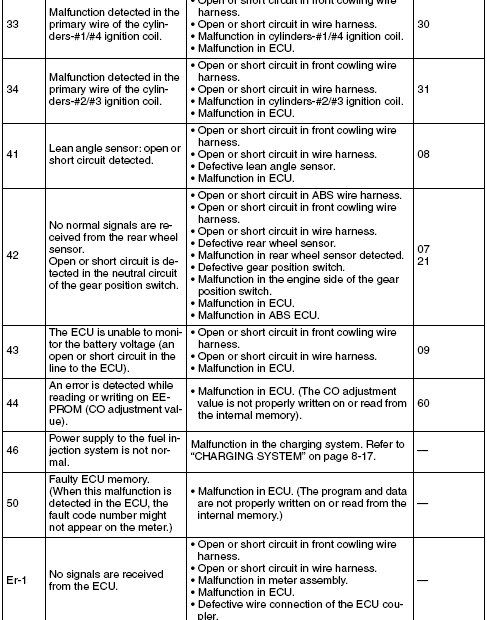
Gen II Codes: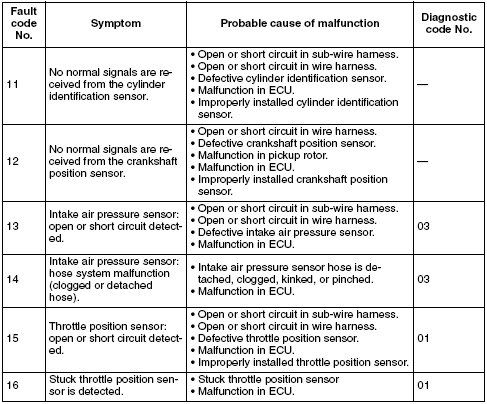
There are no codes #17 or #18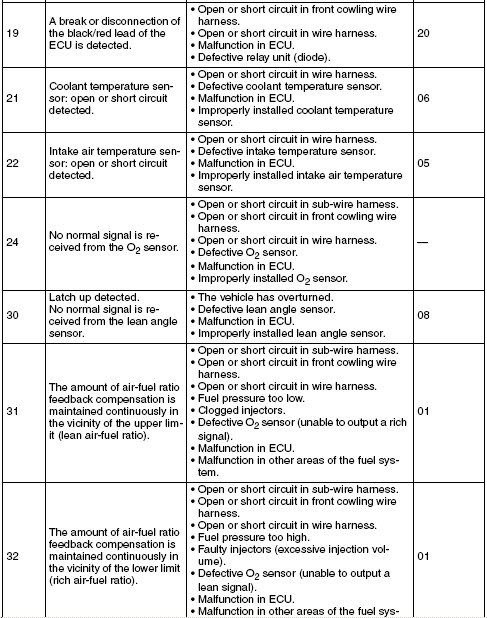
- Home
- Forums
- Ride Reports
- MotoBikes
- Restorations
- Wrenching
- 1963 BMW R69s
- 1969 BMW R60/2
- 1978 Yamaha 125
- 1979 KZ1300
- 1979 Kz1300 - Bob's Beauty
- 1981 CBX SuperSport
- 1981 Kz1300 Model A3 - Chocolatie
- 1984 Ford F250 XL
- 1987 ATK
- 1987 MowieMowie
- 1987 RotoTiller
- 1988 Honda Accord Lxi
- 1990 BMW RT100 - Barrie
- 1991 Harley Davidson FLHTCU
- 1992 Johnnie Deere
- 2000 YZ426
- 2002 Dodge Ram
- 2006 Carson RacerX Trailer
- 2006 Host Camper
- 2006 KrZy8
- 2007 Wabs
- 2012 KTM 690R
- 2013 Naomi - FJR 1300
- 2014-08-01 Air Compressor - Sears
- 2017 Kioti
- 2018 Toy Hauler
- 2020 Honda Fit
- 2021 Miscellaneous
- 2024 Log Splitter
- 2024 NeoDyne MC Lift
- 2050 test
- Lil Trlr
- Eats
- RIP
- PC Not
- Cages
- Test
- FJRF Best
- For Sale