- Home
- Forums
- Ride Reports
- MotoBikes
- Restorations
- Wrenching
- 1963 BMW R69s
- 1969 BMW R60/2
- 1978 Yamaha 125
- 1979 KZ1300
- 1979 Kz1300 - Bob's Beauty
- 1981 CBX SuperSport
- 1981 Kz1300 Model A3 - Chocolatie
- 1984 Ford F250 XL
- 1987 ATK
- 1987 MowieMowie
- 1987 RotoTiller
- 1988 Honda Accord Lxi
- 1990 BMW RT100 - Barrie
- 1991 Harley Davidson FLHTCU
- 1992 Johnnie Deere
- 2000 YZ426
- 2002 Dodge Ram
- 2006 Carson RacerX Trailer
- 2006 Host Camper
- 2006 KrZy8
- 2007 Wabs
- 2012 KTM 690R
- 2013 Naomi - FJR 1300
- 2014-08-01 Air Compressor - Sears
- 2017 Kioti
- 2018 Toy Hauler
- 2020 Honda Fit
- 2021 Miscellaneous
- 2024 Log Splitter
- 2024 NeoDyne MC Lift
- 2050 test
- Lil Trlr
- Eats
- RIP
- PC Not
- Cages
- Test
- FJRF Best
- For Sale
Candy Butt Association
World's Wimpiest Riders
You are here
2019-04-07 Naomi Valve Check

Forums:
2019-04-07 Valve Check
With xxxx miles, time for Naomi's first valve check.
First up, throttle cable games..
Before pictures. Very helpful for reassembly later on.. My first experience with coil over plugs. They fit tight into the well. Gently rotate at lift.
Removed the throttle cable mount for valve cover clearance.. but with my up and back bar riser extenders, still not enough slack. So off we go...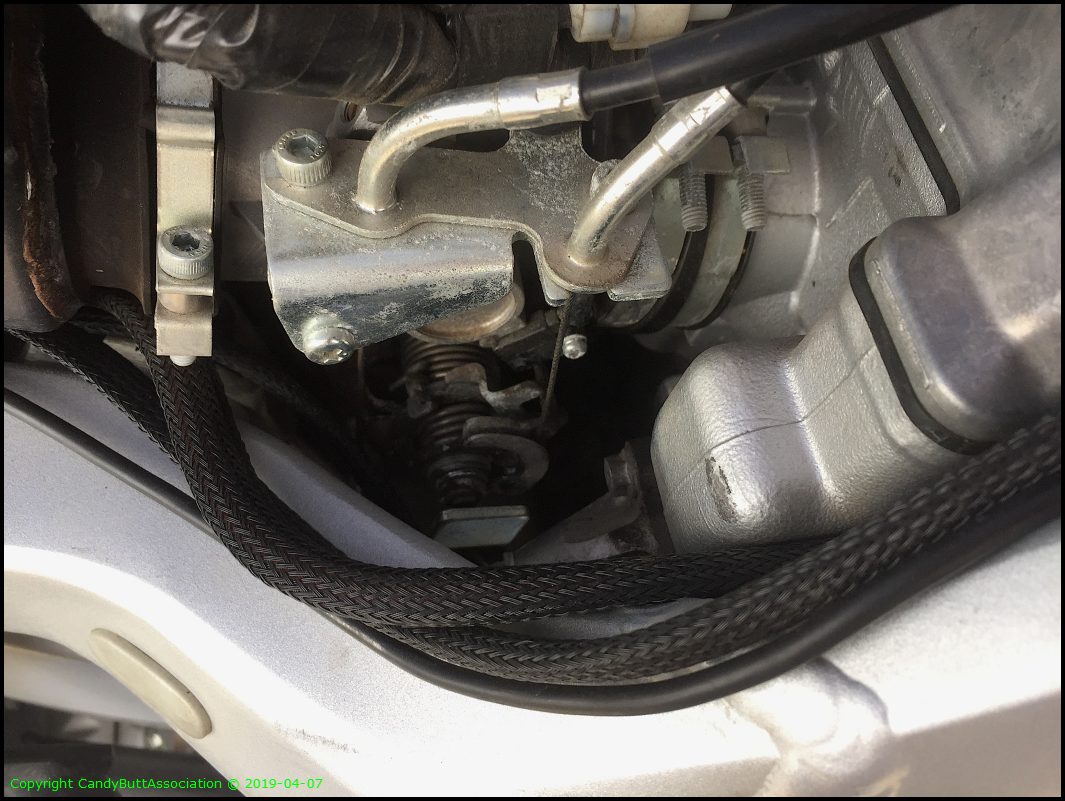
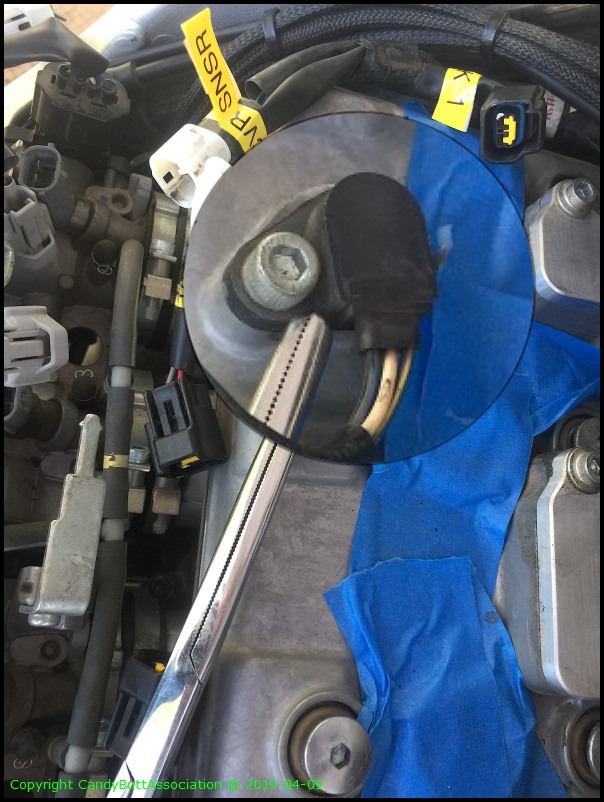
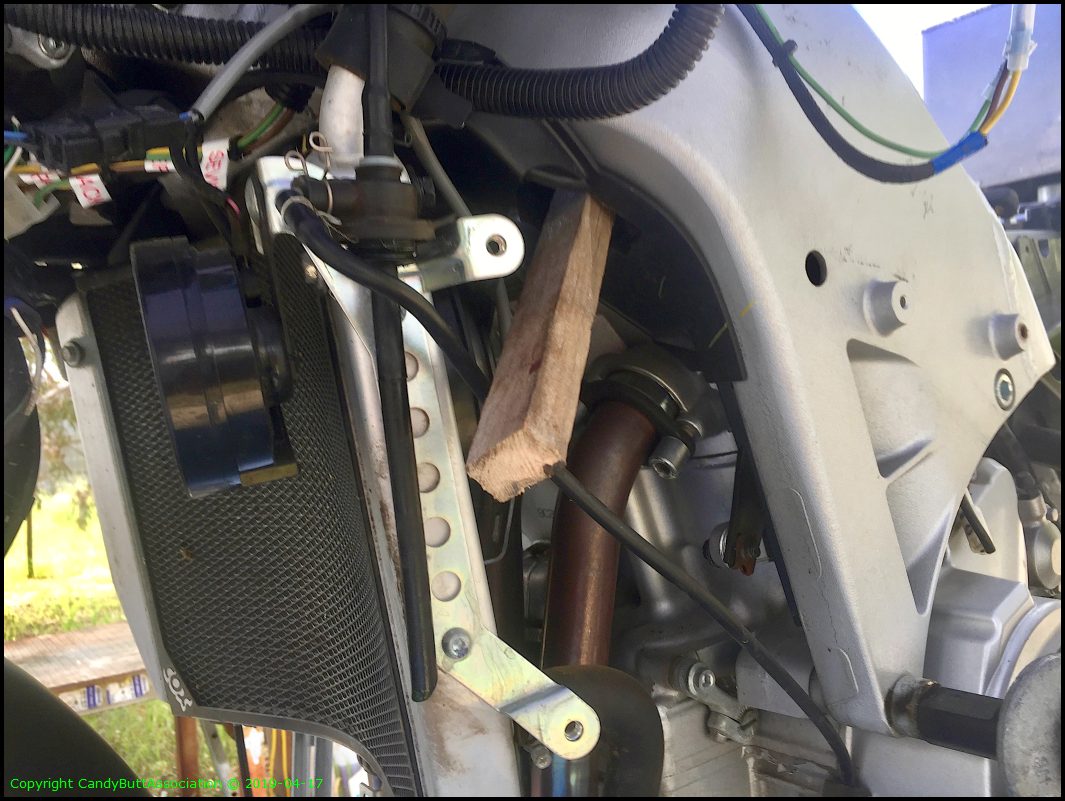
Removed water inlet pipe. Had crud still, even after initially blowing area with compressed air. Hmm, what now. Hey, a 17 mm fits the hole perfect! Used suspension cleaner and compressed air, nothing got into the water jacket area.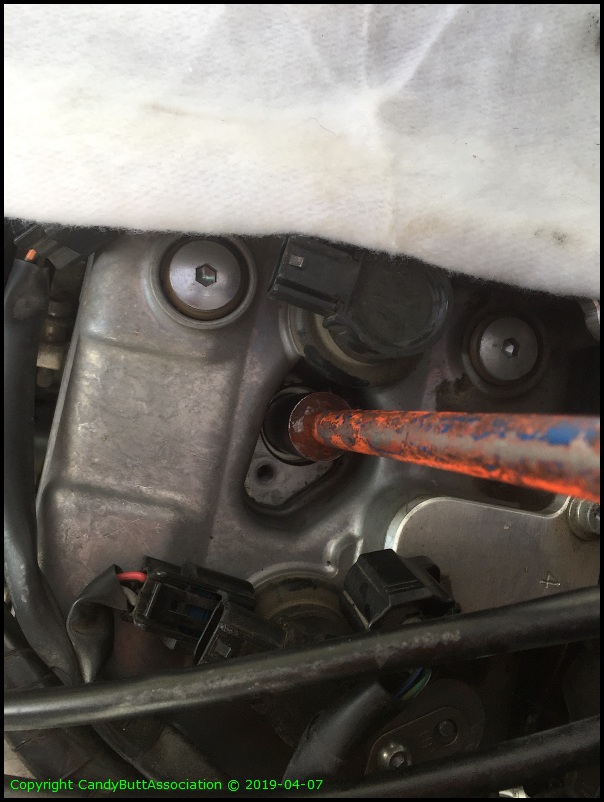
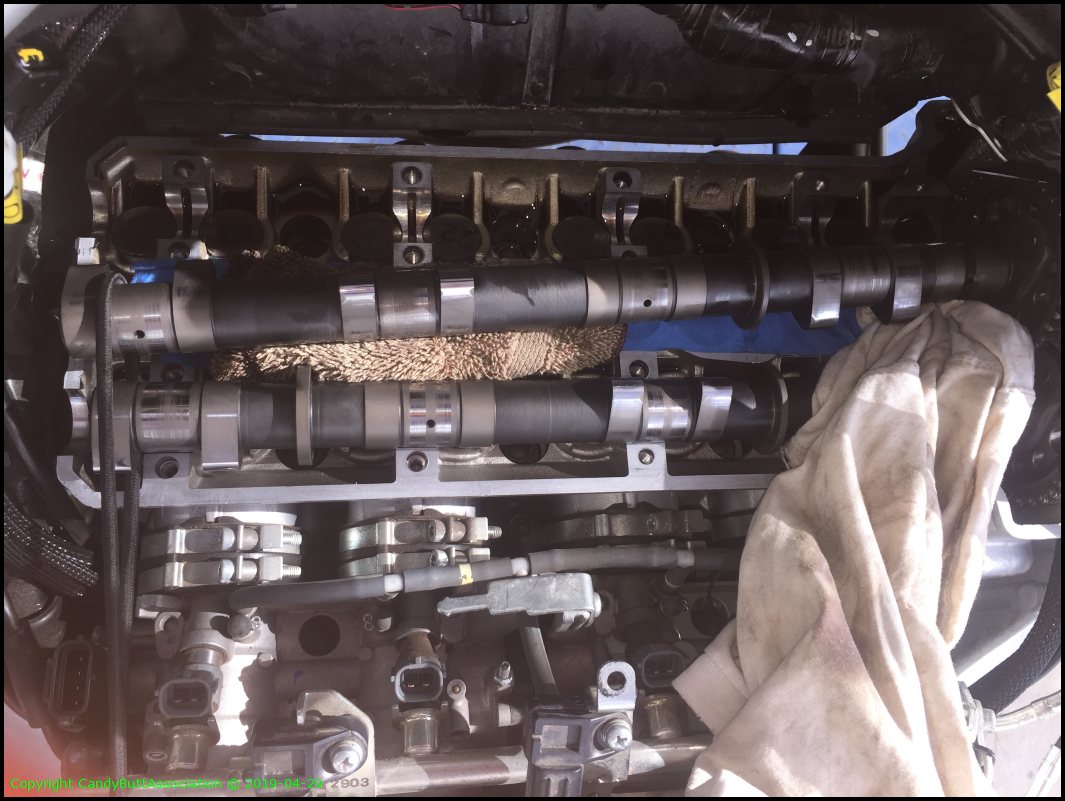
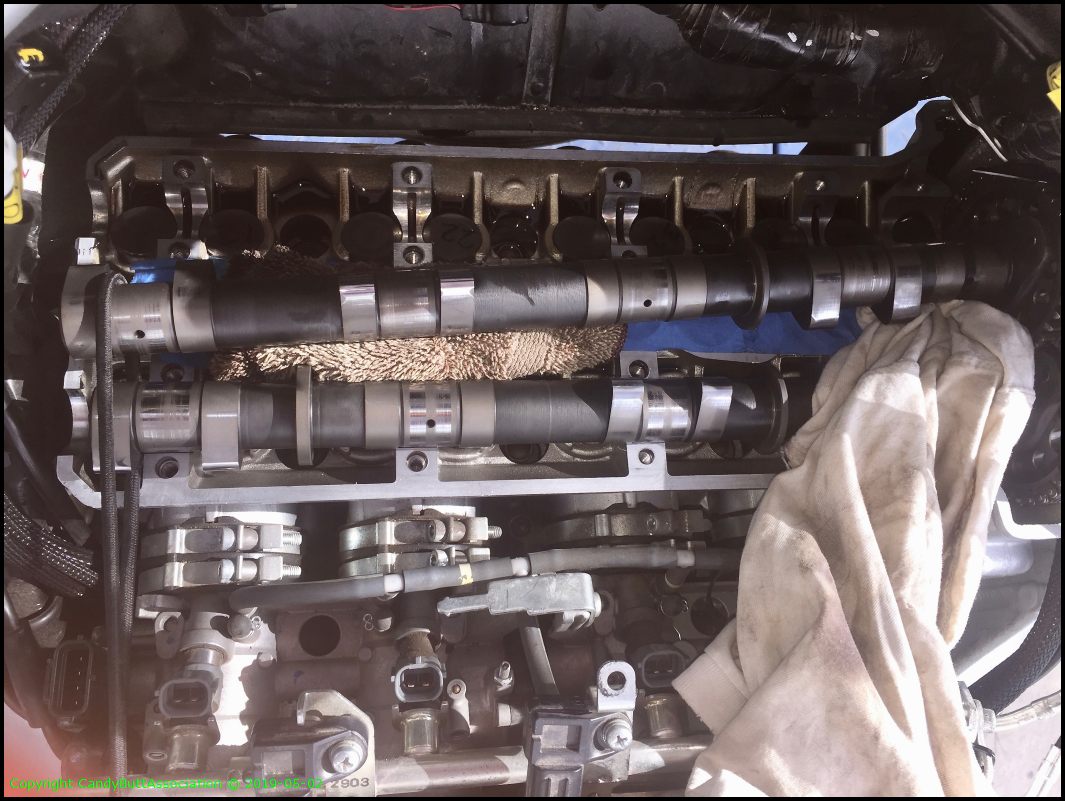
Another view.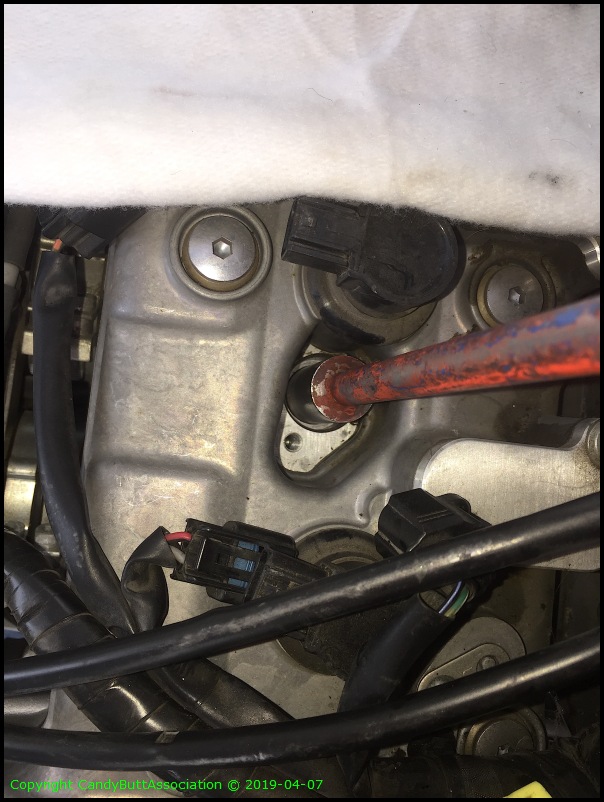
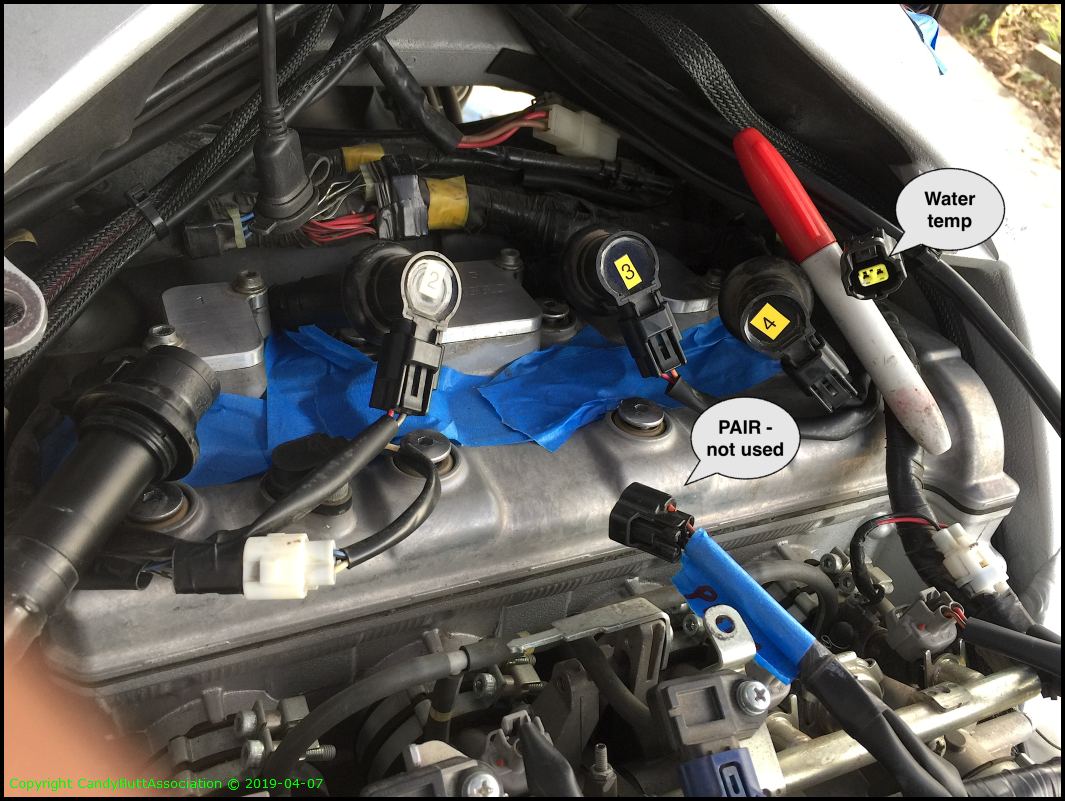
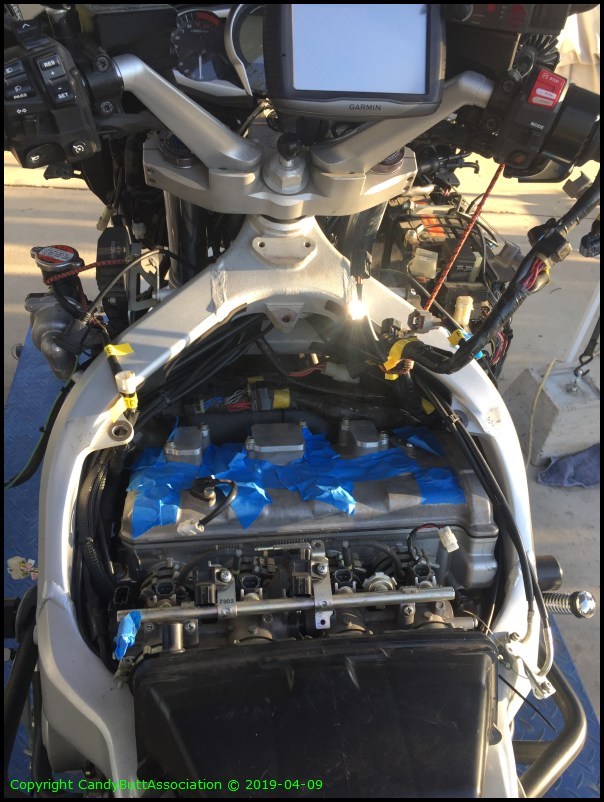
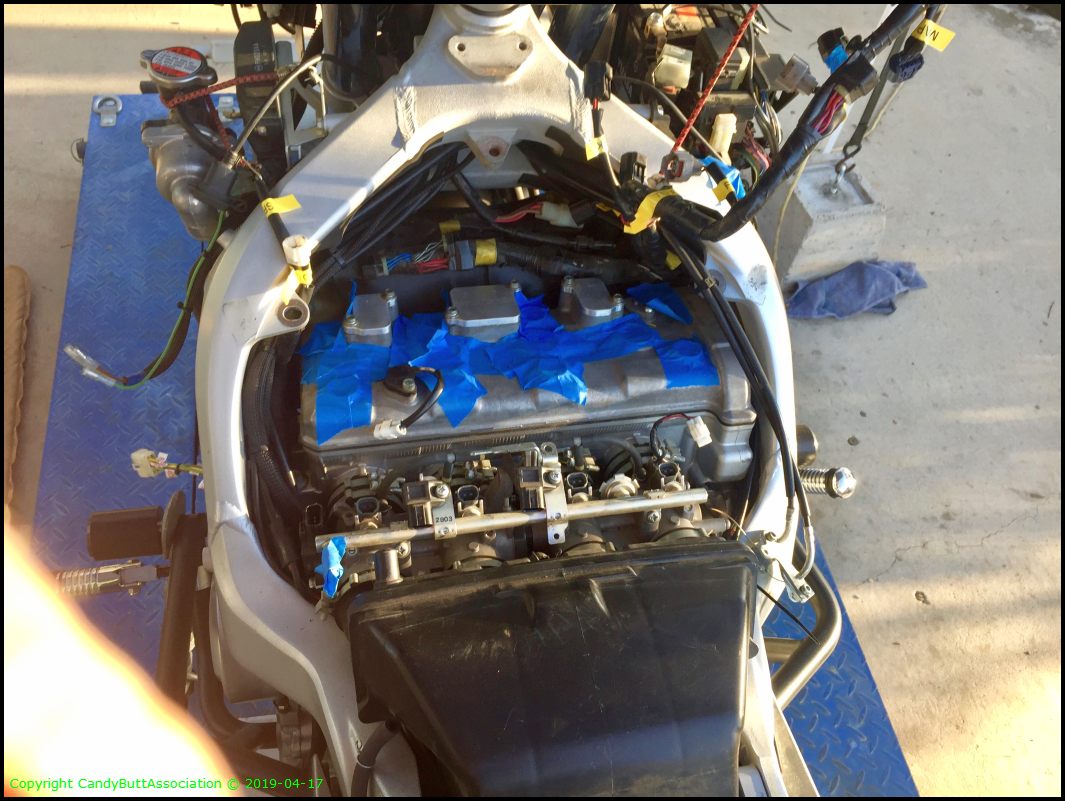
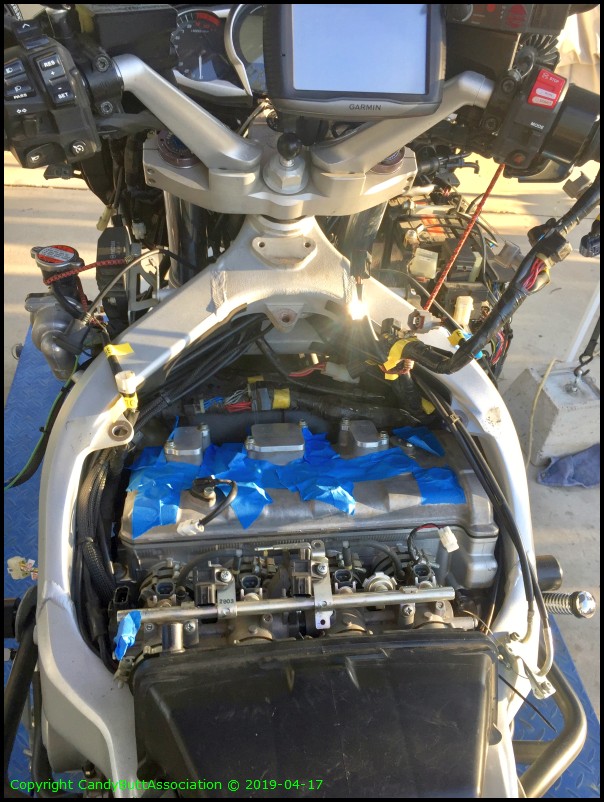
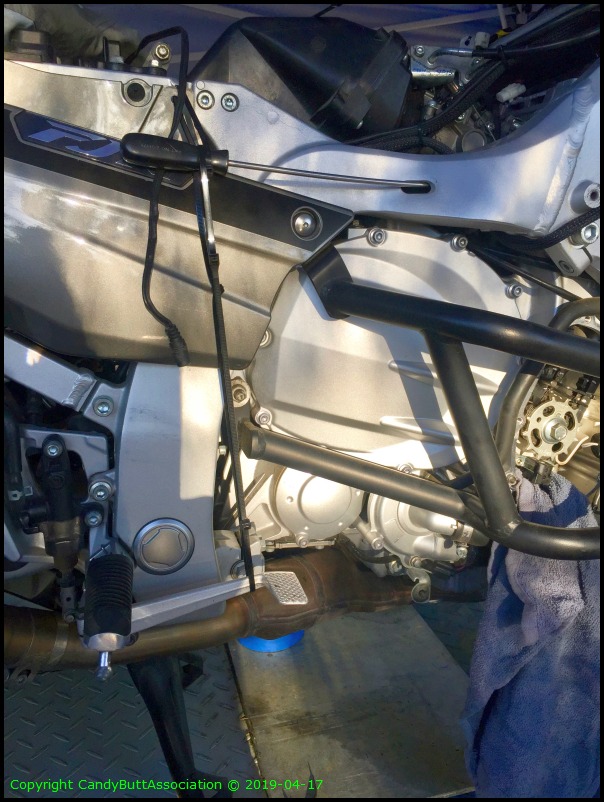
Overall 'big picture' of the engine top end bay.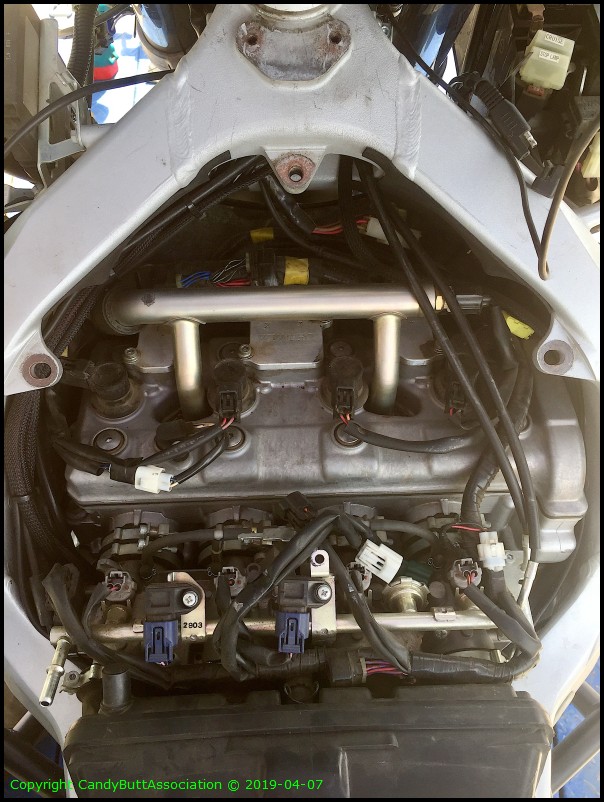
Throttle cable routing. Over water pipe top.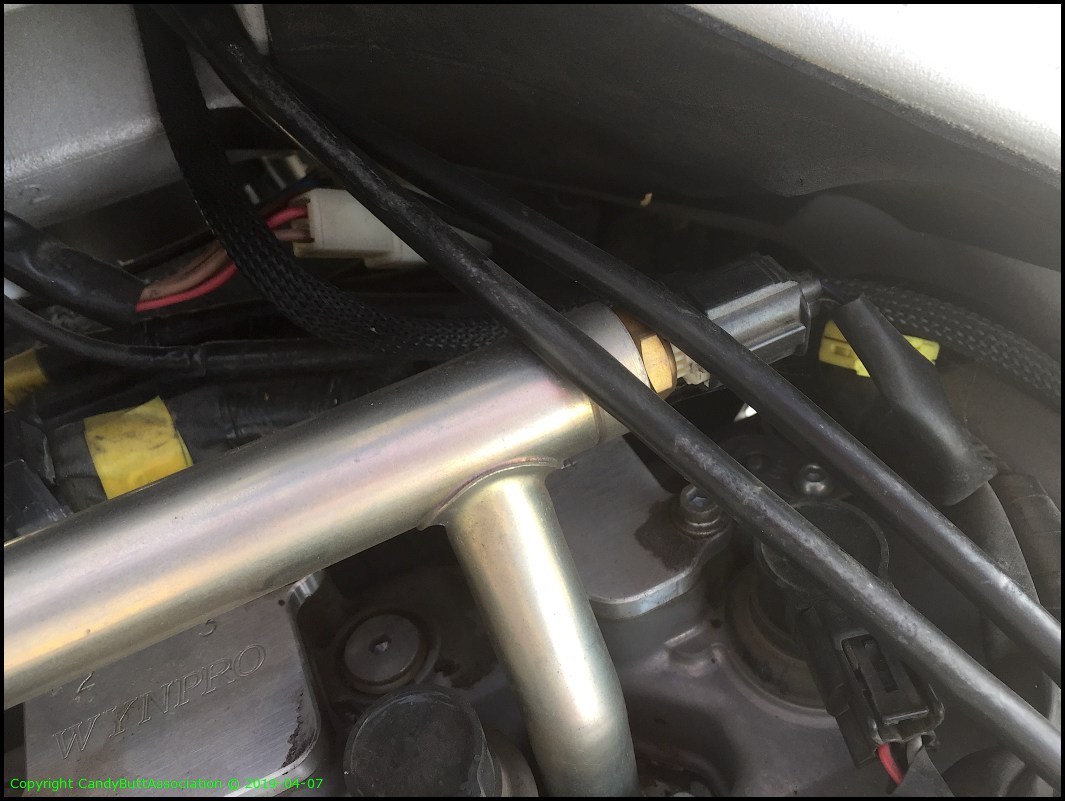
?? What are these?
A little splooge under PAIR caps. Will order new gaskets.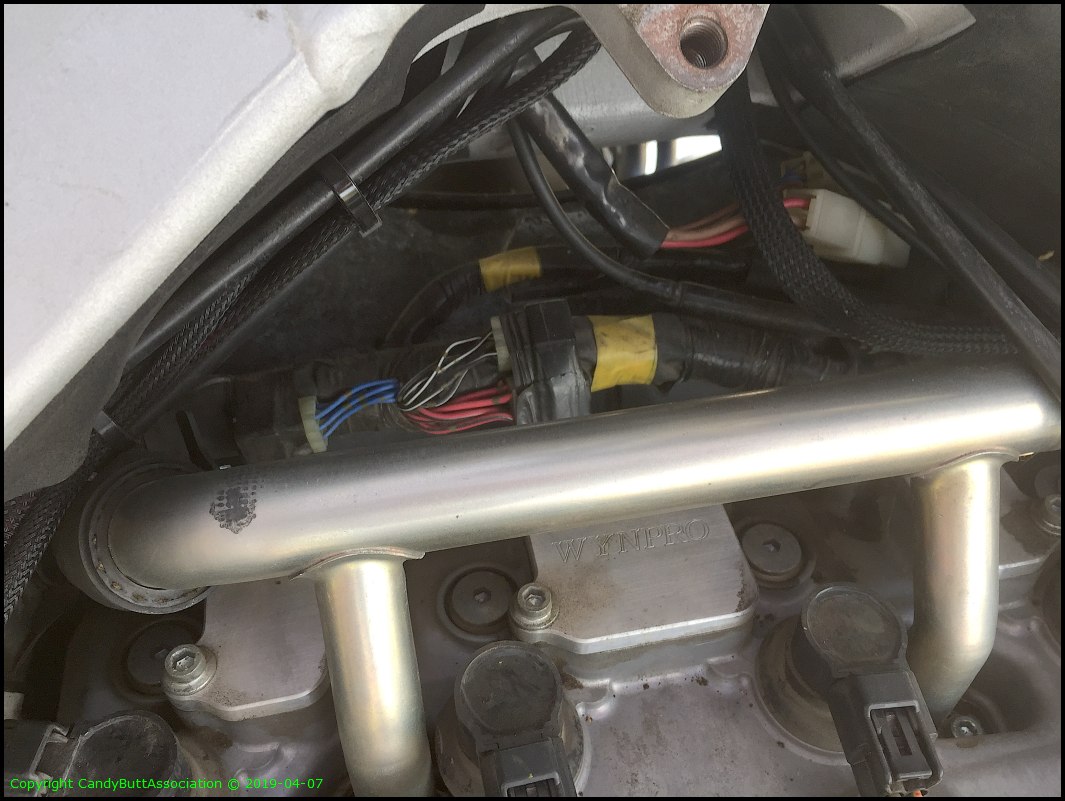
The end for now.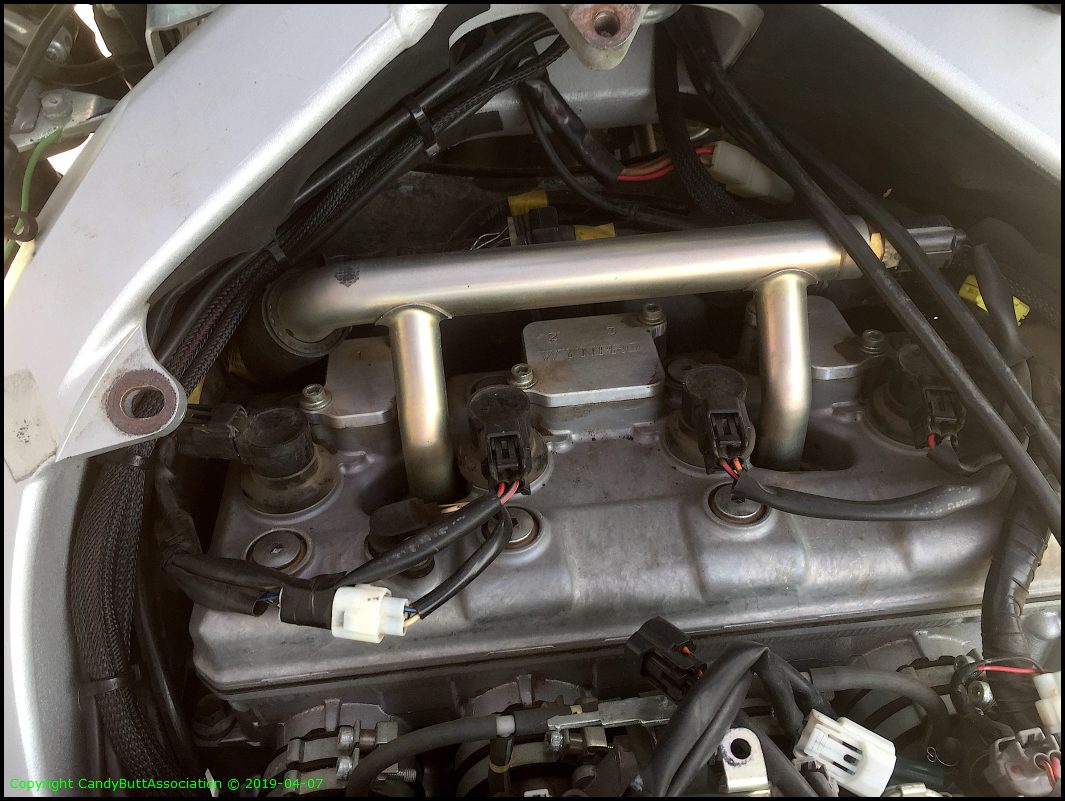
To be continued.
Theme by Danetsoft and Danang Probo Sayekti inspired by Maksimer
2019-04-09 Valve check update
2019-04-09 Valve Check, continued
Making progress on the valve check, 2013 Yamaha FJR. Got all electrical connections labeled so no future confusion.. like last night.. when I couldn't figure out what all those open connections were!
Wiring looms moved out of the way.. but out of time tonight so tomorrow is another day...
What is this sensor?
Or this connection? Gen 3's are soooo confusing!
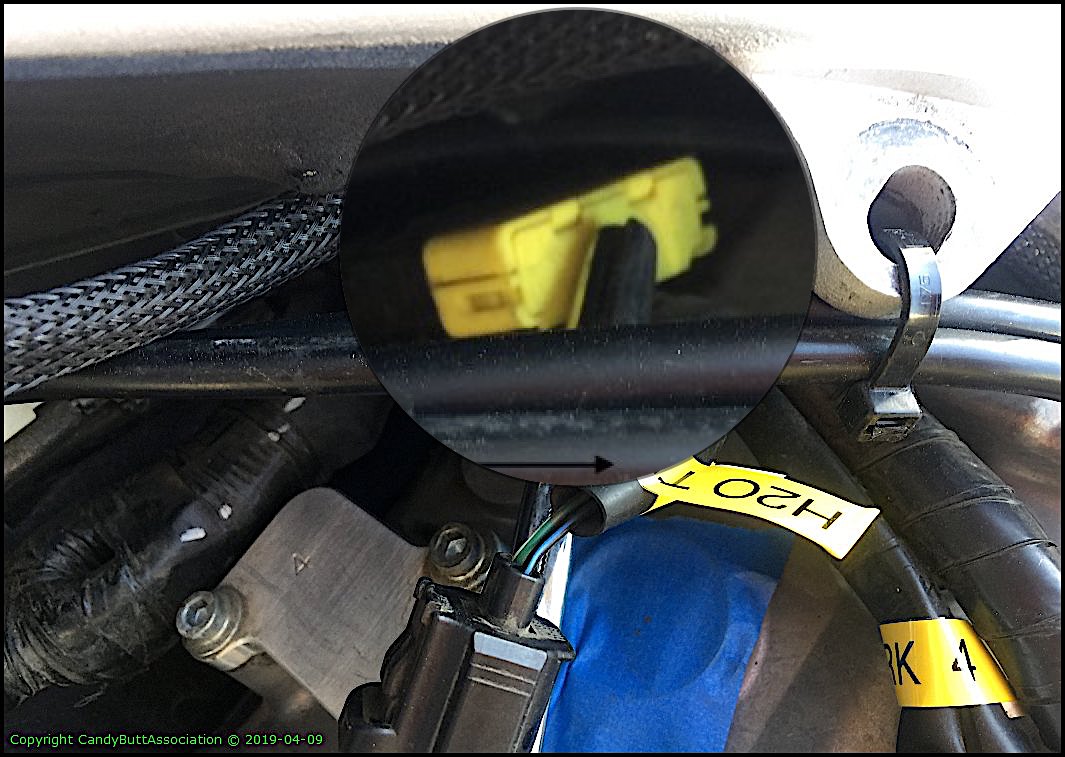
Yet another unknown sensor!
And these two sensors...
TBC
2019-04-17 Valve cover off, Cams tied down
2019-04-17 Valve Cover Removed, Cams Tied Down
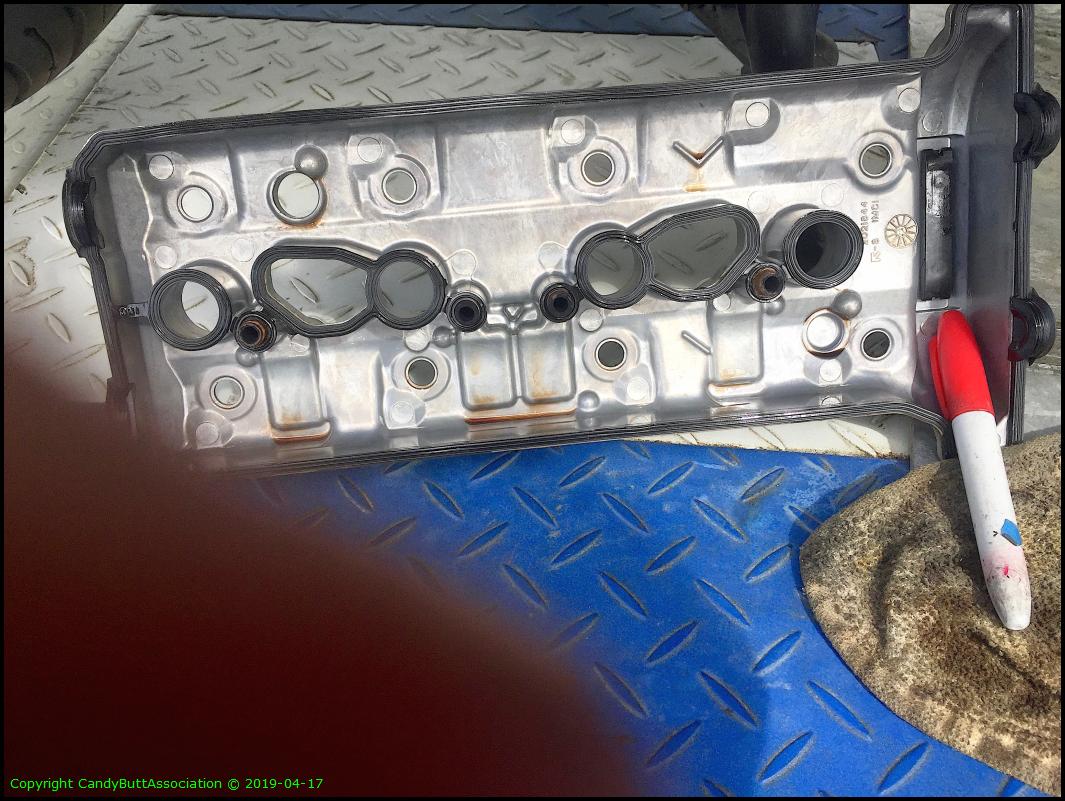
Time to pull valve cover. Never been off. And it was on there good.

Praticing good FMEA. Foreign Material Exclusion Area, e.g. no crap in the holes!
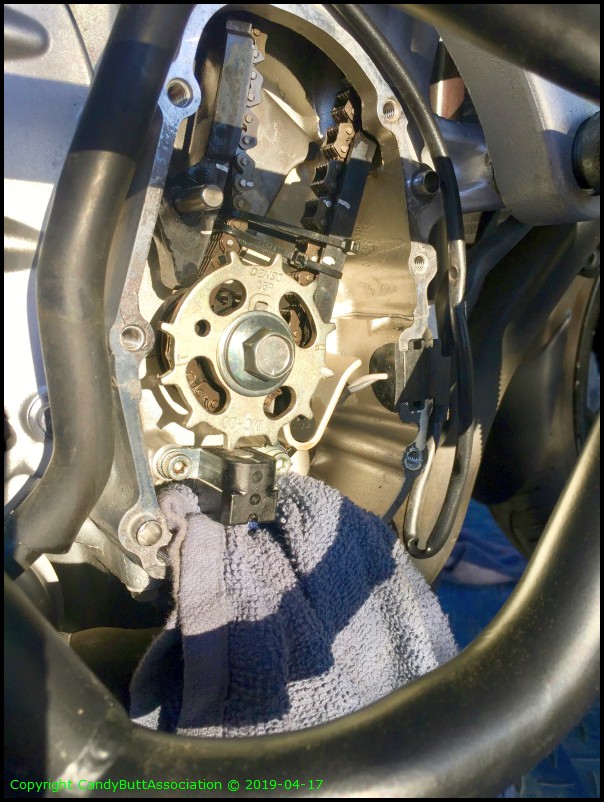
Wiring looms lifted out of the way.
I tried to leverage the cover using a wide flat, angled iron.. But realized all that would create is a bunged up mating surfaces.
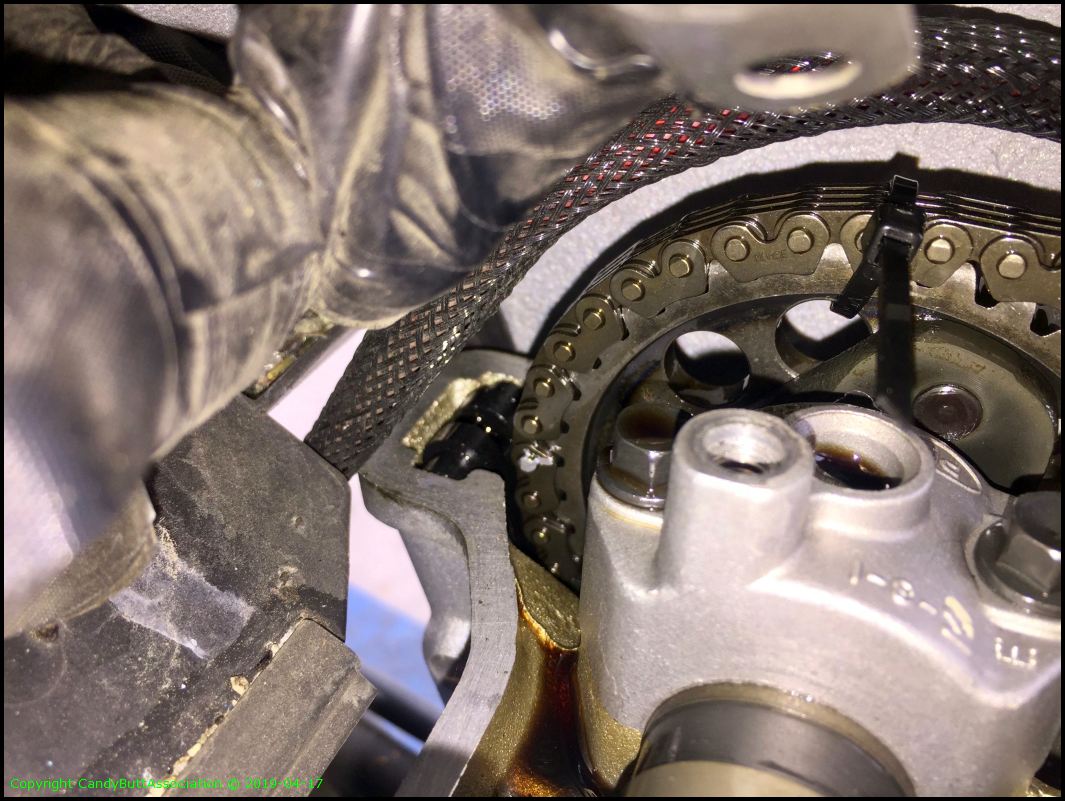
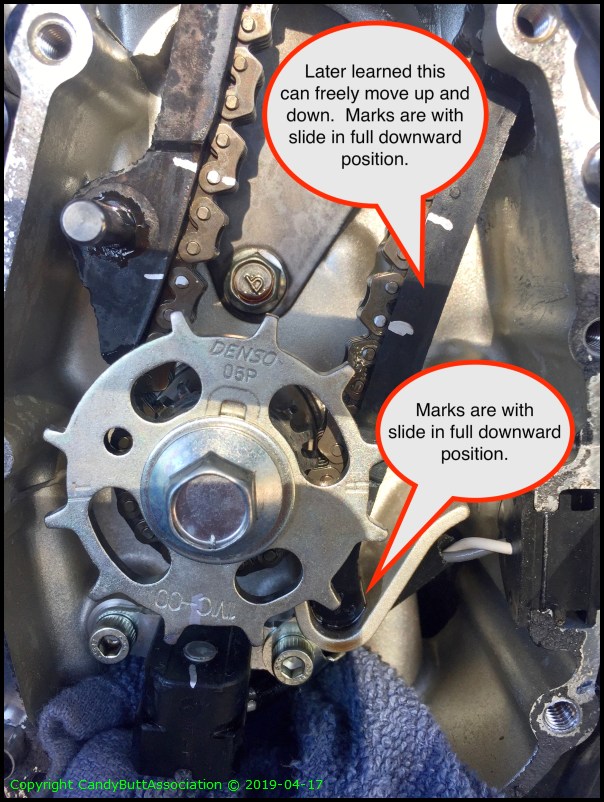
The magic stick... AND a mystery part that was found at crank gear..
Mystery part fits here.
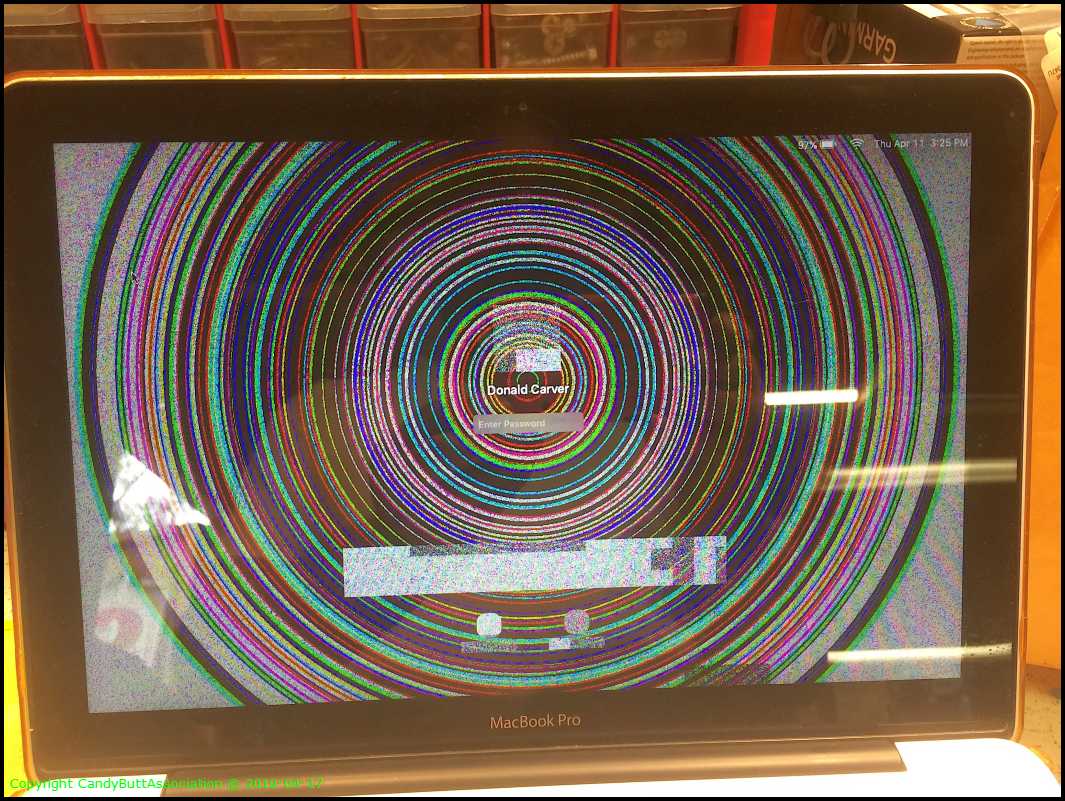
MacBookPro on Acid...
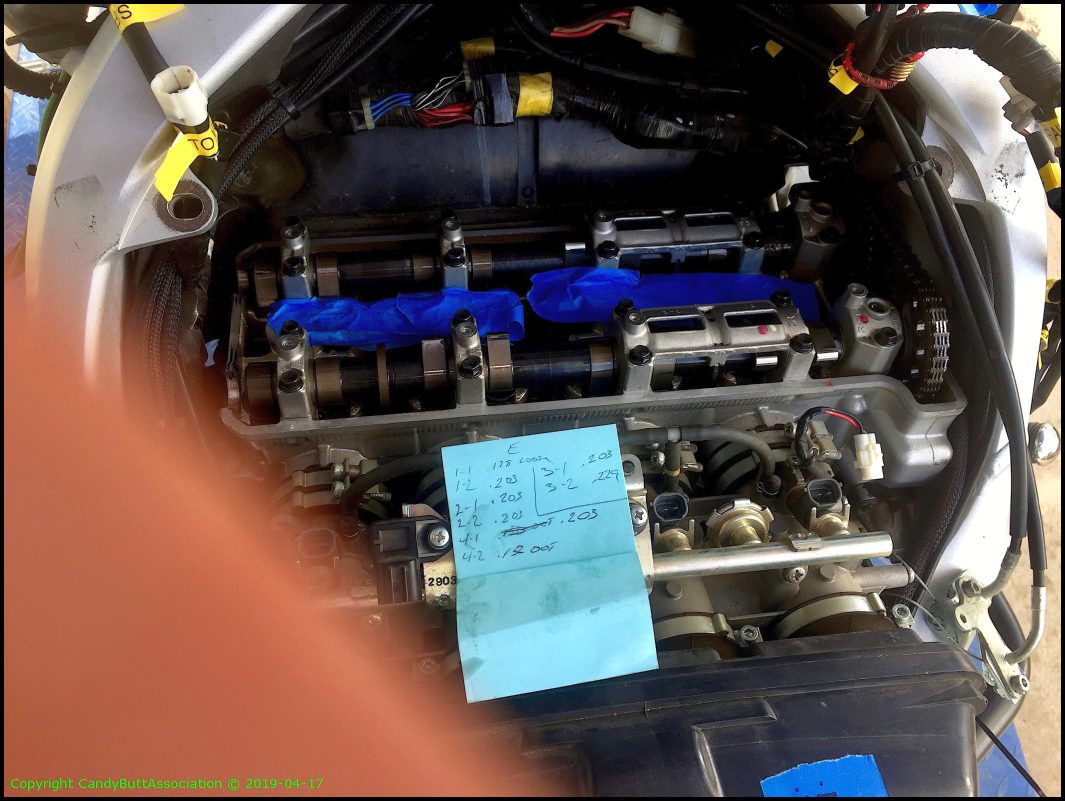
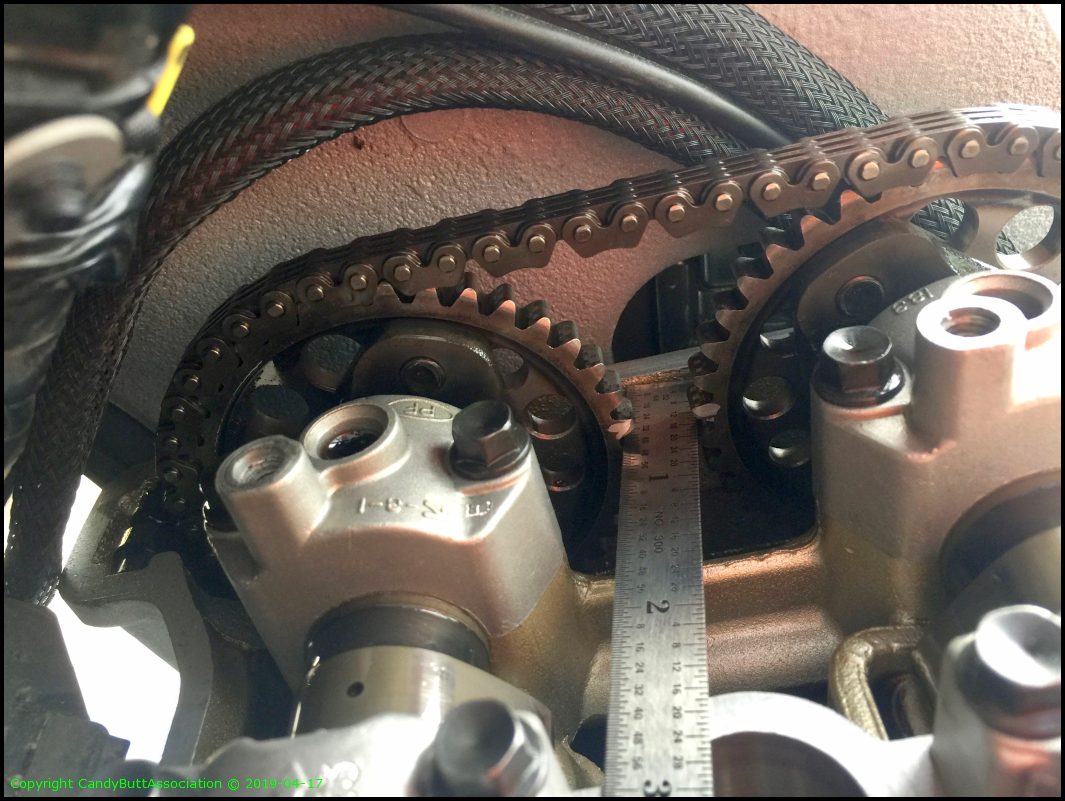
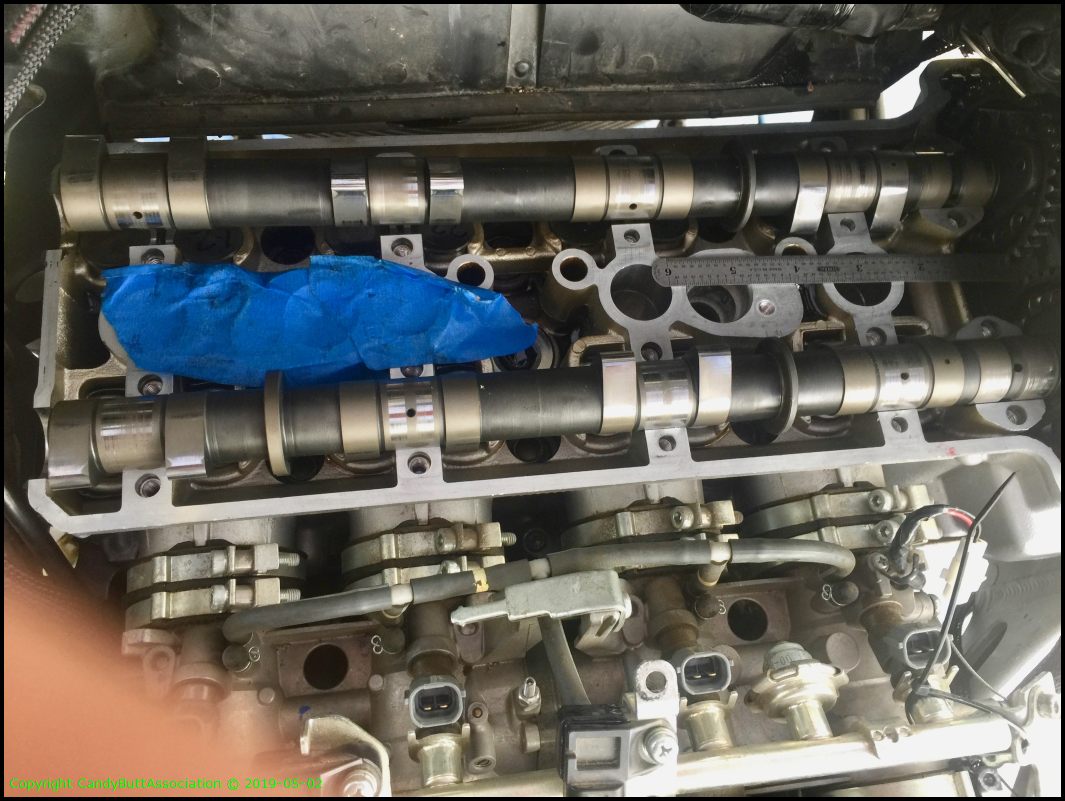
My first set of measurements.
MollyB, the supervisor.
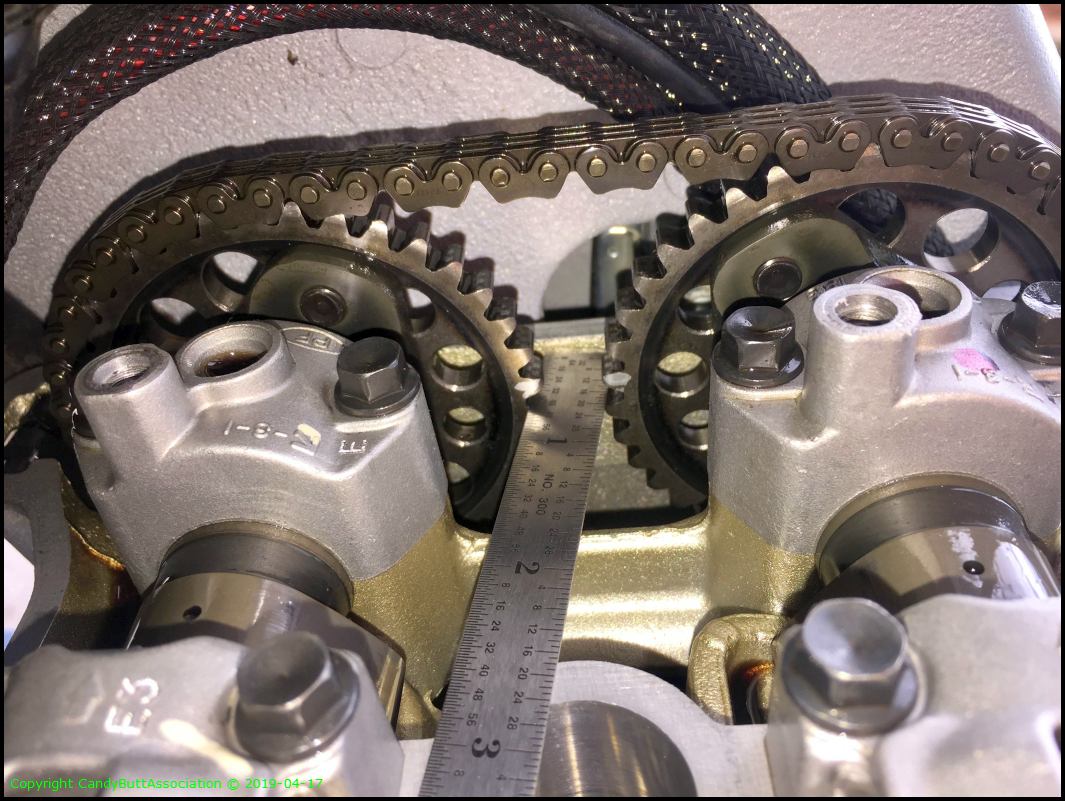
Marked both gears. The ruler is laying across the flats, (not the case cover flange) and is UNDER the marked tooth.
Another pic.
No clue why I took this pic but is has to be important! :)
Intake tied down.
Exhaust tied down.
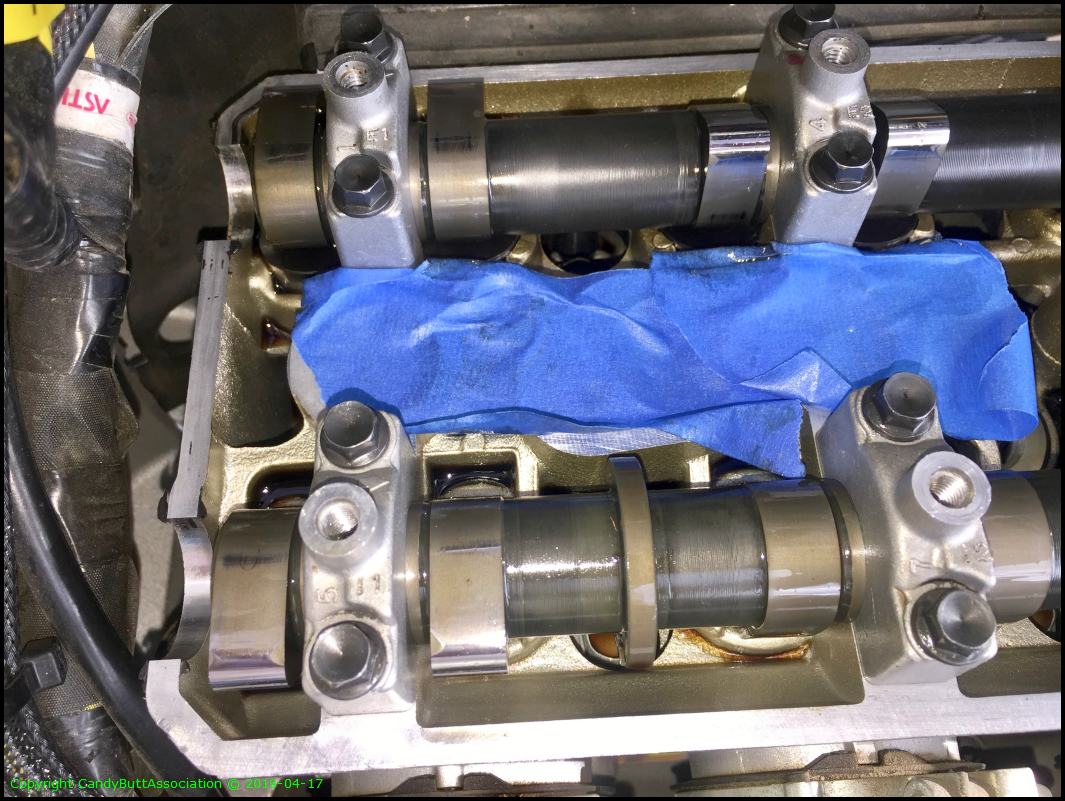
Future pic for reference of cam camps etc.
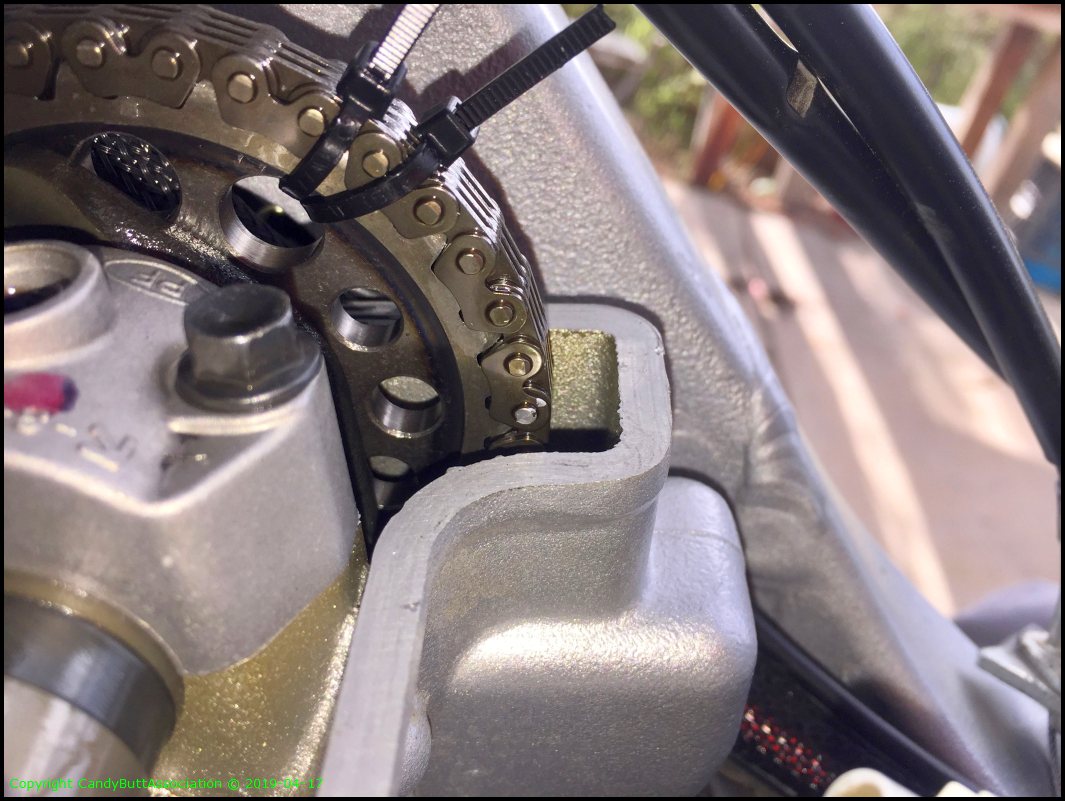
Used a magnent to keep CCT bolt from escaping.. turn bolt with finger, keep it on magnent so it doesn't disappear in to a dark hole..
Washer is aluminum, so be careful!
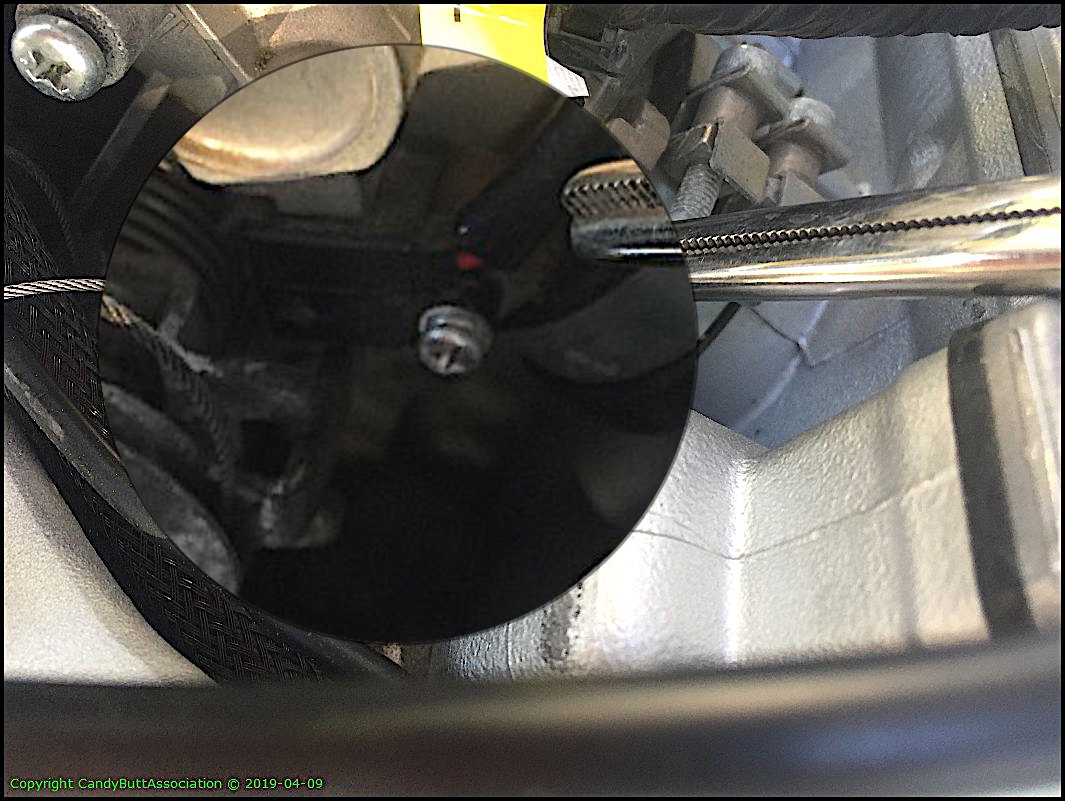
Access port to CCT tensioner screw head.
I marked both intake and exhaust rails and cam chain.
First tie-down. Then, thinking about it, thought this might not allow adequate chain slack to pull chain off top cam gears.
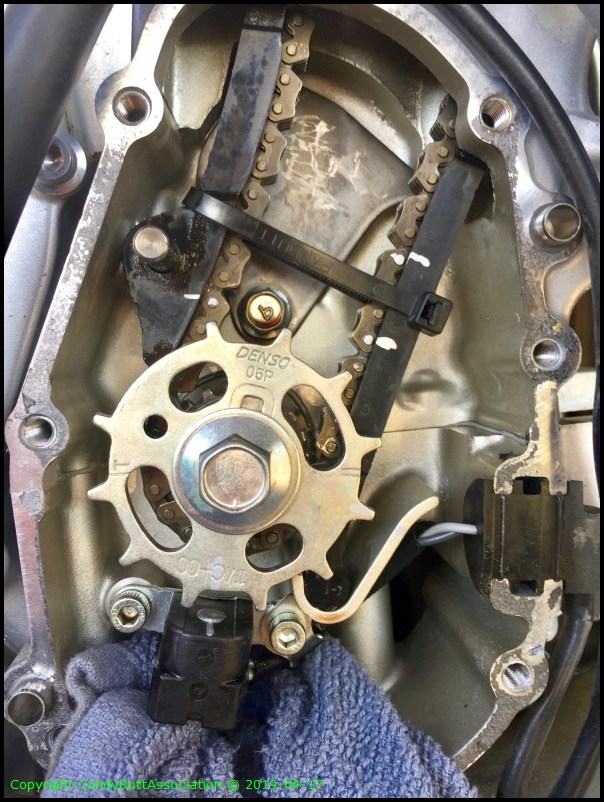
So I used smaller ty-raps and came in behind the cam chain and around the outer edge of exhaust slipper.
The CCT will not 'lock' in the de-tensionsed position so I ended up with this as a solution to keep it de-tensioned.
That's it for now. TBC...
Best location to ty-wrap the Cam chain?
ore
Posted 17 April 2019 - 05:55 PM
OK. Naomi's (2013) cams need to come out. It's been more than 30 seconds since I lifted cams in the 2006 (KrZy8) and now I are cornfused.

When I lifted KrZy8 cams, the dowel pin for the rear tensioner came out. As such, I ty-wrapped like this... On the inside of the tensioner. And, later, I slipped a tooth, IIRC.
Looking at Yamafitters CCT replacement thread, he ty-wrapped like this... - around each tensioner.
My question is - If both tensioners get ty-wrapped per Yamafitter, is there adequate chain slack to lift the cams?
What's the best location to ty-wrap to ensure adequate slack and yet not slip a tooth?
Thanks,
dCarver
I wouldn't change a fucking thing; I've lived hard, played hard, and I ain't done yet. I've paid some severe penalties along the way, but the rewards have been so much greater; even if for just have participating in the game of life with utmost abandon. It's not who rides the furthest in a day, but rather in a lifetime. CBA member #1, IBA #31845 and very proud of both.
#2 RossKean
FJR Commander
Posted 17 April 2019 - 07:18 PM
#3 SkooterG
Purveyor of Crooked Facts
Posted 17 April 2019 - 08:57 PM
I've never ty-wrapped the chain to the crank sprocket. I've used a socket - I believe 12mm, between the guide and left side of the case to keep it from slacking and slipping. I learned that method from someone else here that had a photo posted in some thread.
FJRForum: No fun allowed here!
FJR#1 - The 'Dirty Ol Whore' - 2004 non-abs - RIP @ 226,400 - Gone, but not forgotten.
FJR#2 - The 'Hula Girl' - 2004 ABS - 154k
FJR#3 - The 'Virgin' - 2004 ABS - 4344 miles, a garage queenFJR#4 - The Oregon FJR - 2004 ABS - 65kFJR#5 - The Bastard POS Gen II - 2009A - 106k
FJR#6 - 2014 FJR1300 ES
#4 SkooterG
Purveyor of Crooked Facts
Posted 17 April 2019 - 09:20 PM
Lucky for you I found (Fred's) photo of the socket method. It's a 10mm 1/4" drive socket. Works great for me.
http://www.fjrforum....arned/?p=787762
FJRForum: No fun allowed here!
FJR#1 - The 'Dirty Ol Whore' - 2004 non-abs - RIP @ 226,400 - Gone, but not forgotten.
FJR#2 - The 'Hula Girl' - 2004 ABS - 154k
FJR#3 - The 'Virgin' - 2004 ABS - 4344 miles, a garage queenFJR#4 - The Oregon FJR - 2004 ABS - 65kFJR#5 - The Bastard POS Gen II - 2009A - 106k
FJR#6 - 2014 FJR1300 ES
#5 SkooterG
Purveyor of Crooked Facts
Posted 17 April 2019 - 09:46 PM
Though I *think* to have slack on the chain to remove the cams I put the socket lower - like against the chain where it hits the crank sprocket.
FJRForum: No fun allowed here!
FJR#1 - The 'Dirty Ol Whore' - 2004 non-abs - RIP @ 226,400 - Gone, but not forgotten.
FJR#2 - The 'Hula Girl' - 2004 ABS - 154k
FJR#3 - The 'Virgin' - 2004 ABS - 4344 miles, a garage queenFJR#4 - The Oregon FJR - 2004 ABS - 65kFJR#5 - The Bastard POS Gen II - 2009A - 106k
FJR#6 - 2014 FJR1300 ES
#6 Fred W
1 Wheel Drive
Posted 18 April 2019 - 03:22 AM
For valve adjusts, with everything lined up at TDC, I just ty-wrap the chain to the top of each of the cam sprockets. That fixes their position in relation to each other so the only one you have to worry about changing is at the crank.
Most likely when you pull the cams up youll introduce slack on the front side of the chain where there should be none, and the chain will jump one tooth on the crank. The trick is, when putting everything back together, to turn the crankshaft backwards a few degrees (CCW) while fitting the chain at the crank sprocket, and gather most of the slack in the rear chain run. Tension the chain temporarily (use the socket trick) and turn the crank back CW to the timing mark. Everything should be back in time.
Its OK to turn the crankshaft backwards by itself, but you never want to turn it backwards very much when the chain is hooked up to the cams as youll put a lot of chain pressure on the CCT.
After everything looks good you reinstall the CCT, cut the ty-wraps on the cam sprockets and rotate the crank around a couple of turns by hand to recheck timing marks.
#7 rbentnail
Economic Plankton
Posted 18 April 2019 - 06:47 AM
Don't use a socket and leave the tywraps for wire installation. Cutting corners will bring you nothing but heartache. Do the job and reset your timing with all 3 timing marks as described in your FSM. It's the only way to guarantee that you didn't screw it up. Ask the 2 guys in just the past 2 weeks who did tywrap and didn't check the timing marks. And the 30 or so guys before that that screwed it up with a socket or tywraps.
Russ- Darksider #64
#8 Fred W
1 Wheel Drive
Posted 18 April 2019 - 07:07 AM
I really dont see how you can screw up the timing when just changing a CCT if you keep tension on the chain the whole time. Its been when people (including paid mechanics in the shops) pull out a chain tensioner without restraining the chain that you get screwed up timing about 50% of the time.
#9 dcarver
FJR Forum Post Whore
Posted 18 April 2019 - 08:01 AM
Fred, does this mean the CCT has to be removed to perform a valve clearance check?
And Thank You to all who have responded.
I wouldn't change a fucking thing; I've lived hard, played hard, and I ain't done yet. I've paid some severe penalties along the way, but the rewards have been so much greater; even if for just have participating in the game of life with utmost abandon. It's not who rides the furthest in a day, but rather in a lifetime. CBA member #1, IBA #31845 and very proud of both.
#10 Intech
Mr. Camping Meet
Posted 18 April 2019 - 08:08 AM
Don,
The CCT doesn't need to be removed to perform the check. It only needs to be backed out (take the tension off) if you have to remove the cams.
RIP BeemerDons....JSNS
RIP Petey
#11 SkooterG
Purveyor of Crooked Facts
Posted 18 April 2019 - 11:06 AM
Well, I recently did a valve check and re-shim on my 09 FJR and used the socket to keep the chain from slipping and losing time on the crank sprocket while the cams were removed. And of course I used ty-wraps on both cam sprockets to keep those in time. And of course I verified timing before buttoning everything up. This isn't that hard to do. The shortcuts work. I've done it before without sockets and ty-wraps and it was a pain in the ass that added more time and frustration. Sure, everything turned out ok. But I would rather work smarter, than harder.
FJRForum: No fun allowed here!
FJR#1 - The 'Dirty Ol Whore' - 2004 non-abs - RIP @ 226,400 - Gone, but not forgotten.
FJR#2 - The 'Hula Girl' - 2004 ABS - 154k
FJR#3 - The 'Virgin' - 2004 ABS - 4344 miles, a garage queenFJR#4 - The Oregon FJR - 2004 ABS - 65kFJR#5 - The Bastard POS Gen II - 2009A - 106k
FJR#6 - 2014 FJR1300 ES
#12 AuburnFJR
FJR Commander
Posted 18 April 2019 - 11:56 AM
Not for the valve check. If you have to adjust the valves, then you will need to pull the tensioner.
This all assumes you have #1 cylinder at TDC (#1 cams will point opposite of each other (intake faces the back of bike, Exhaust faces forward). There are two holes in the cams that will line up with the arrows on top of the cover for cylinder #3 and the timing marks on the ends of the cam gears will be even with the cases. The manual shows all the marks and rayZerman put up some great pictures (this is with engine out and the wholes are not quite lined up with the arrows) it also shows the holes and the arrows to look for.
I ended up using a impact driver to remove the crank timing bolted to the end of the crank so it would break it free without moving the crank. (same for putting it back on - IIRC it is 45 ft-lb). It is keyed, so no worry about installing wrong. I marked the cam chain and the gear so I could visually verify that everything was lined up after I got the cams back in. I tie wrapped the camshafts to keep them in line also. The biggest issue is when putting the cams back in, is to make sure you get the slack out of the cam chain between the exhaust cam and the crankshaft gear.
After the issue I had trying to use tie wraps, it is easier to just remove the cams, not worry about the tie wrap and follow the manual re-install. I had to move the cam chain on the crank one tooth after I got the slack out of the chain between the exhaust and the crank.
Best location to ty-wrap cam chain on crank??
Post by dcarver » Wed Apr 17, 2019 9:00 pm
When I lifted KrZy8 cams, the dowel pin for the rear tensioner came out. As such, I ty-wrapped like this... On the inside of the tensioner. And, later, I slipped a tooth, IIRC.
Looking at Yamafitters CCT replacement thread, he ty-wrapped like this... - around each tensioner.
My question is - If both tensioners get ty-wrapped per Yamafitter, is there adequate chain slack to lift the cams?
What's the best location to ty-wrap to ensure adequate slack and yet not slip a tooth?
Thanks,
dCarver
Re: Best location to ty-wrap cam chain on crank??
Post by wheatonFJR » Wed Apr 17, 2019 9:20 pm
Re: Best location to ty-wrap cam chain on crank??
Post by dcarver » Wed Apr 17, 2019 9:41 pm
Re: Best location to ty-wrap cam chain on crank??
Post by raYzerman » Wed Apr 17, 2019 9:58 pm
Duct tape can't fix stupid, but it can sure muffle the sound.
2019-04-28 Valve Clearance Data
Specs (mm)
Intake: 0.15 - 0.22
Exhaust 0.18 - 0.25
2019-04-28 CamsLifted
2019-04-28 Cams Lifted
I removed and shimmed cams on my 2006 KrZy8 FJR1300 but still don't feel comfortable. So it takes a LOT of time..
When I shimmed KrZy8, the throttle bodies were removed, so accessing the cam chain tensioner (CCT) was super easy. This time around, not so easy as the TB's are installed.
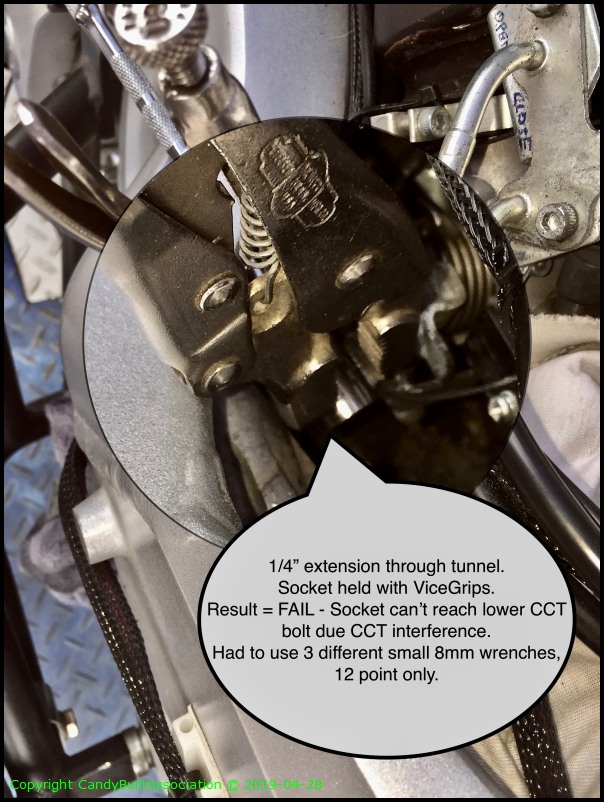
Here was my first bright idea which was a total FAIL. Ended up with 2 8mm 12 points and a 5/16" 12 point.. About an hour later I had the lower CCT bolt out. What a total PITA. The trick is to slot the head for a screwdriver which from what I've read can access via the frame access hole. I'm looking for an allan head tomorrow at the hardware store.
See notes in pic.
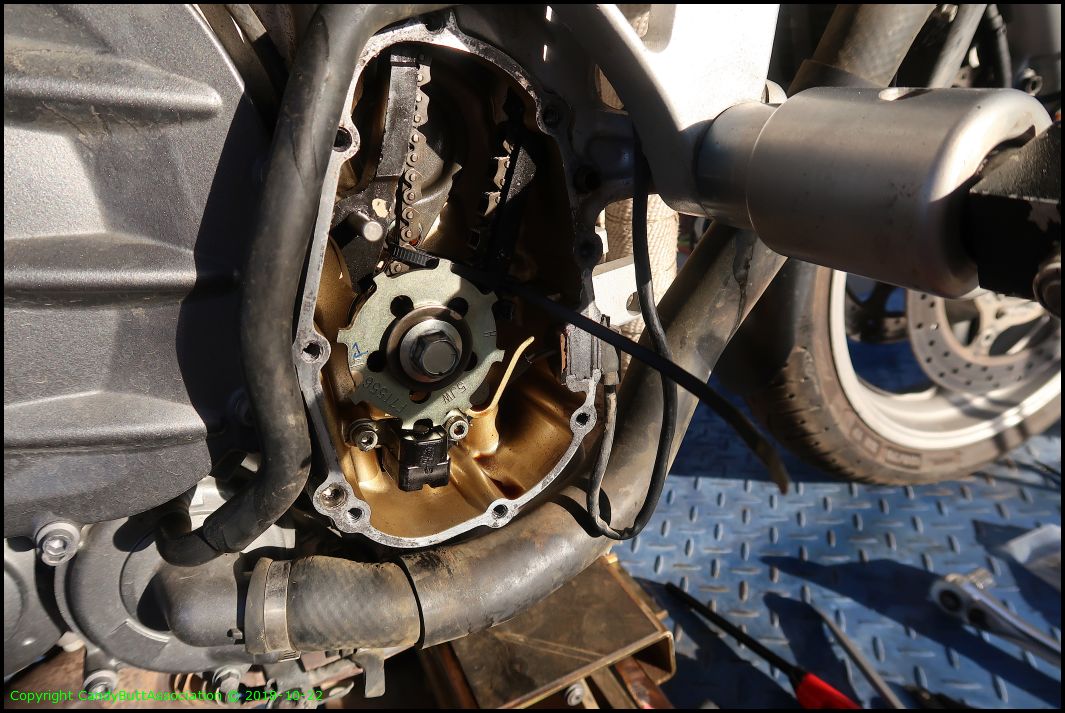
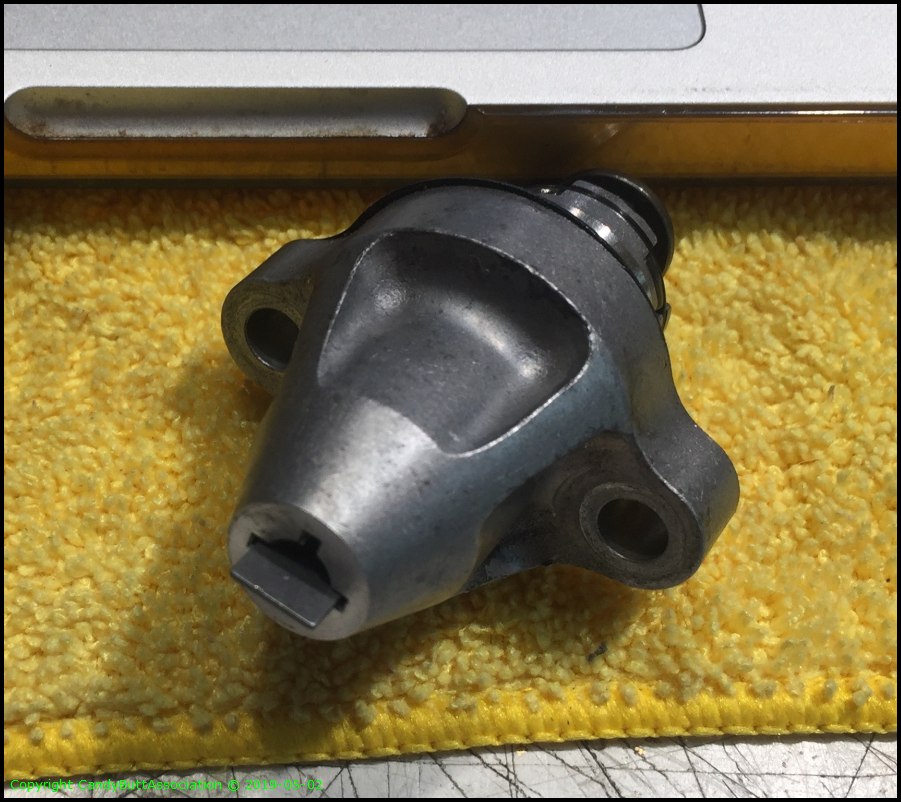
Got the CCT removed. It was difficult to remove, had to go from the bottom side, but with the newer CCT (revised by MamaYama) they don't 'lock' down which leaves the plunger fully extended. Which makes it harder to remove.
When messing around the RHS, near the cam chain tower, be very careful to not drop anything into the crankcase... No matter how careful you are, somewhere, sometime, you might mess up and be a true pickle.
When removing cams, factory service manual says loosen outsides first, work to inside. Installation, reverse the pattern.
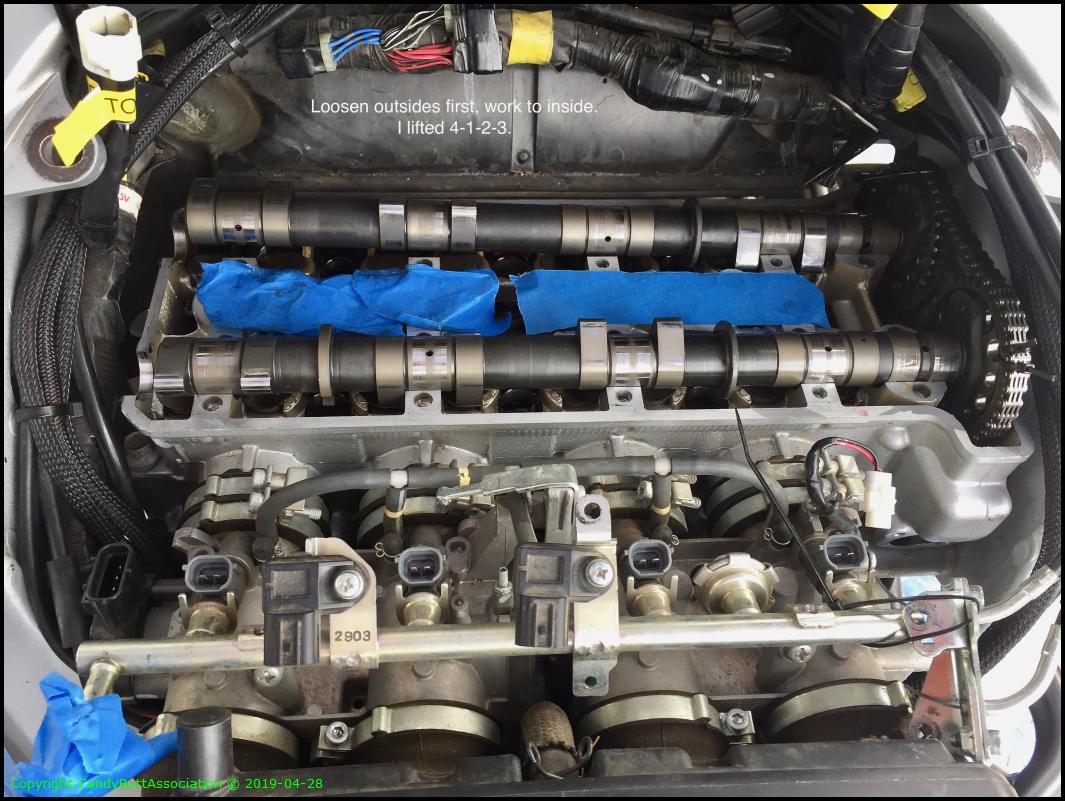
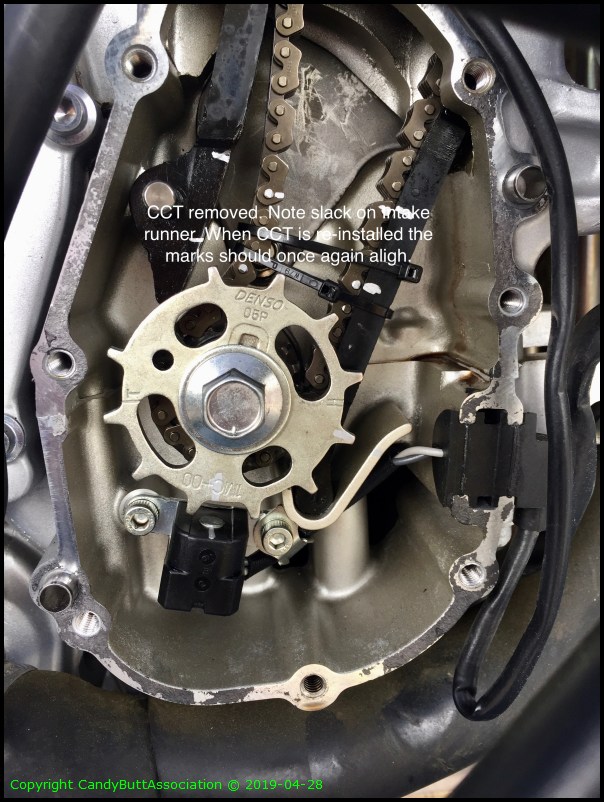
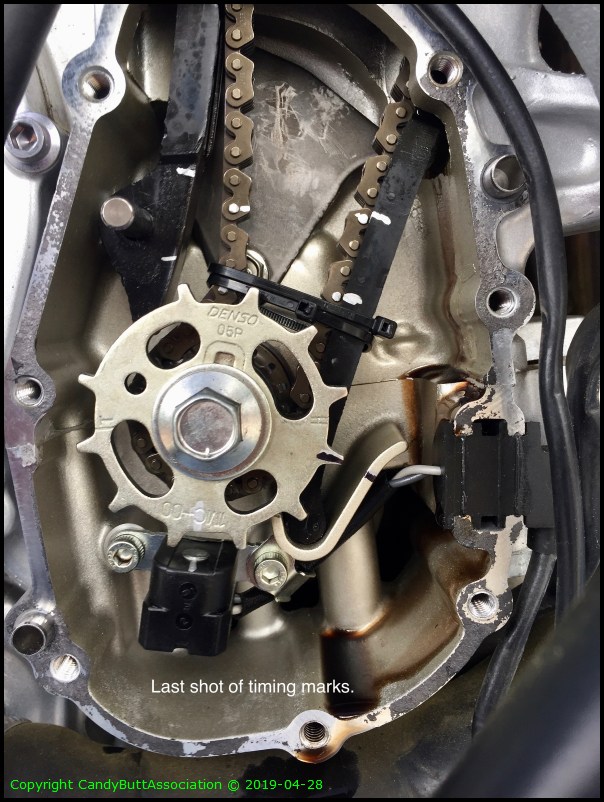
Here cam chain is marked *AFTER* CCT removal.
TBC...
2019-04-29 Cams Shimmed
2019-04-29 Got the Cams Shimmed
Well then. One afternoon gone shimming the cams. Here's my super sophisticated technique...
After shimming all but one valve for optimum clearance, the topside timing marks still line up.. a good sign.
The 'big' pix.. Caps not on yet. Use lots of oil on cap tops and bottoms... and start from the center and work out. I like to tighten the #3 caps as it is the widest and stoutest.

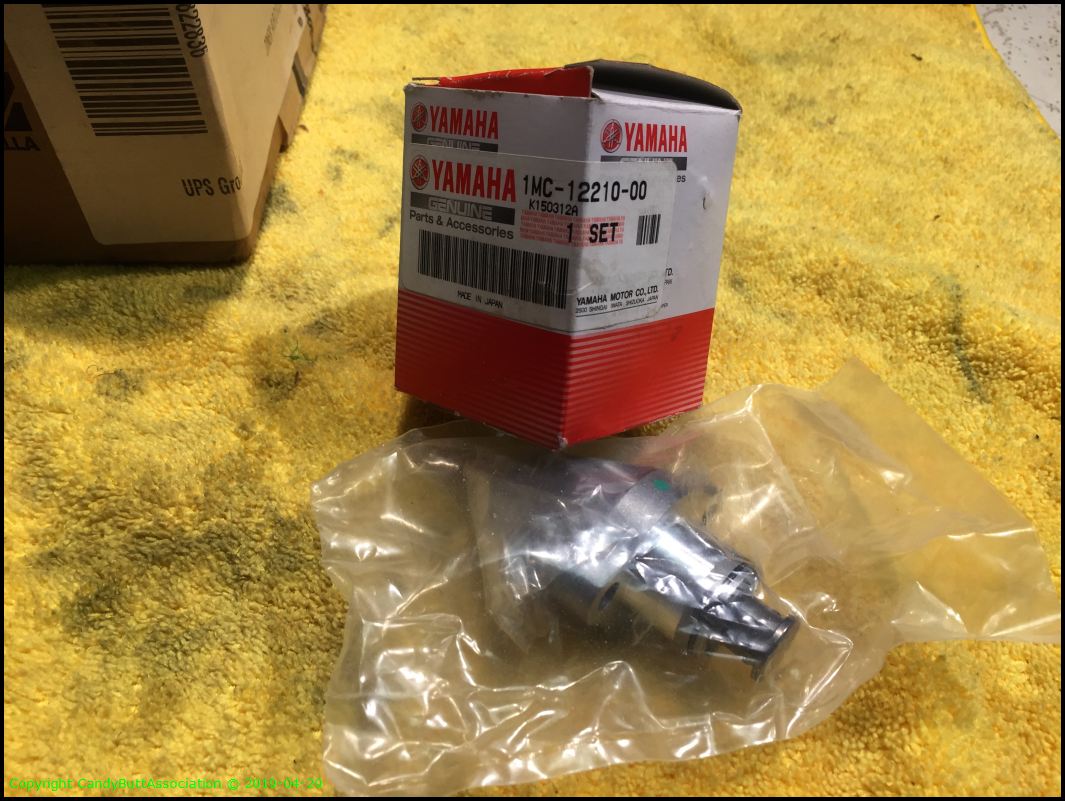
I had an new CCT so I used the locking 'pin' from it on the OEM part.
The BossDawg be supervising..
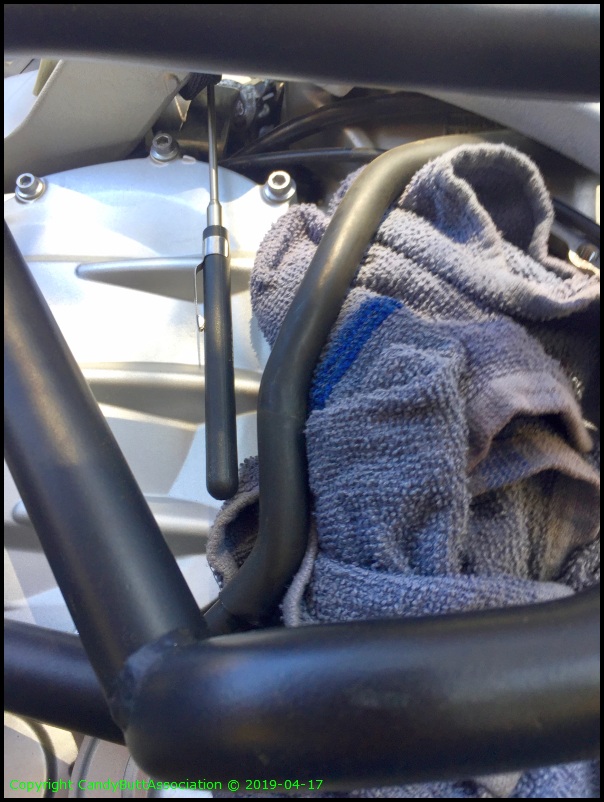
Another pic... Use plenty of rags..
Final numbers..
That is it for now..
TBC.. Hope the final measurement check and alignment is good. This is alot of work...
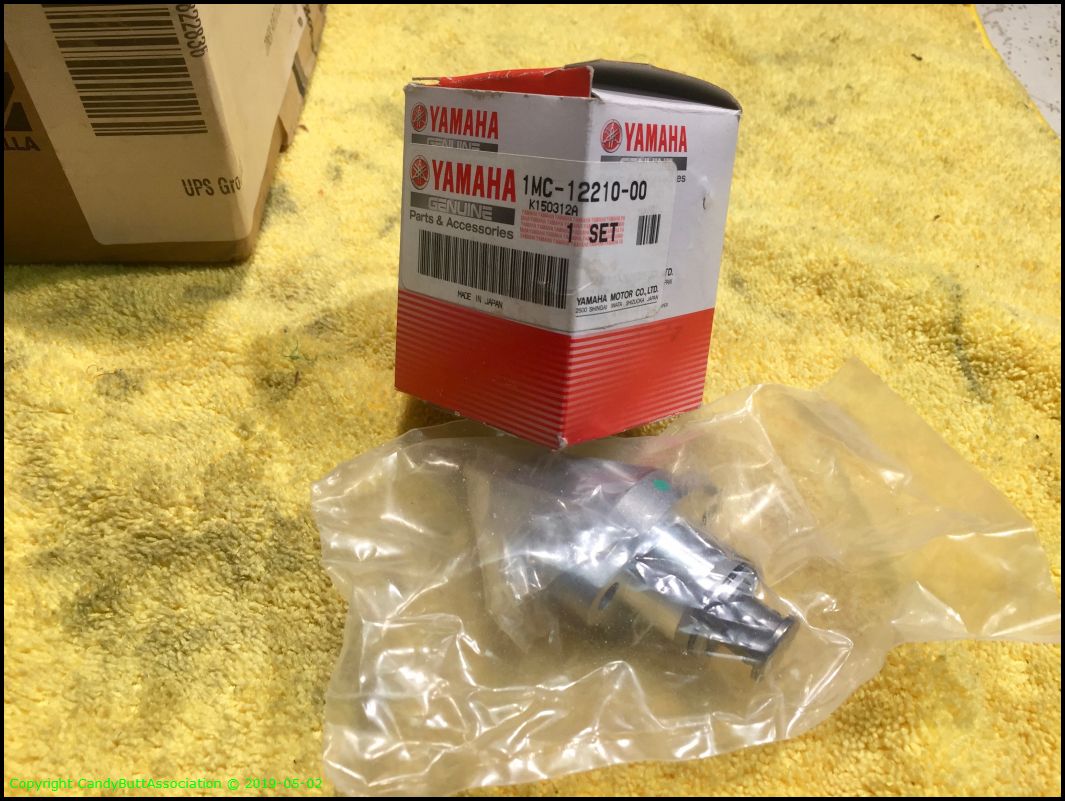
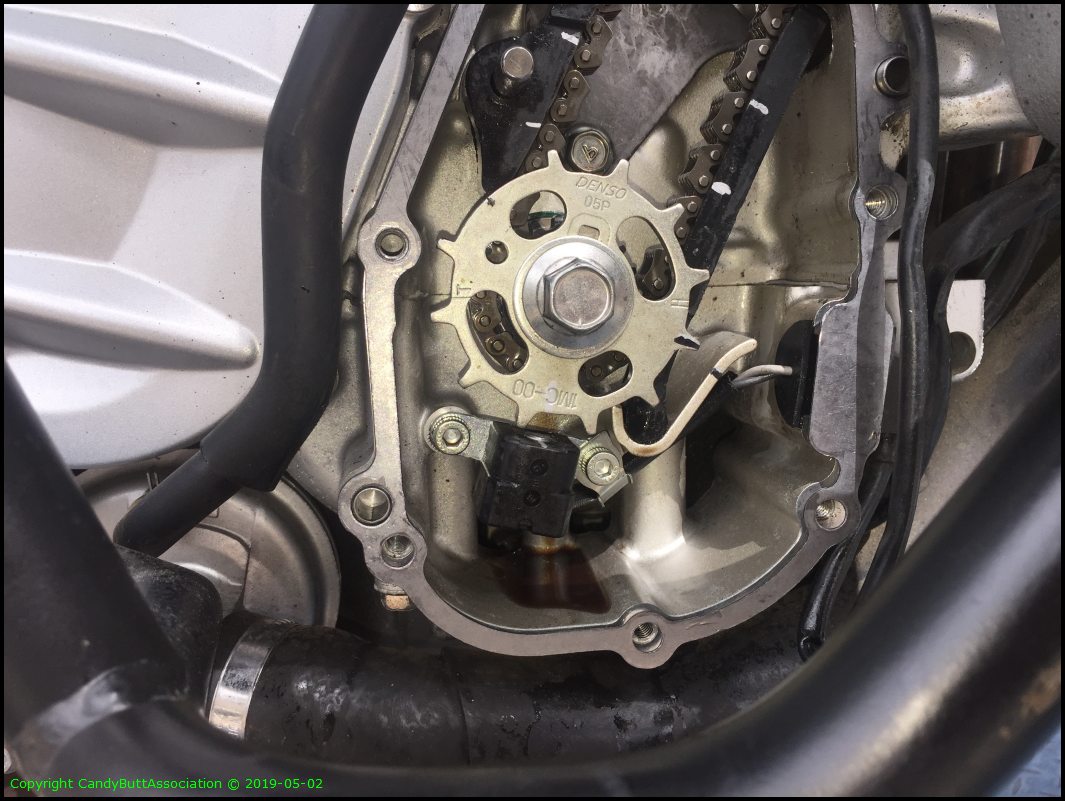
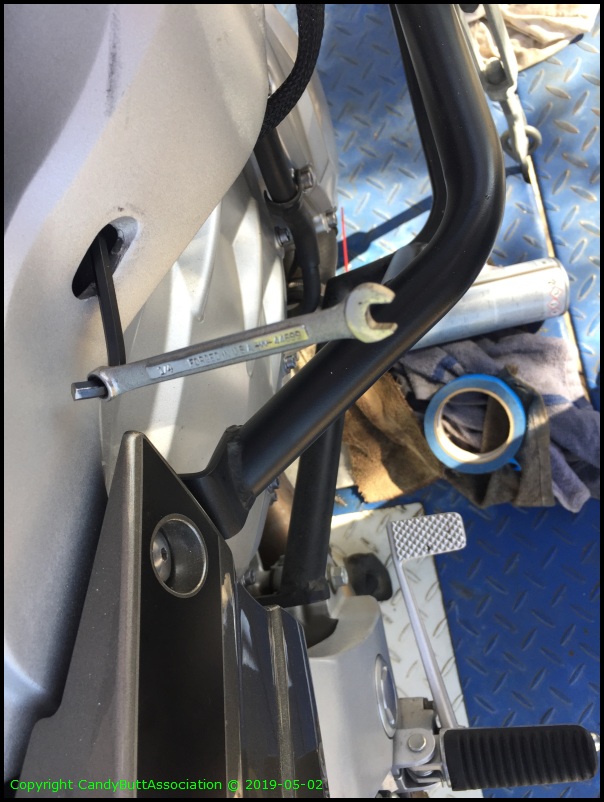
2019-05-02 CCT and Valve Cover Installed
Edit
Tips and Tricks of shimming, re-installing cam chain tensioner and valve cover.
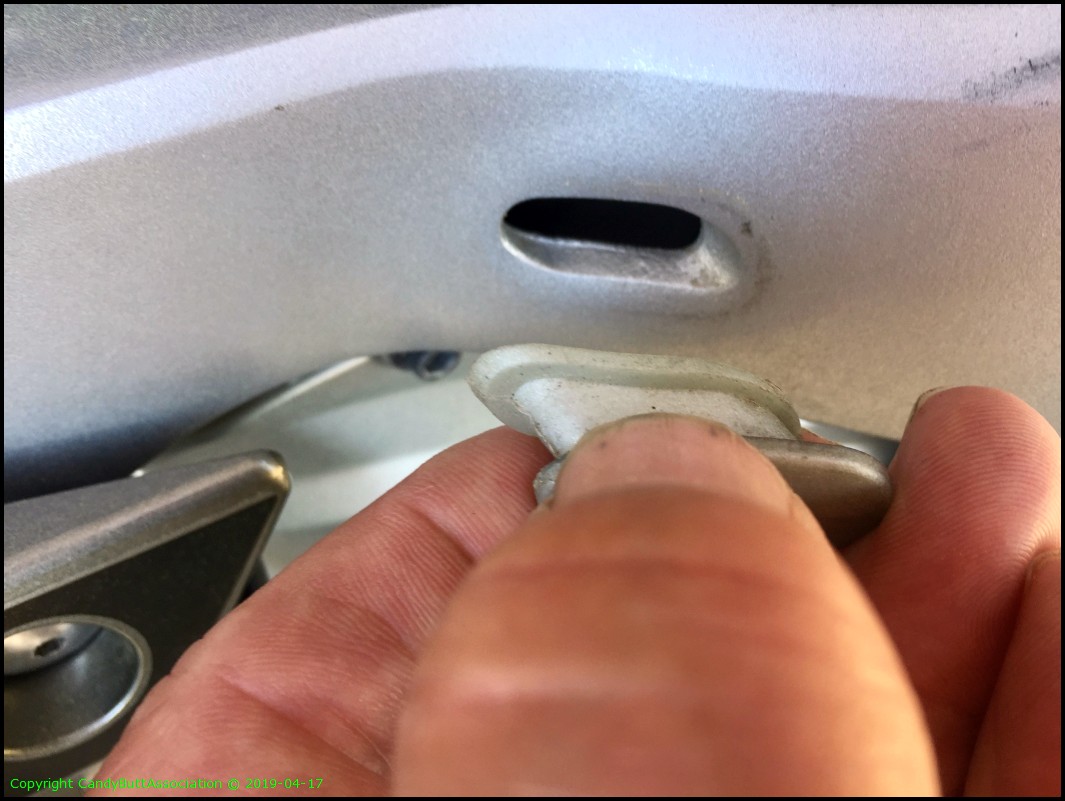
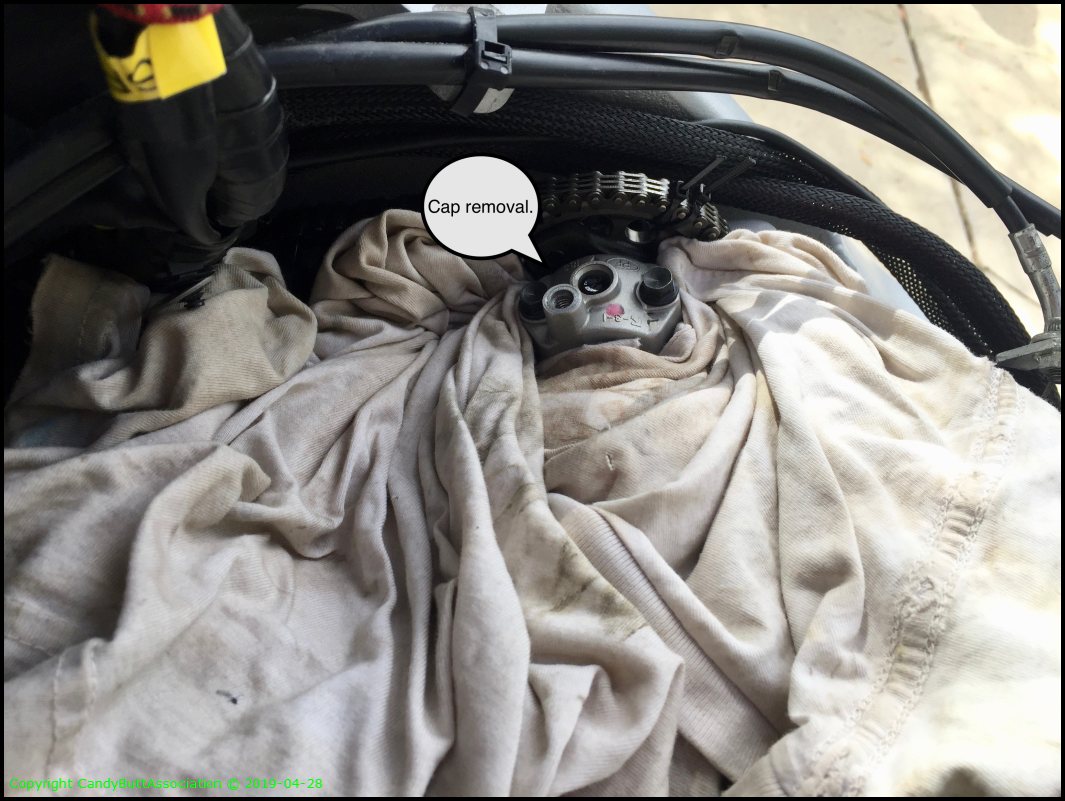
Use bungee cord to keep exhaust cam in place. Valve 4 is the hardest. I used a pencil magnet to lift the cup up and out. Plus, the magnet helps keep the shim in place too. Use a rag to prevent debri falling into the engine.
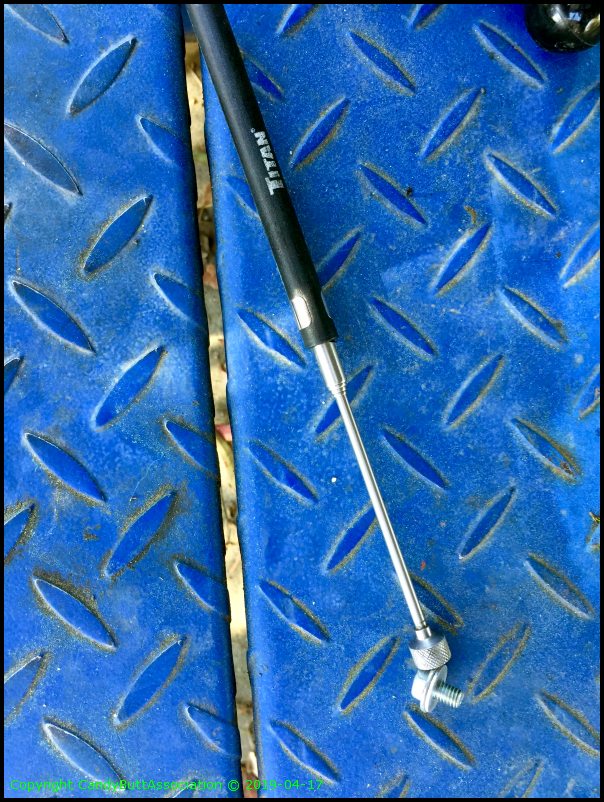
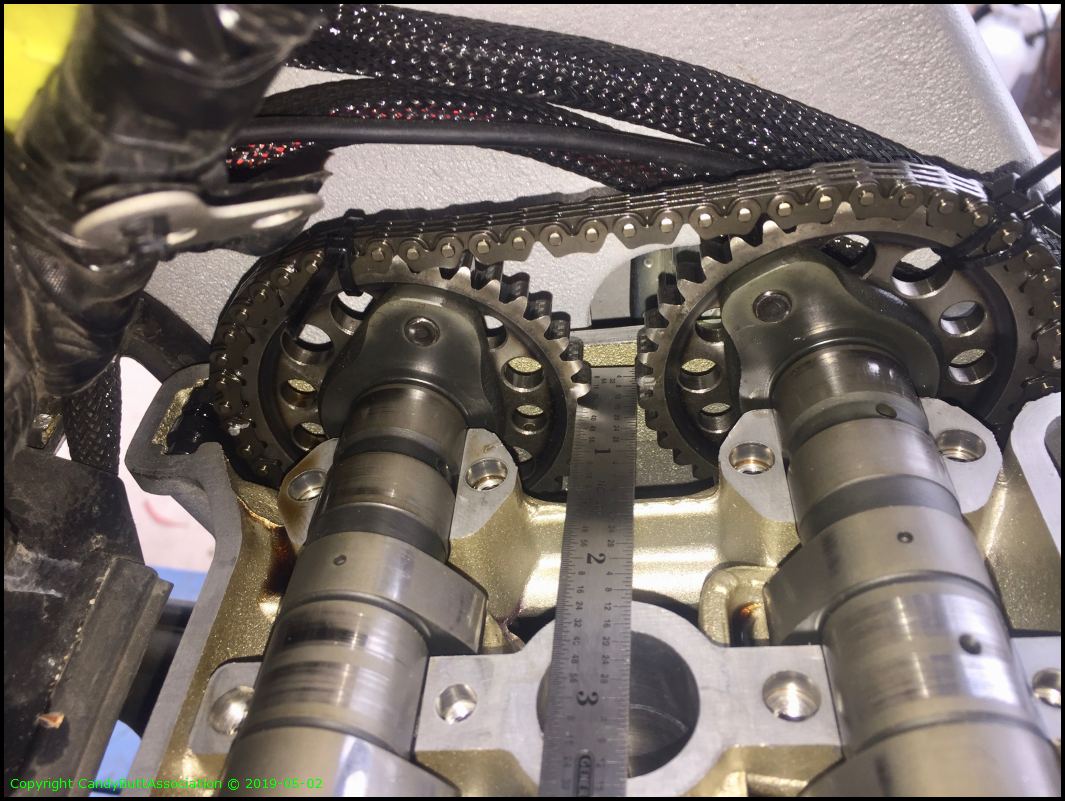
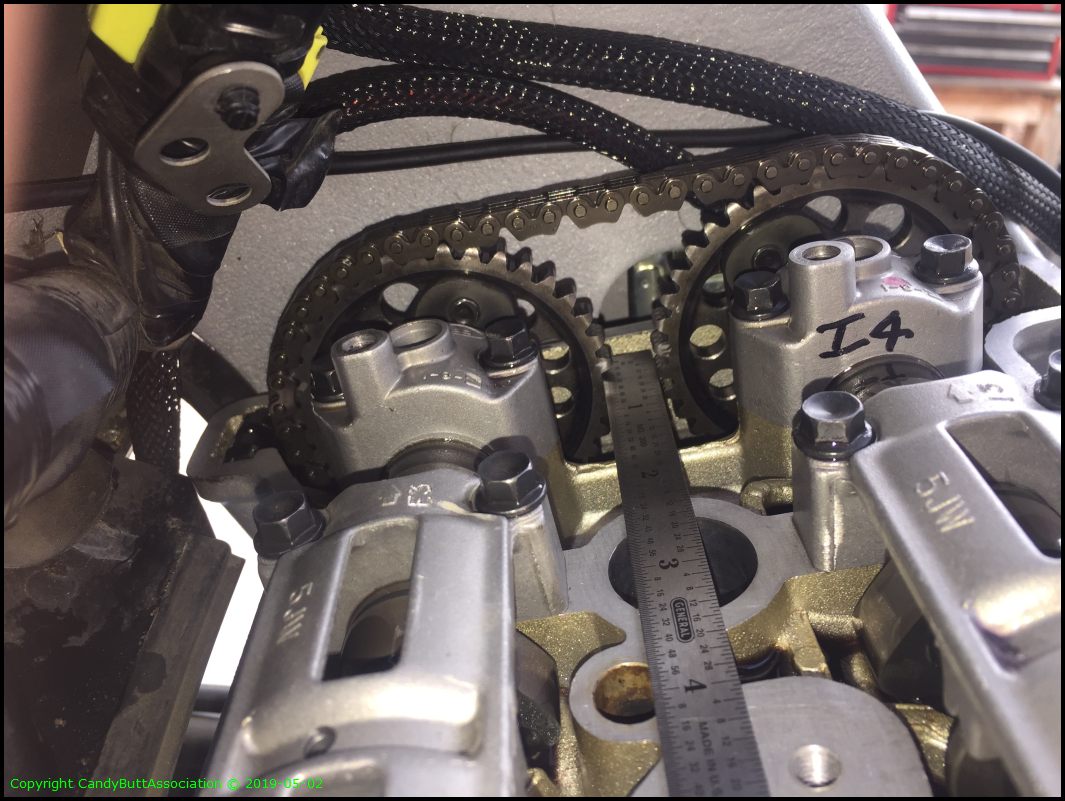
Rough check of cam timing is SAT. See ruler on right.
A better view. Ruler is under marked teeth, as it should be. Identical to previous pictures. Whew.
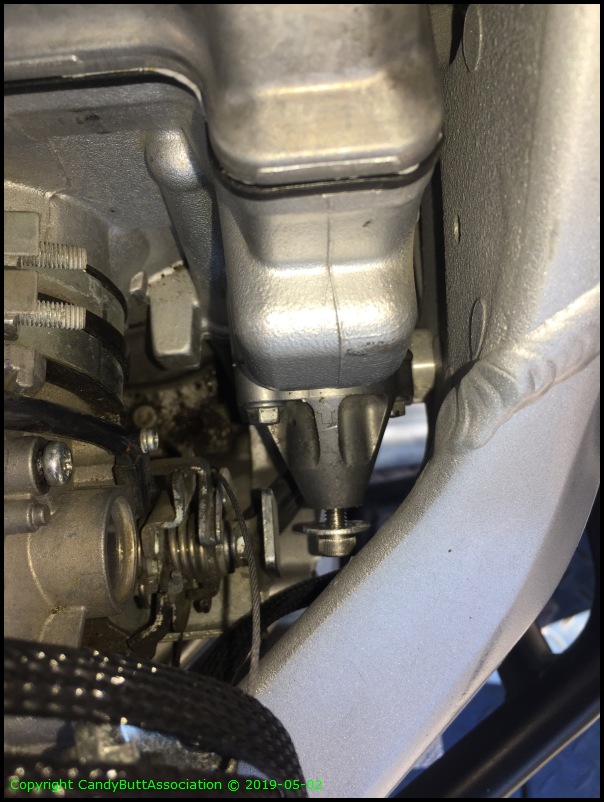
Fortunately had a brand new CCT. I didn't use the new CCT as the OEM part is the latest and greatest and has good feel and movement. But I did use the 'key' to keep the CCT retracted for easier installation.
MollieB be supervising.
Here's the key..
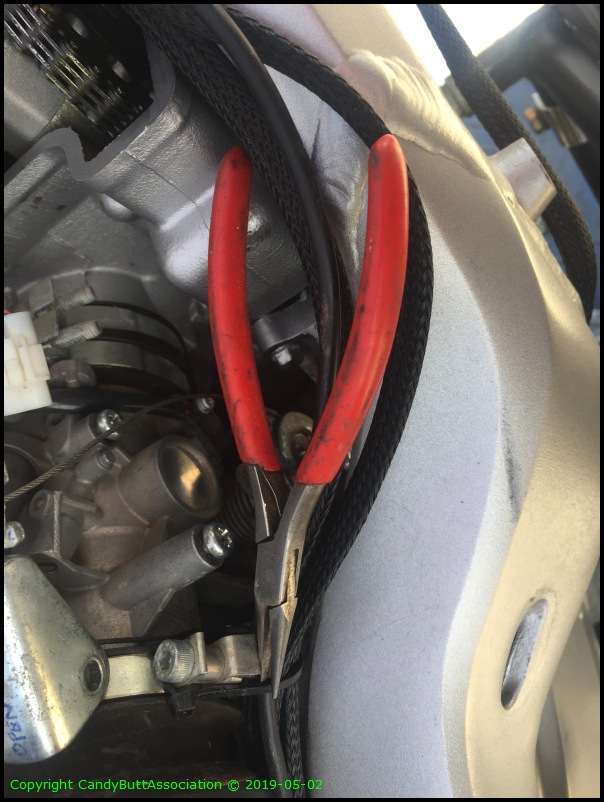
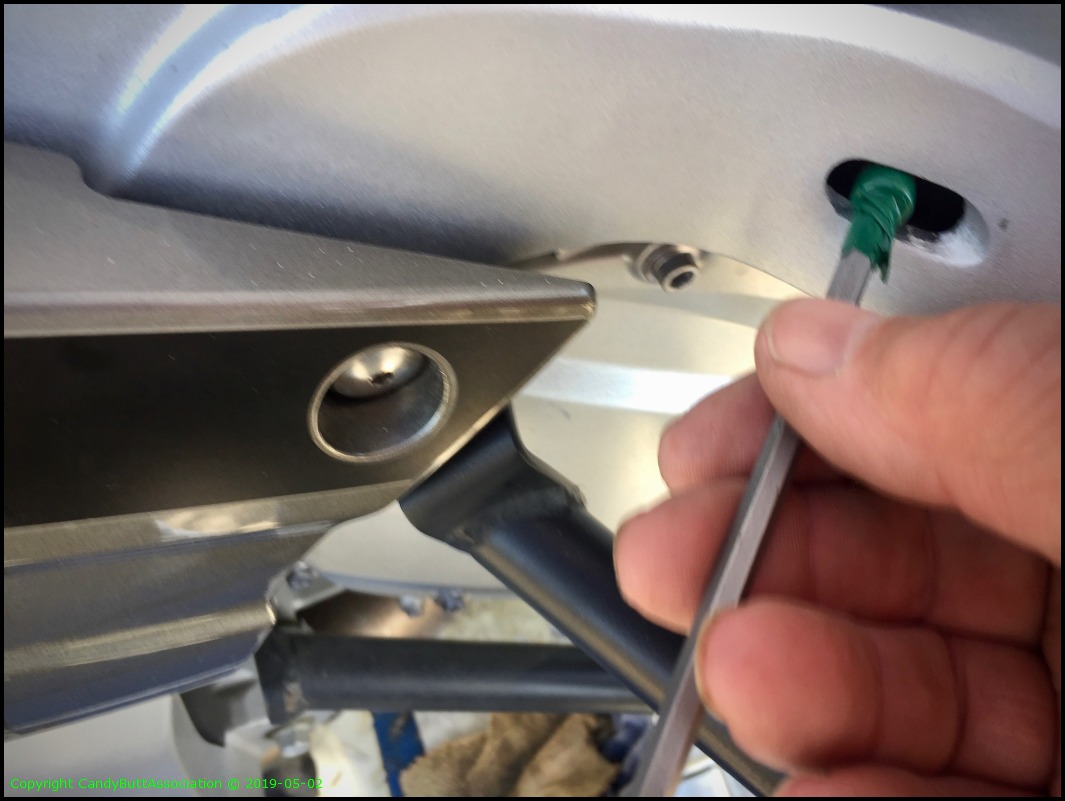
Hemostats to place CCT.
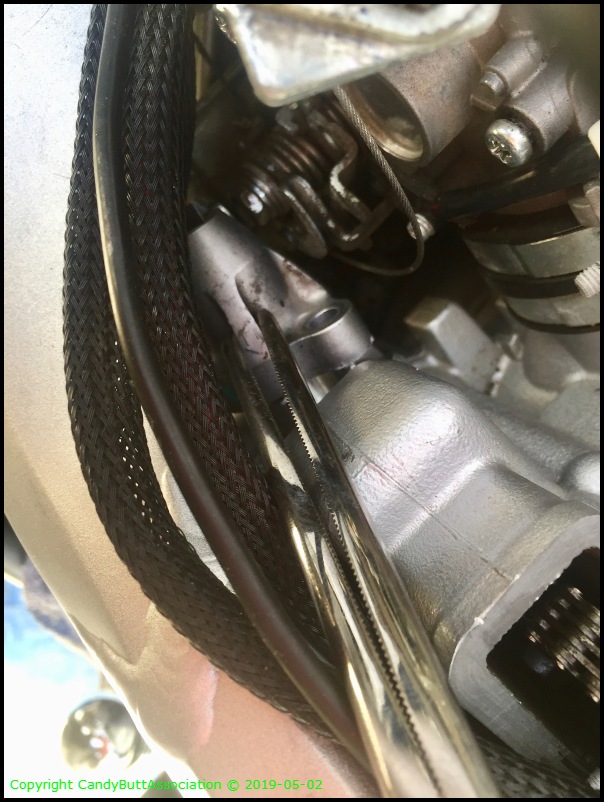
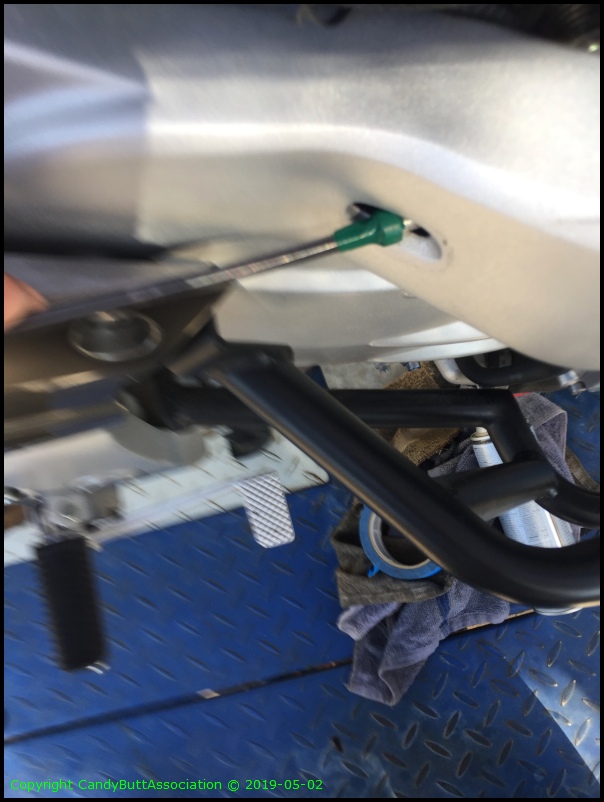
Thought that maybe using a cap screw I could access CCT mounting bolt through the hole in frame. No go. The cap screw head is too large to pass through frame hole and the alignment of allen driver is all wrong. Oh well.
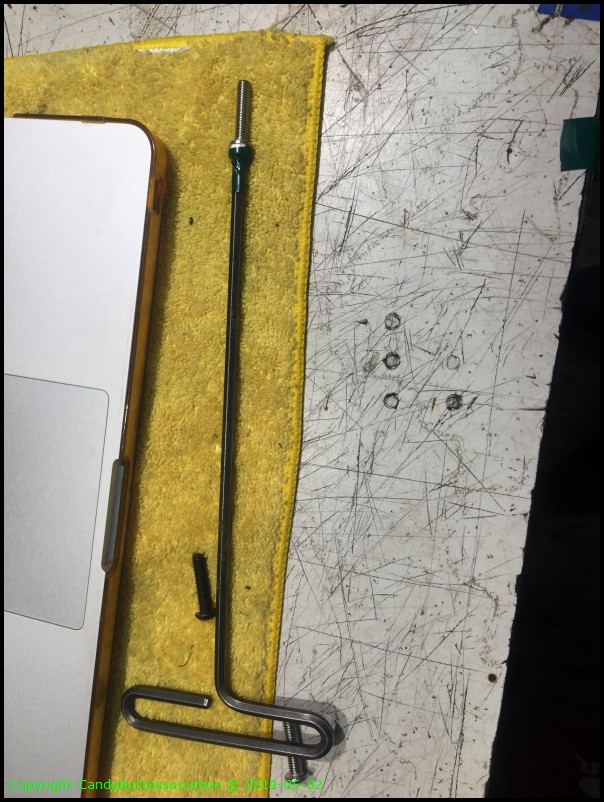
So plan 'B'. Slot the bolt head for easier install and removal.
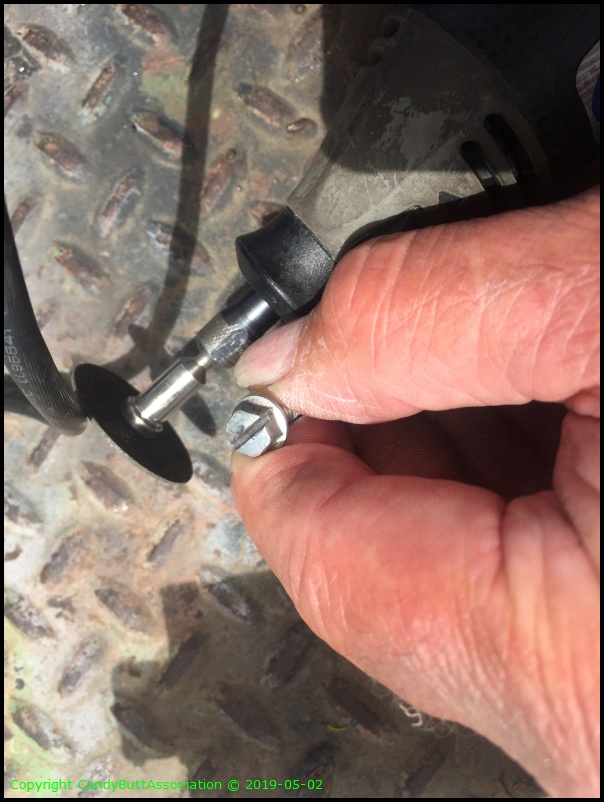
Used a small needle nose plier to place top bolt. The bottom bolt I used hemostats. Then used a combination of screwdriver, 5/16 12 point and 8mm 12 point to tighten. The lower bolt is a bitch.
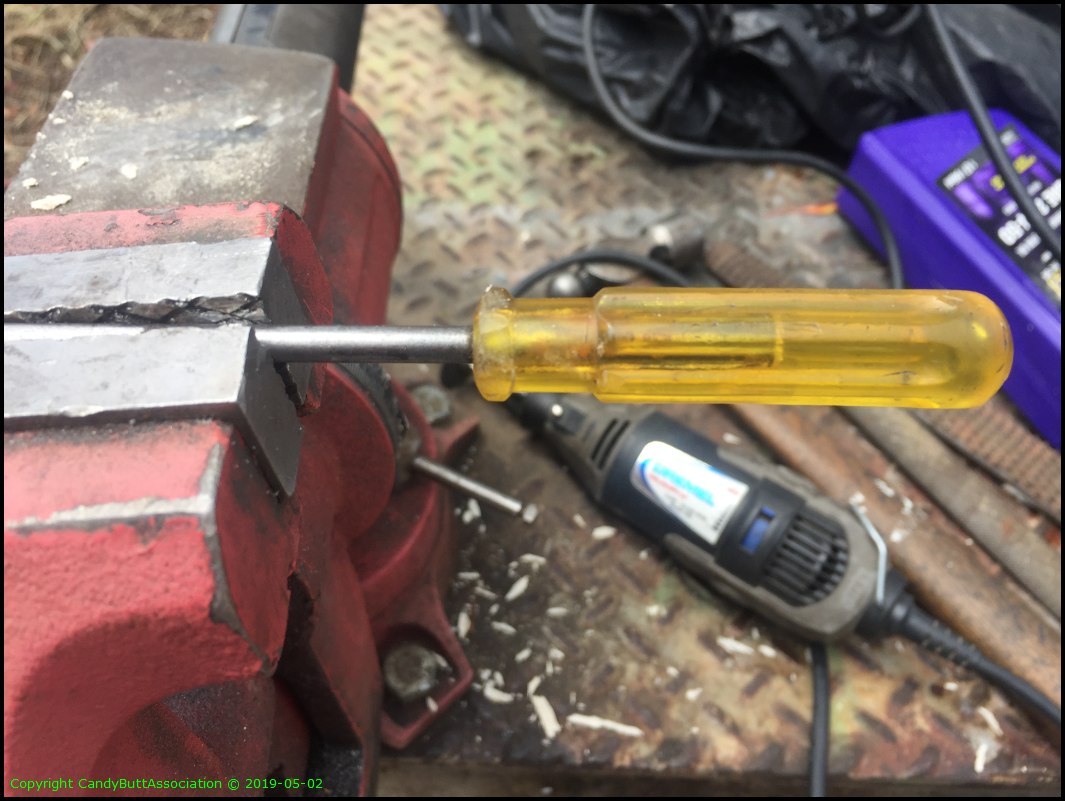
Customized a screw driver by filing down the plastic collar nearest to vice. This allowed screwdriver rotation and no frame interference.
Cut ty-wraps, careful no to lose any to engine bowels, pull key from CCT, and timing is still good. WooHoo!
Rotated crank about 20 revolutions to ensure no valve/piston interference and to seat buckets. Then took final lash measurements. All SAT.
After being a dumbshit for the second time... meaning I failed to tape the inside frame hole to prevent CCT center bolt from falling into frame, got back to thinking of using a cap screw through frame hole again.
Just a weeeeee bit too tight.
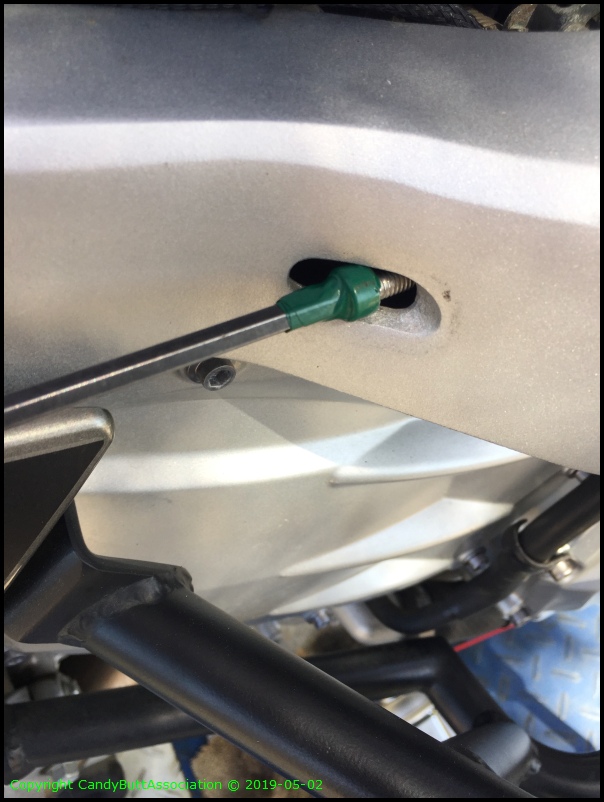
Small casting ridge is the issue.
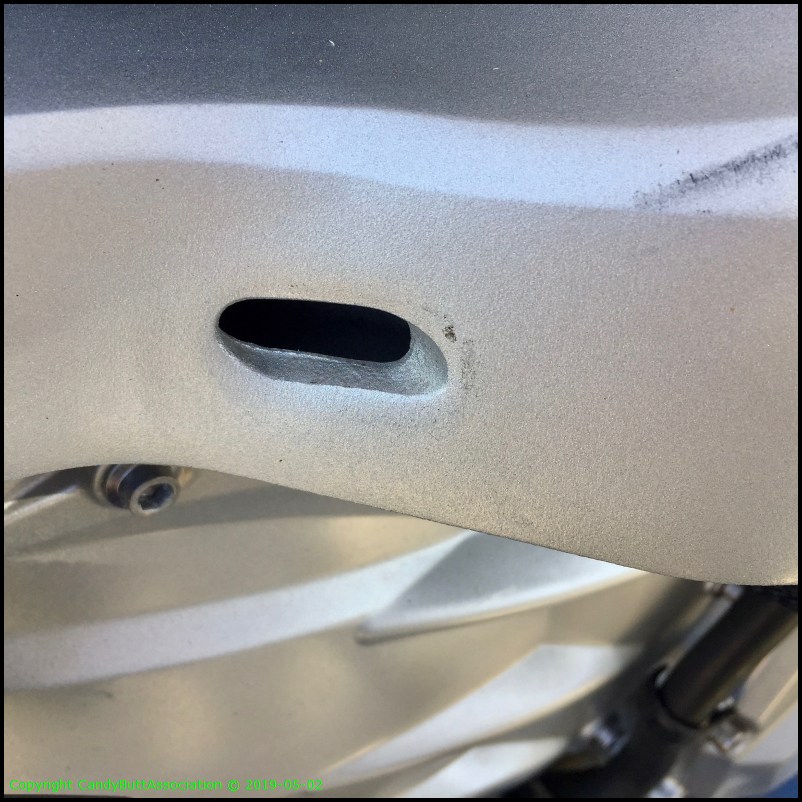
Used a Dremel and file to slightly widen the opening. Now my frame will flex, frame will break and all kinds of bad joo-joo will happen. NOT.
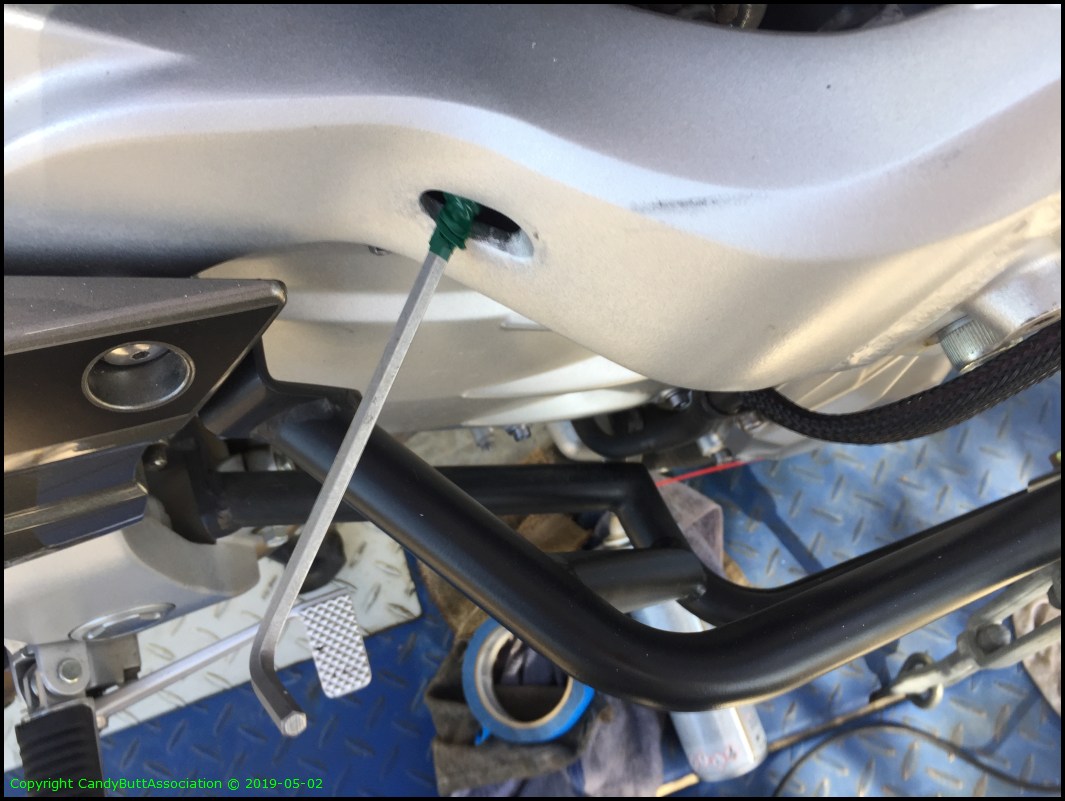
That's better. Fits. Use electrical tape to keep fastener on allen wrench.
Super easy now.
Customized allen wrench allows rotation.

Use small box end wrench for final torque.
Connected all electrical, installed tank and wonders of wonders Naomi fired right up!
TBC.