- Home
- Forums
- Ride Reports
- MotoBikes
- Restorations
- Wrenching
- 1963 BMW R69s
- 1969 BMW R60/2
- 1978 Yamaha 125
- 1979 KZ1300
- 1979 Kz1300 - Bob's Beauty
- 1981 CBX SuperSport
- 1981 Kz1300 Model A3 - Chocolatie
- 1984 Ford F250 XL
- 1987 ATK
- 1987 MowieMowie
- 1987 RotoTiller
- 1988 Honda Accord Lxi
- 1990 BMW RT100 - Barrie
- 1991 Harley Davidson FLHTCU
- 1992 Johnnie Deere
- 2000 YZ426
- 2002 Dodge Ram
- 2006 Carson RacerX Trailer
- 2006 Host Camper
- 2006 KrZy8
- 2007 Wabs
- 2012 KTM 690R
- 2013 Naomi - FJR 1300
- 2014-08-01 Air Compressor - Sears
- 2017 Kioti
- 2018 Toy Hauler
- 2020 Honda Fit
- 2021 Miscellaneous
- 2024 Log Splitter
- 2024 NeoDyne MC Lift
- 2050 test
- Lil Trlr
- Eats
- RIP
- PC Not
- Cages
- Test
- FJRF Best
- For Sale
Candy Butt Association
World's Wimpiest Riders
You are here
2024-12-29 Kz1300 Carbs - Scotch Tool, Reassembly, Float Check, Bench Sync

Forums:
Edit. This thread has grown exponentially as the carbs continue to fight me and I try to understand the learning curve. Thought it best to make some links..
1. Diaphragm Video
4. Needle Measurements and Carb Contamination
5. Reassembly
9. No Fuel/Air Adjustment on Carbs 1, 2
13. Carb Sync and Pilot Jet Adjustments?
14. 2025-02-17 Needle Jet Measure, Tower Circlips, Make Best Rack
Finally getting back to working on KZ 1300 carburetors. I am hoping to learn as much as possible this time around about how these carburetors work. I have several very good resources from past posts on kZ1300.com.
These carbs have been worked on by wiredgeorge and they certainly did not come back as nice as the ones from Jack Wagner @old school carbs, who rebuilt my Honda CBX carbs.
After bench synchronization, I put them on the bike and it ran, but not good. If my memory serves me correct the center bank didn't have any fire at all. Even manually raising the slides had no result.
I checked for spark and all was good. So, I removed the carburetors and that was almost 9 months ago.
Colder winter weather makes me want to ride this water heater so now is that time to start working on these carburetors.
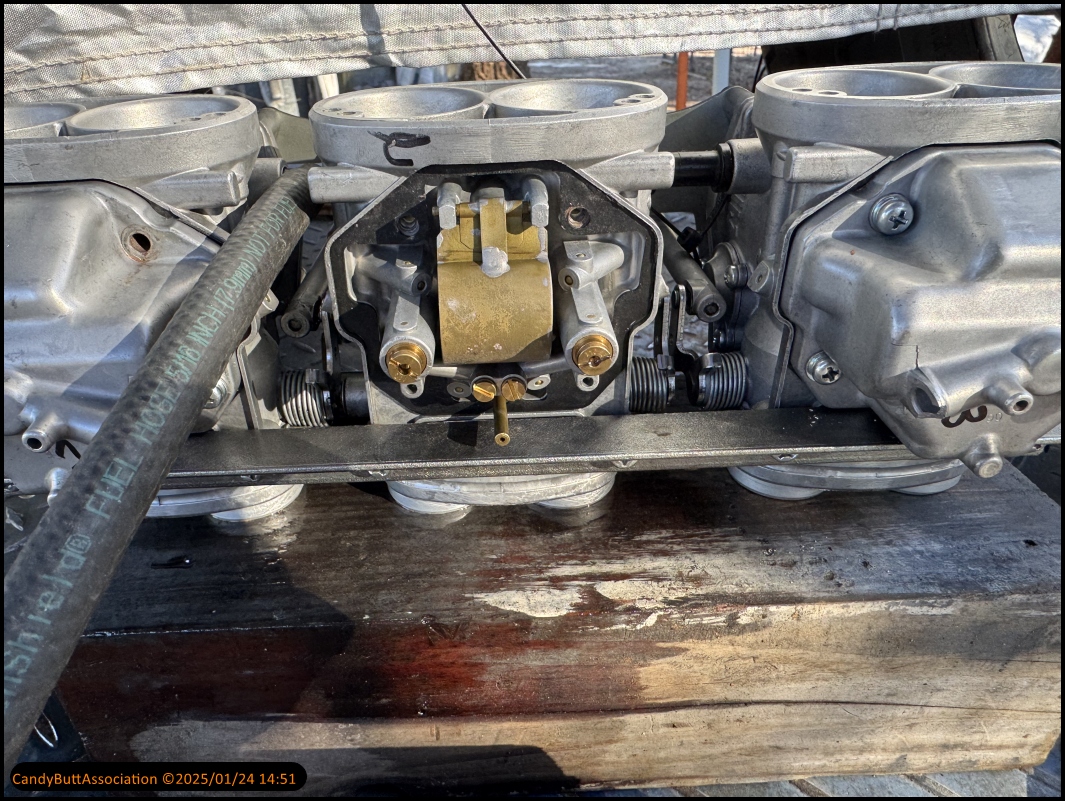
First office is a careful disassembly and inspection. Armed with a Scotch Cleaning Tool, FSM and time.. away we go.
Here is a summary of the work I have already done on these carburetors.
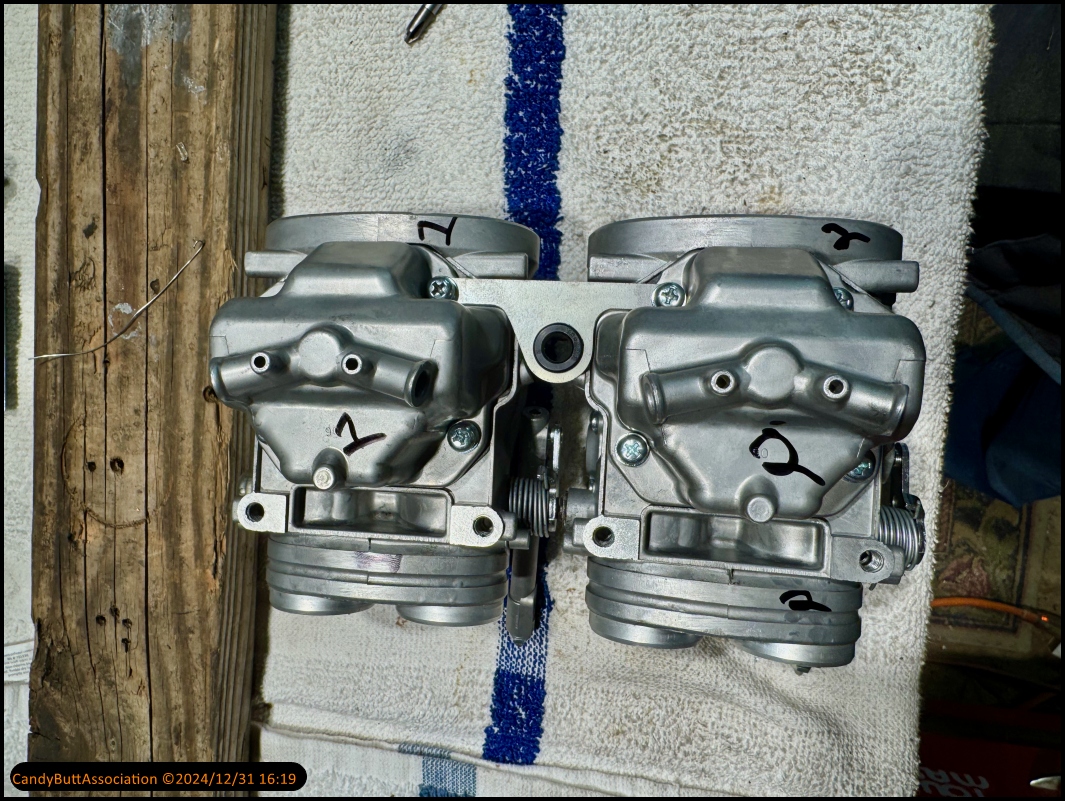
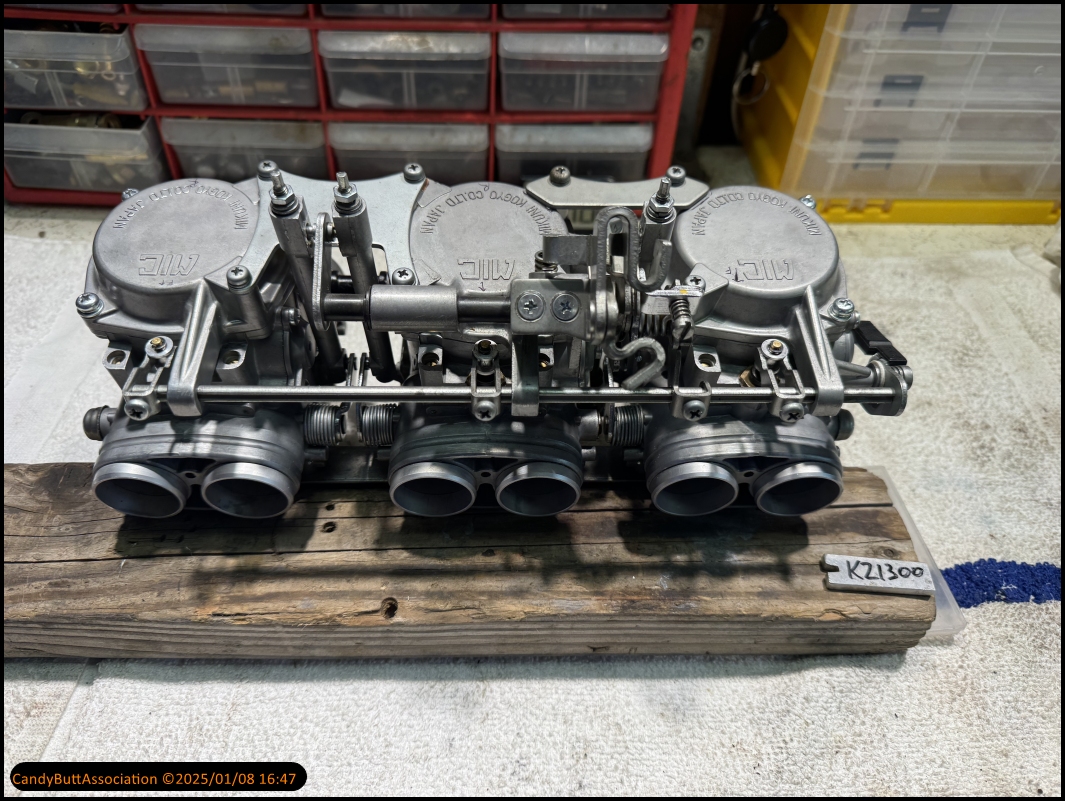
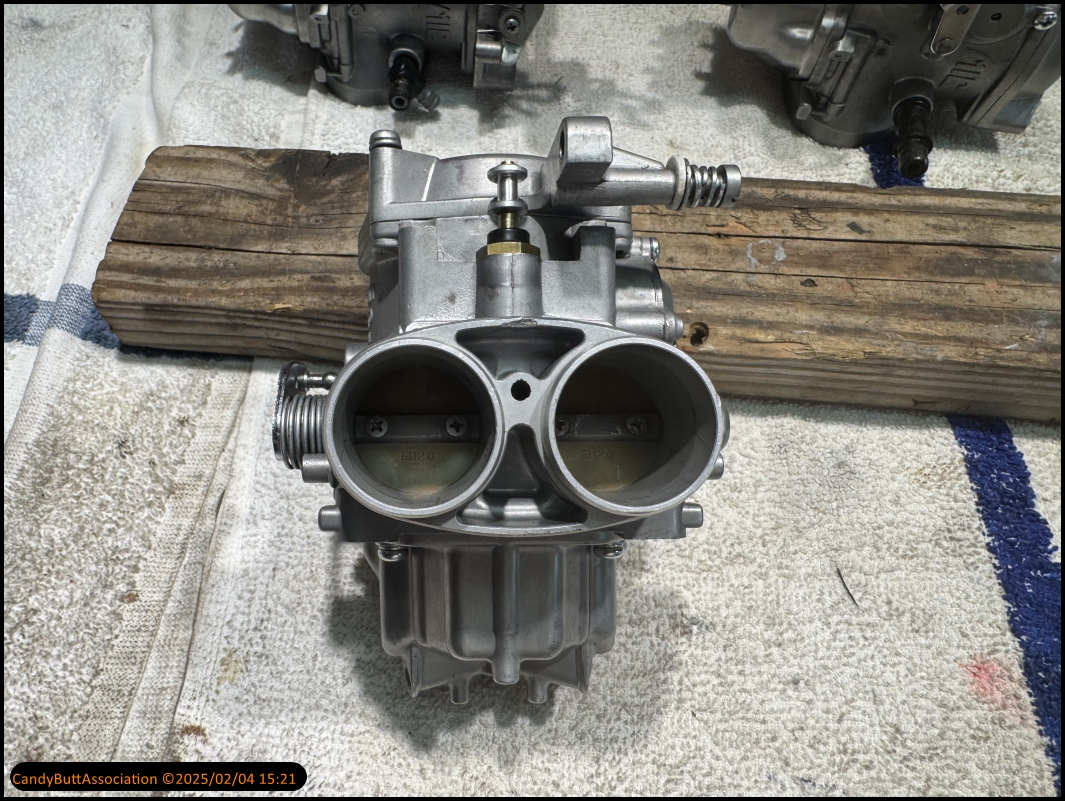
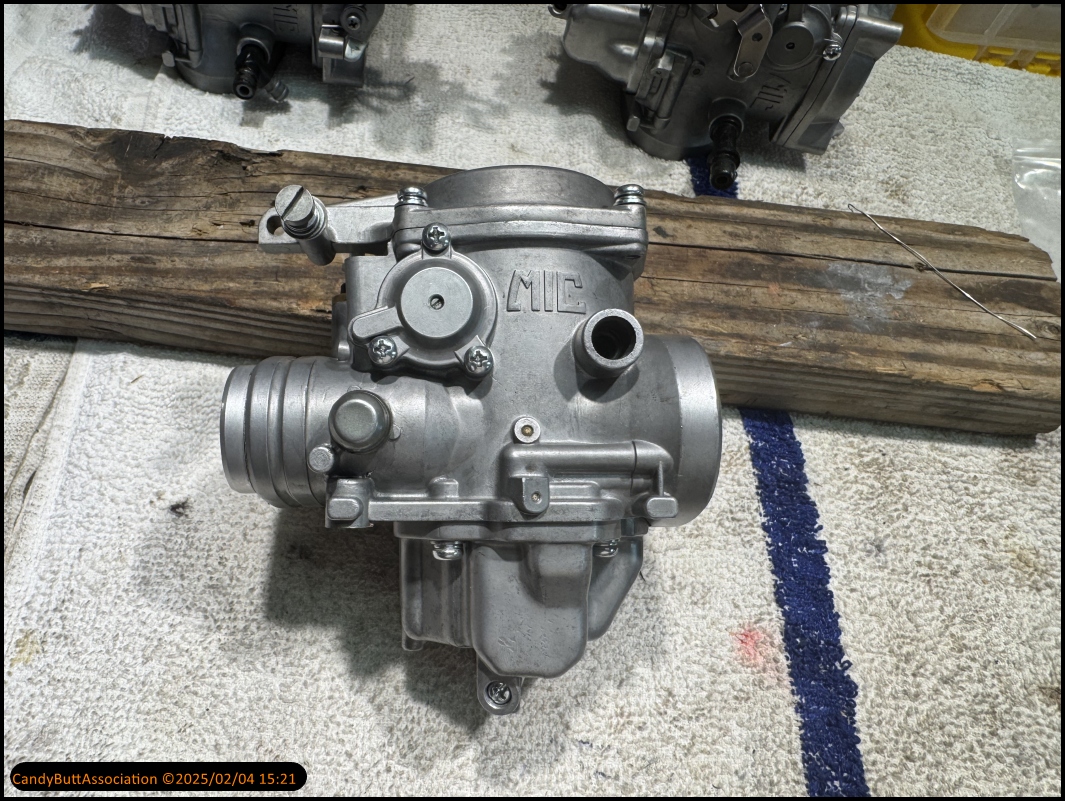
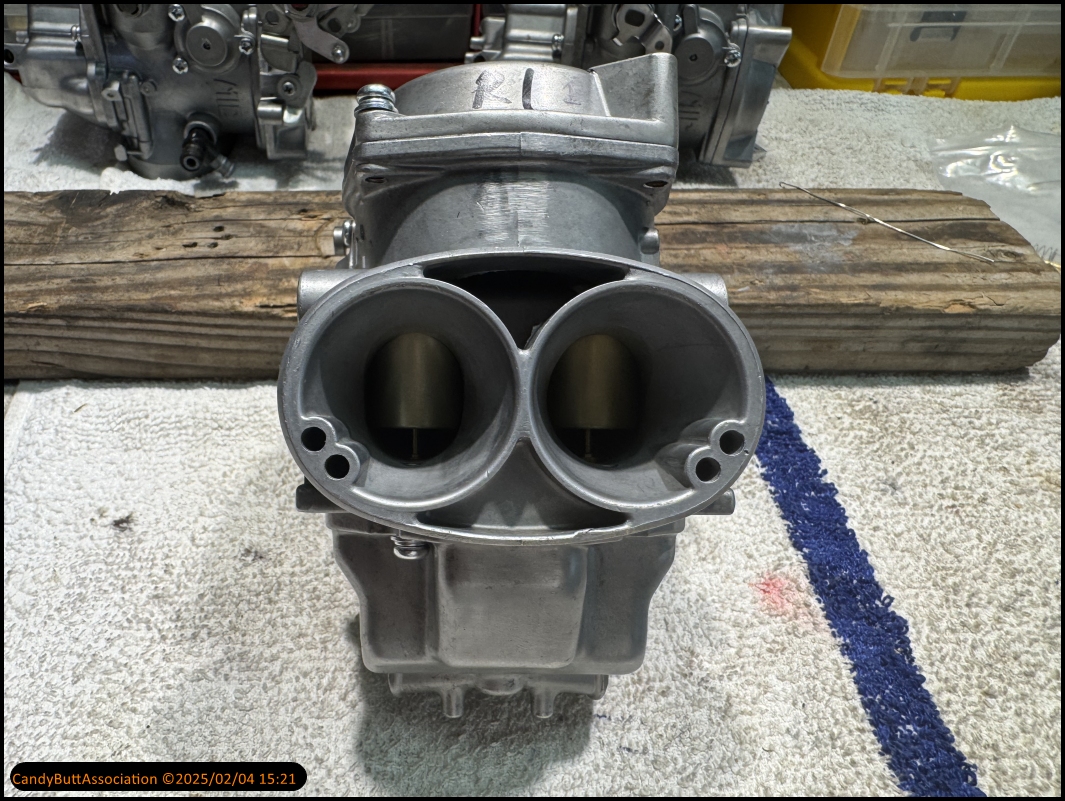
A picture to remind me of what they look like fully assembled.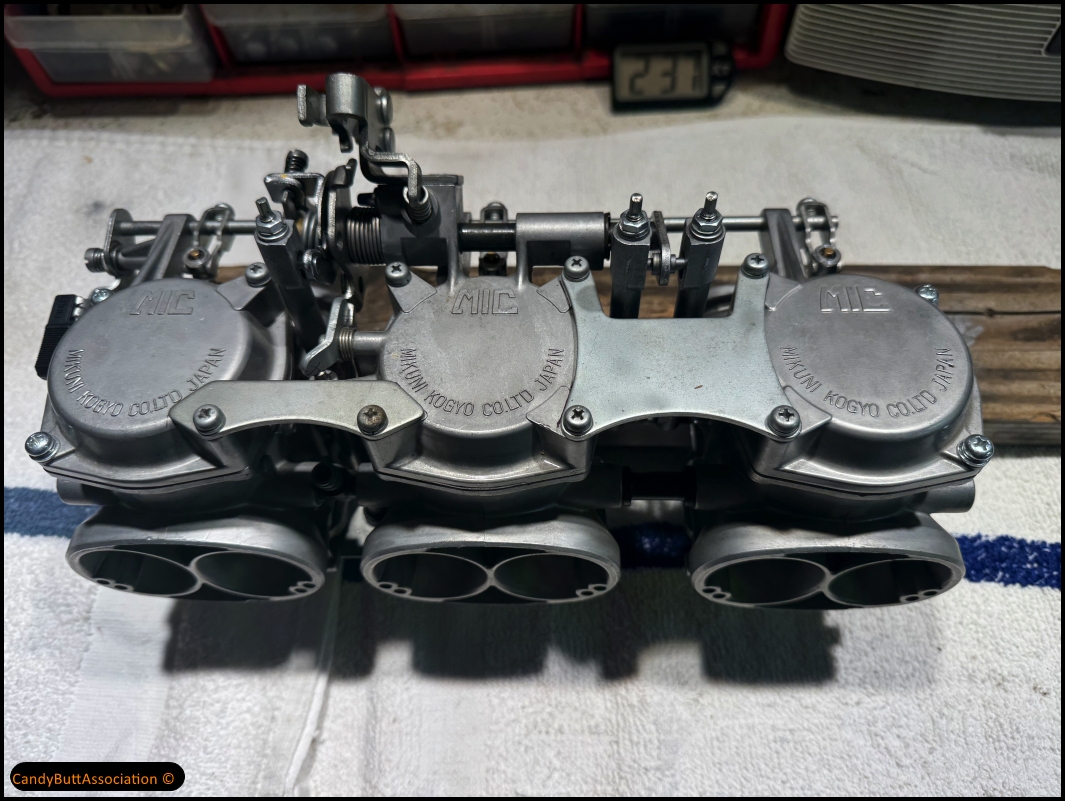
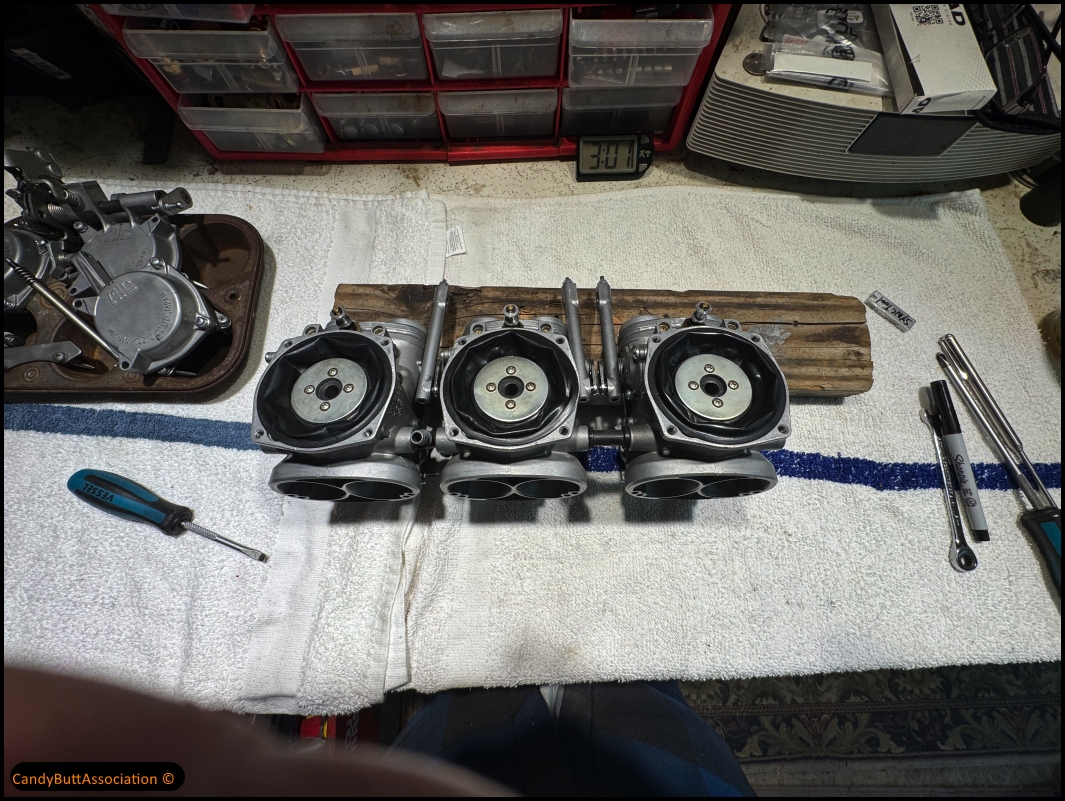
Opening up. This time I was very careful to not lose any parts from the synchronization rods. Last time one of the little springs came out and got lost in the shop on the floor. It took me forever to find it. I finally did find it. It was right next to the 10 mm socket. ![]()
Diaphrams look 'crinkly.. Not sure if ok or not.. I have another rack. I'm going to see which of the two have the better diaphragms and use them. I am also going to order some diaphragms from Helmut from Germany.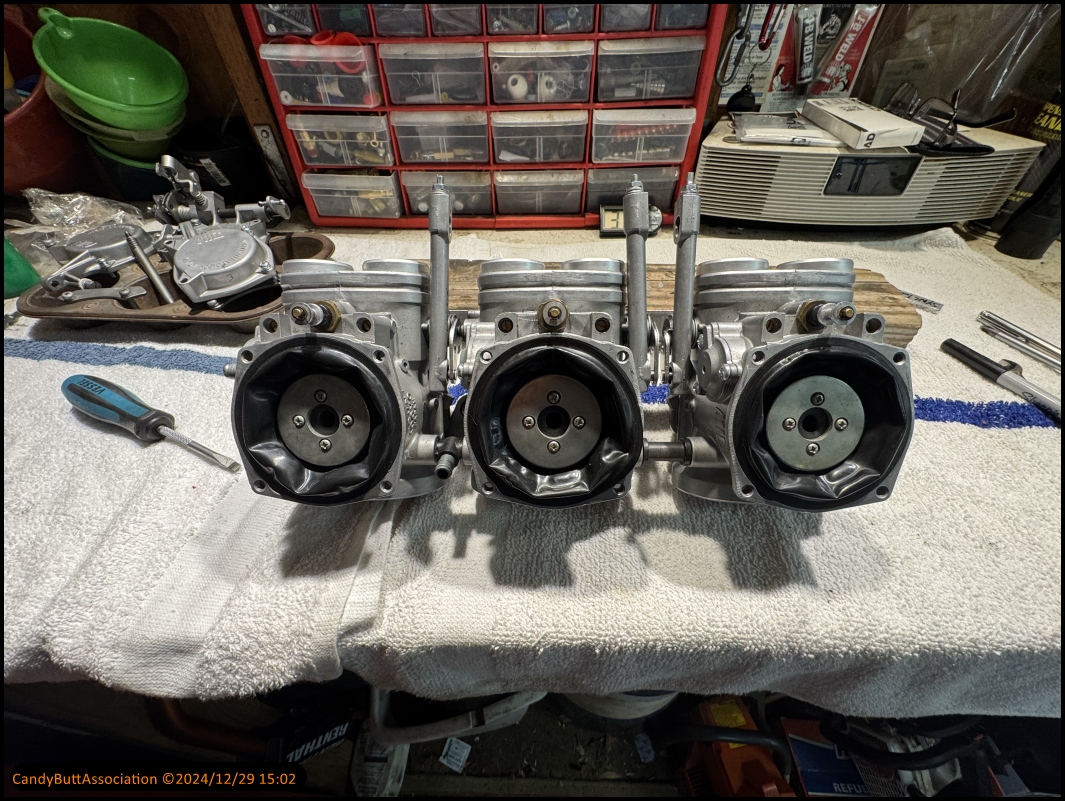
These carburetors should be spotless internally as they just came back from a professional rebuild.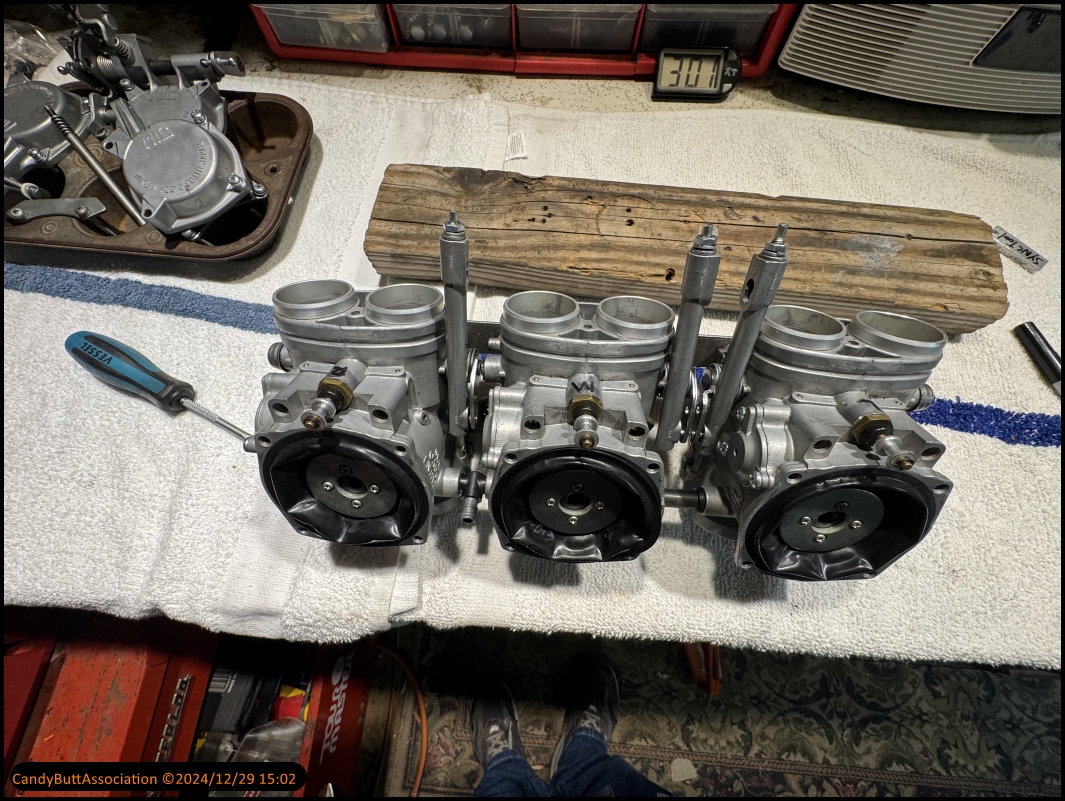
Come to think of it, this is the only motorcycle in my collection that has diaphragm CV carbs. So I have nothing to compare to. It just seems like the diaphragms should not be crinkled, but rather soft, smooth, and supple.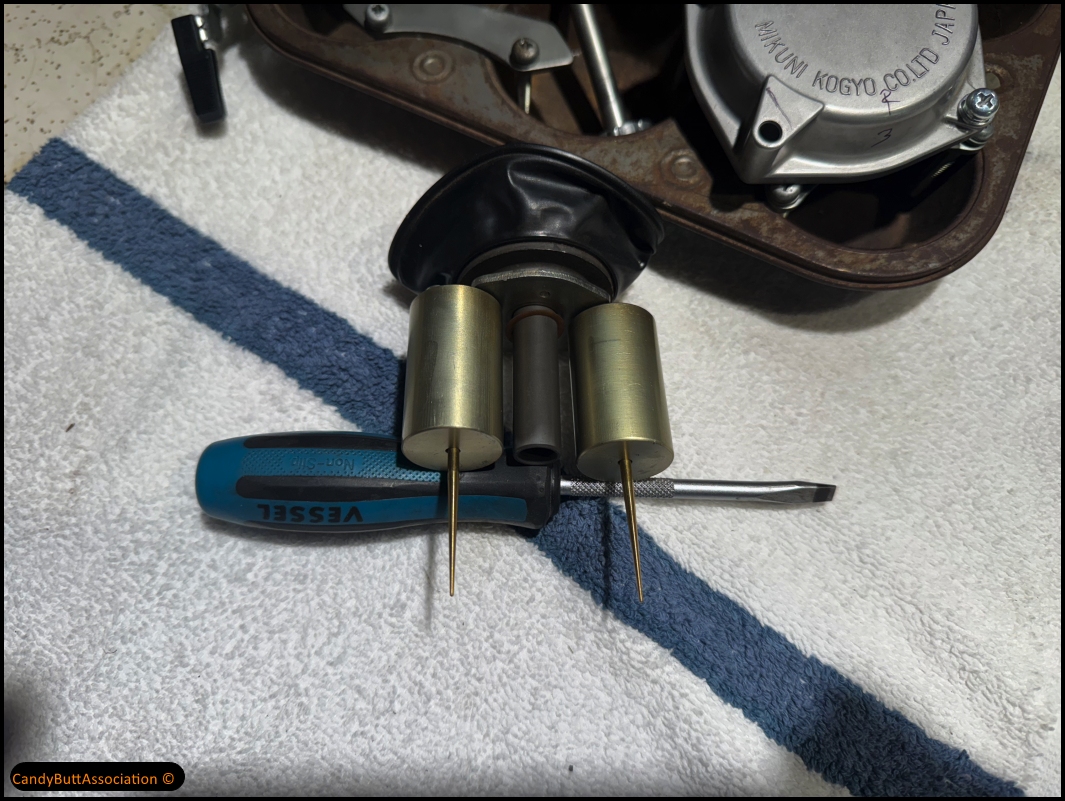 ll
ll
Tomorrow, I will disassemble all the slides and make sure the needle is in the correct position according to the factory service manual.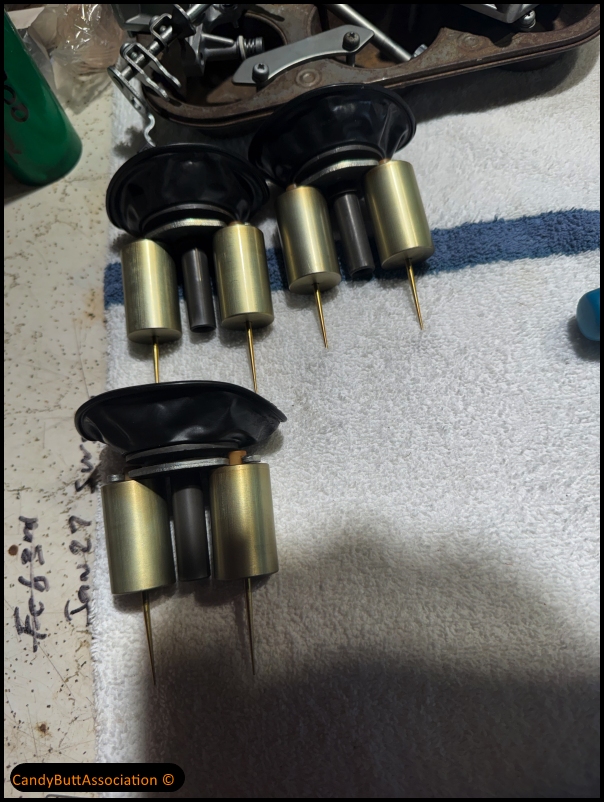
Pic to show orentation. Gracias.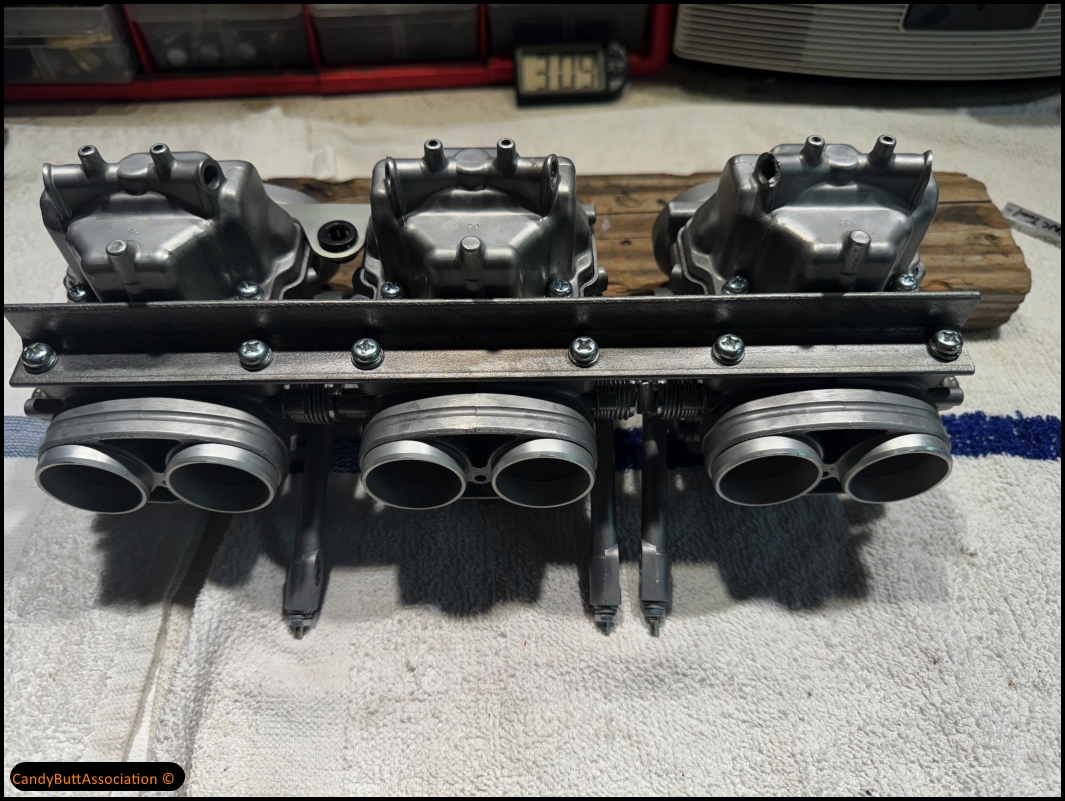
Proper orientation of the carburetor support plate.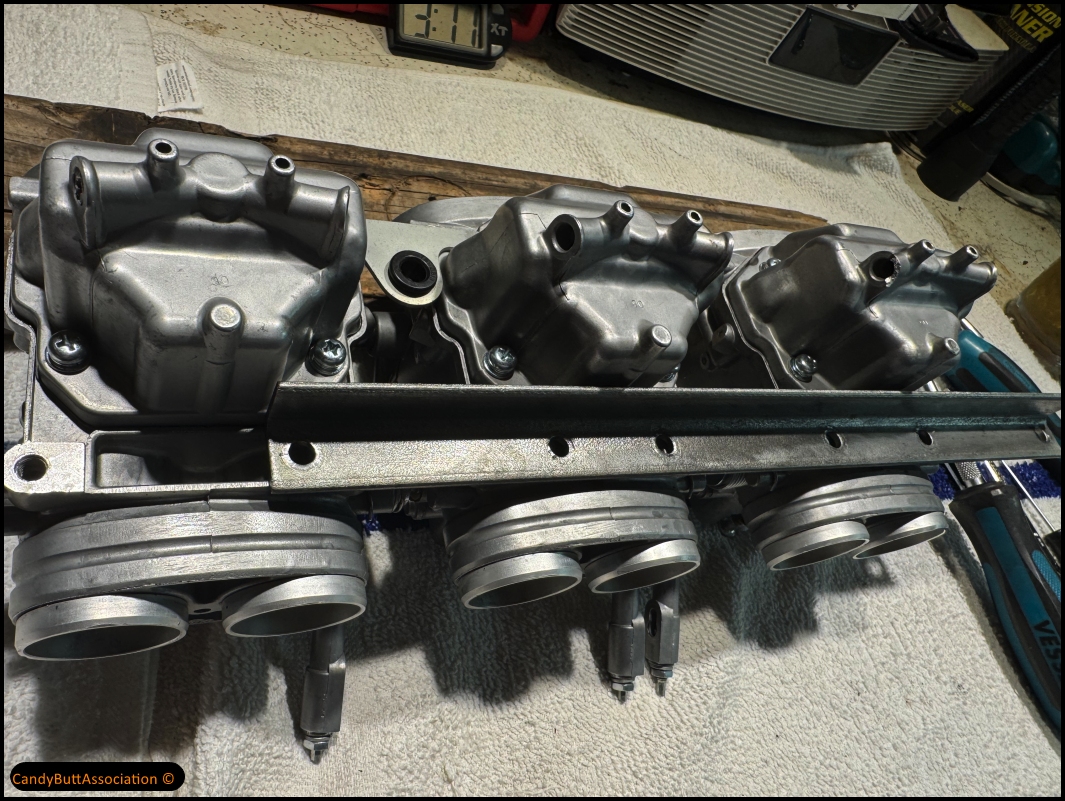
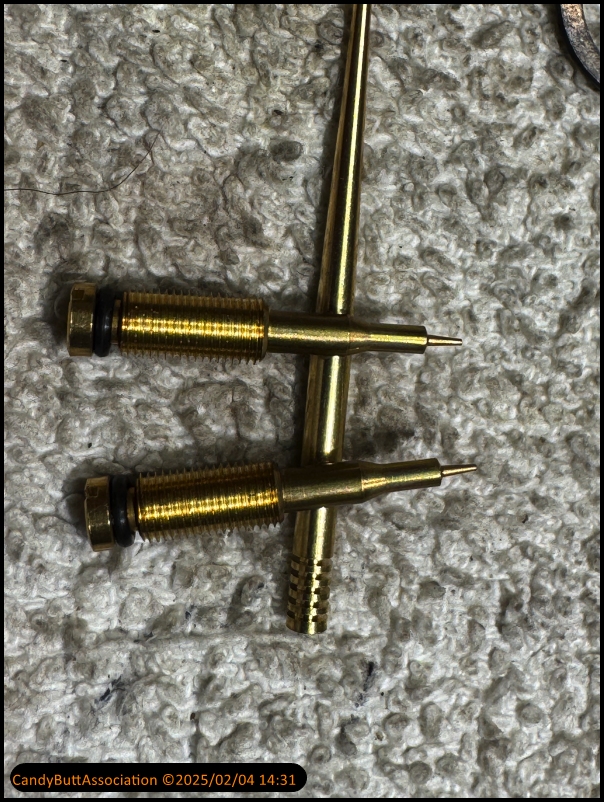
One of my drain screws is booger up. I need to find a new one.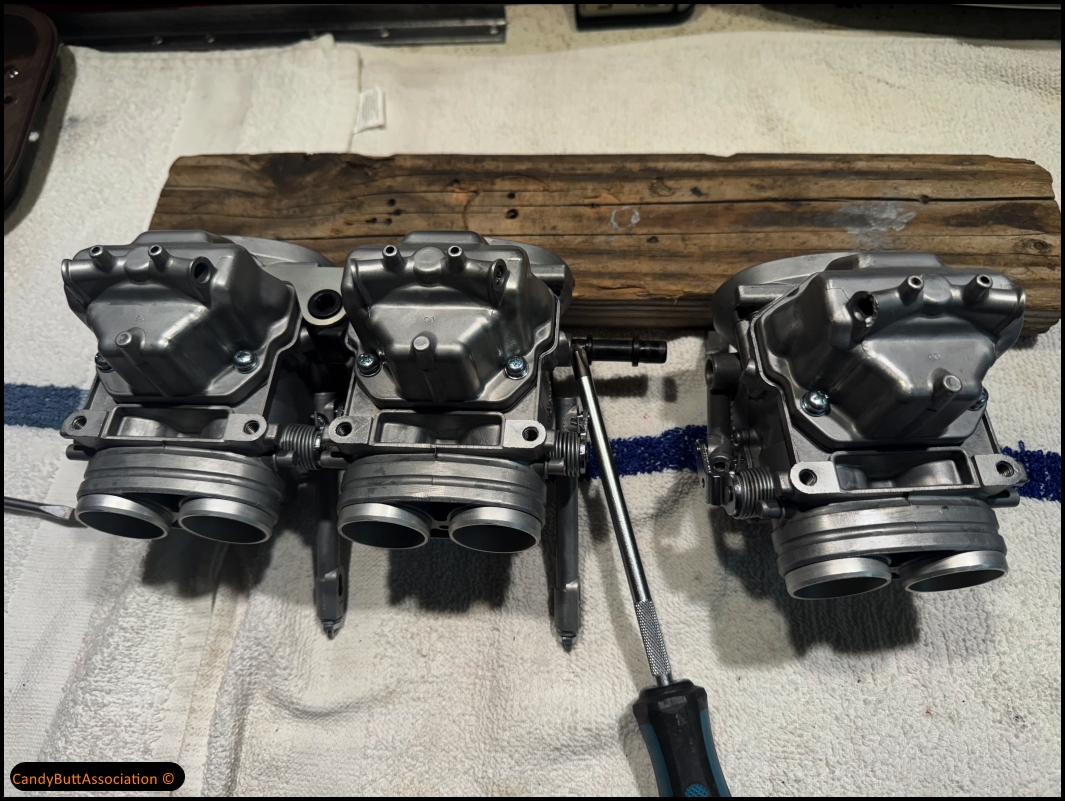 t
t
First wonderment.. How come this 'fresh rebuild' has 'gook' to make o-rings seal? I am hoping that Helmut offers these for sale.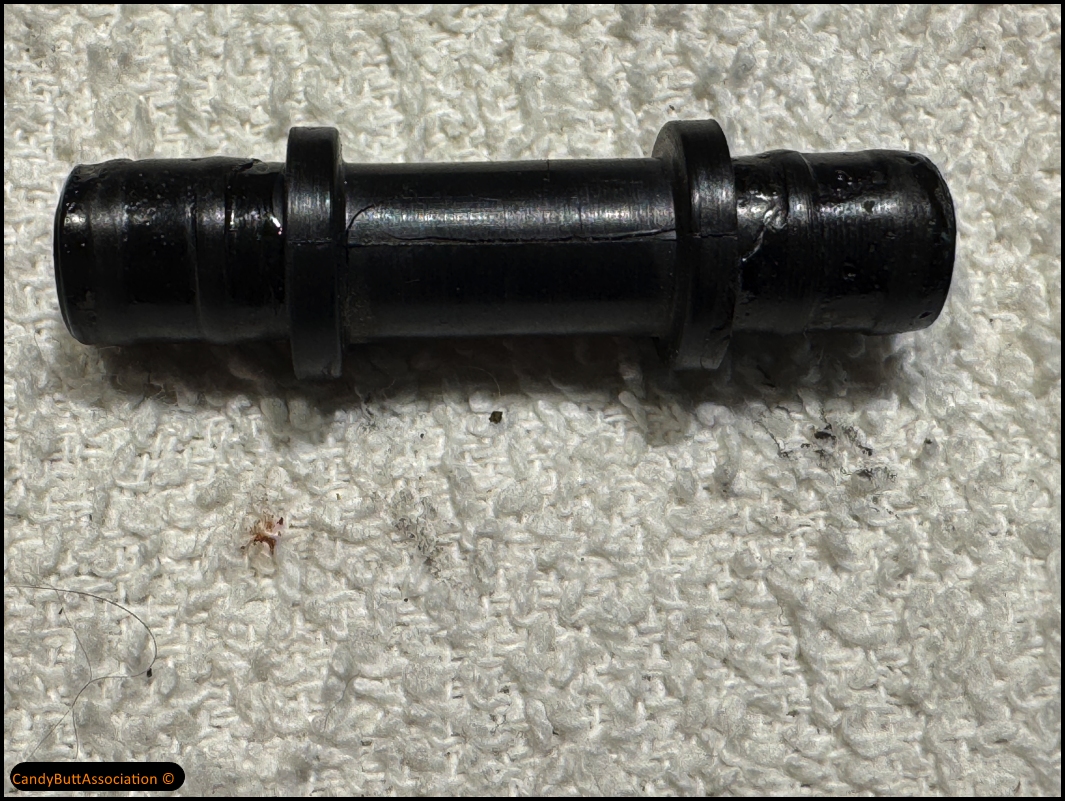
Fetching the spring..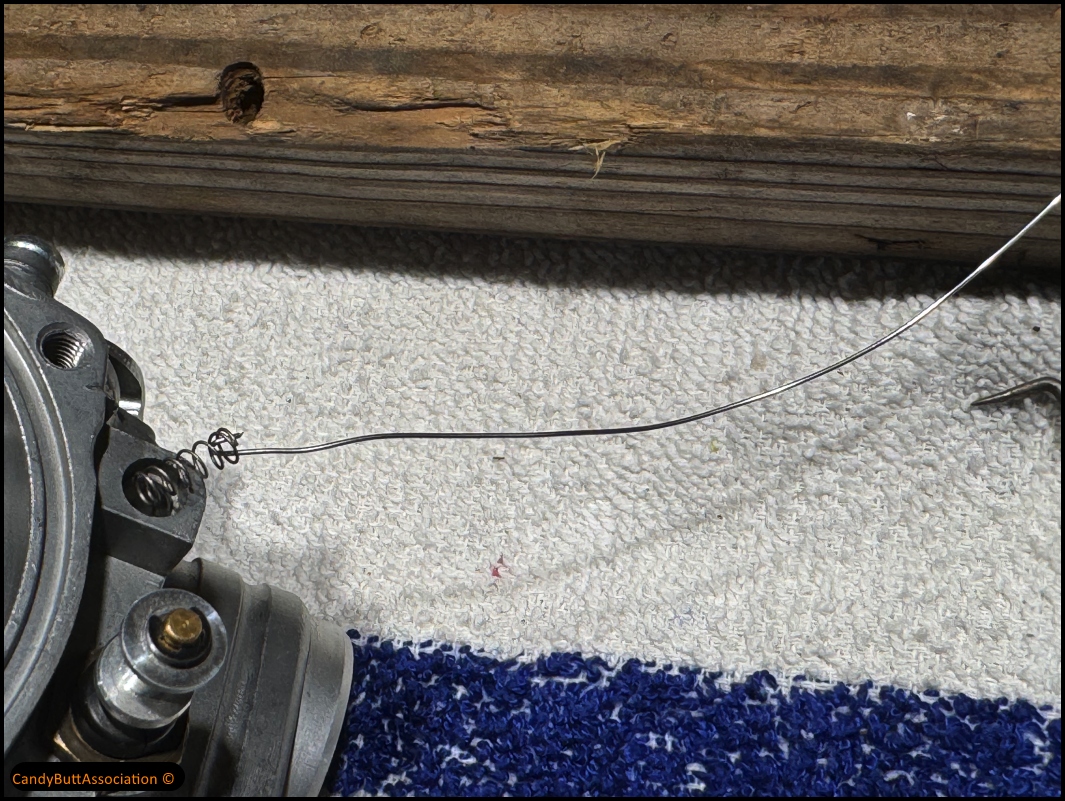
Supposedly this is new brass. I'm thinking about getting slightly longer springs as the needles are loose would adjust it out 1 1/2 to 2 turns.... no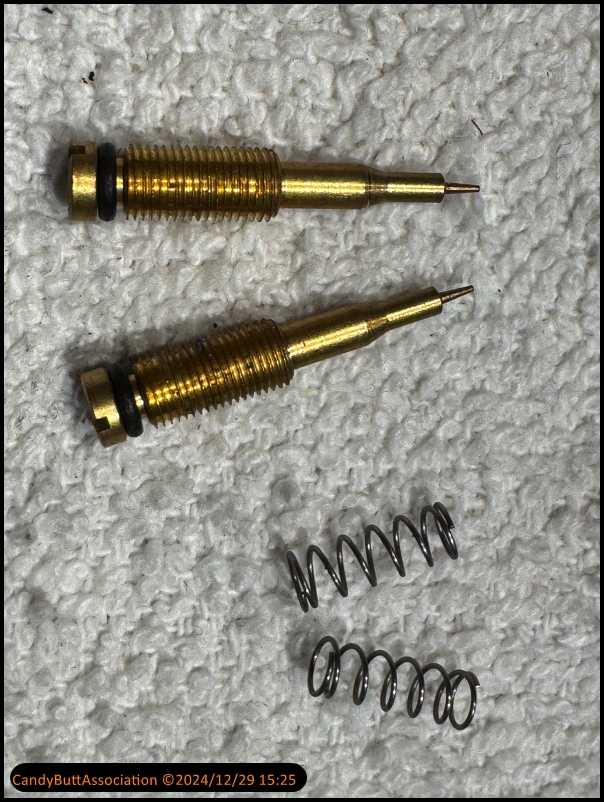
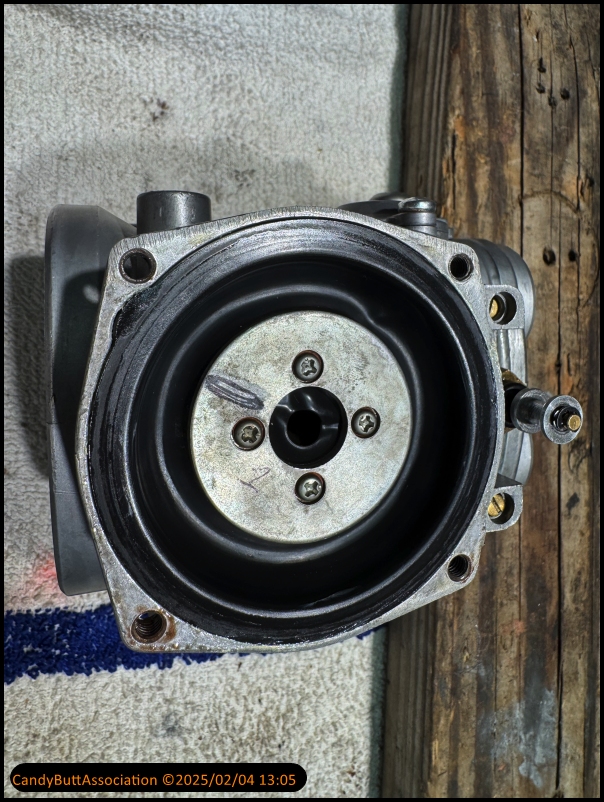
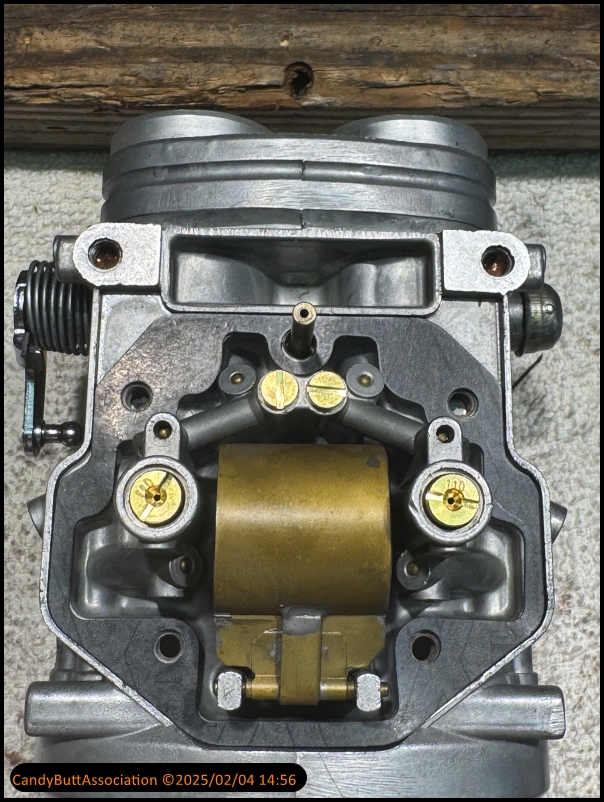
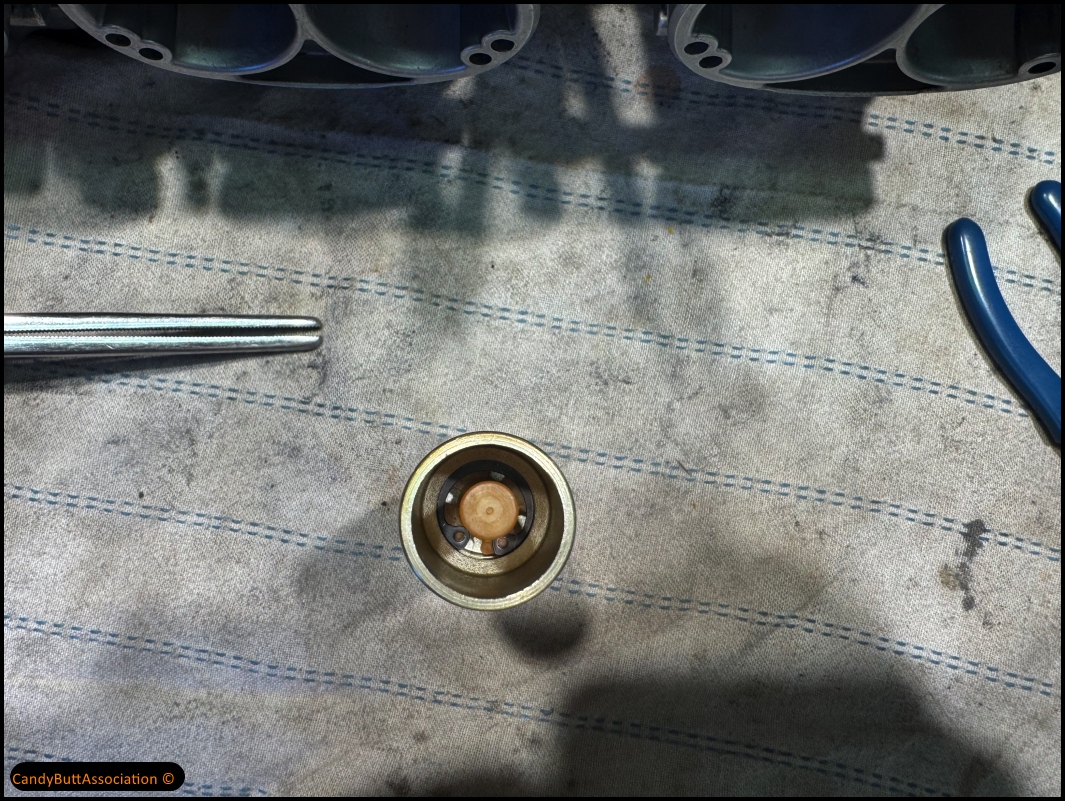
Float bowl removed. Scotch made brass floats.
I don't really think there is anything clogging passageways, but it won't hurt to flush using Scotch's tool.
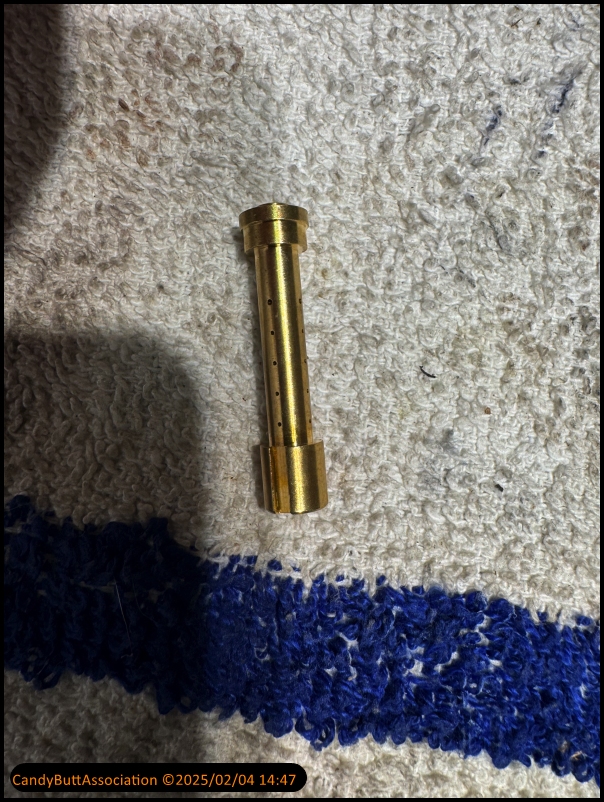
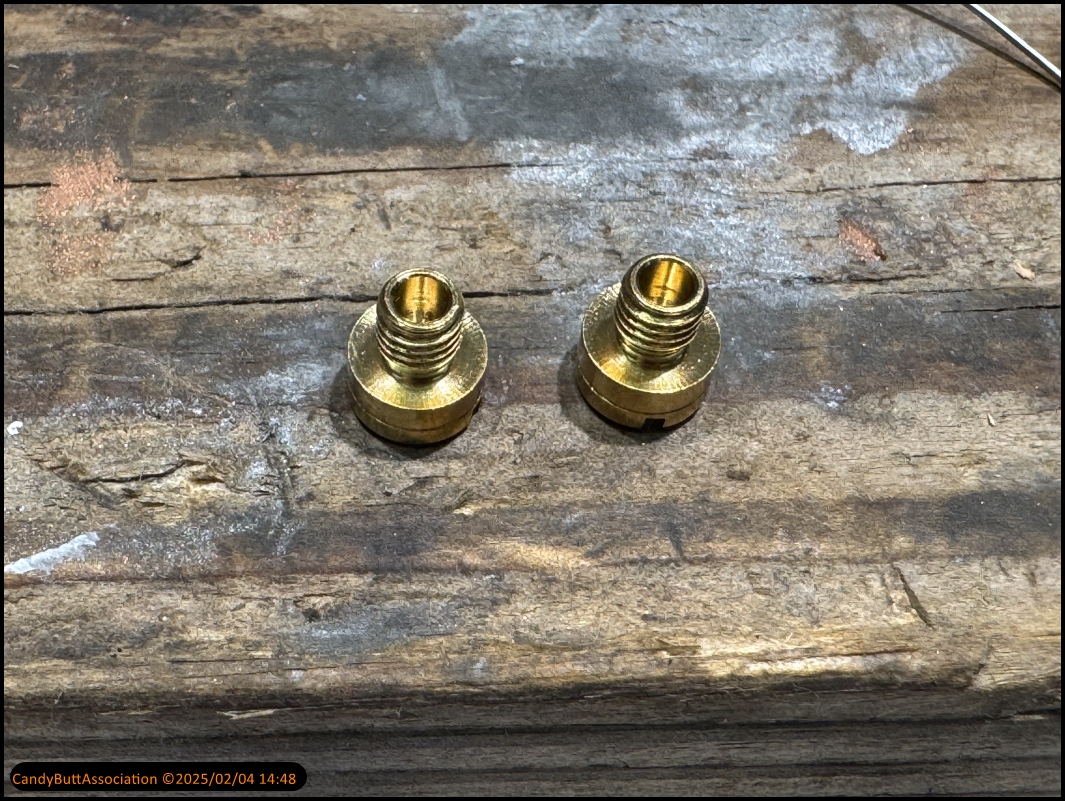
Interesting. The needle jet is made of metal unlike most I have seen on Japanese bikes.
A little bit of crap to the left of the brass.
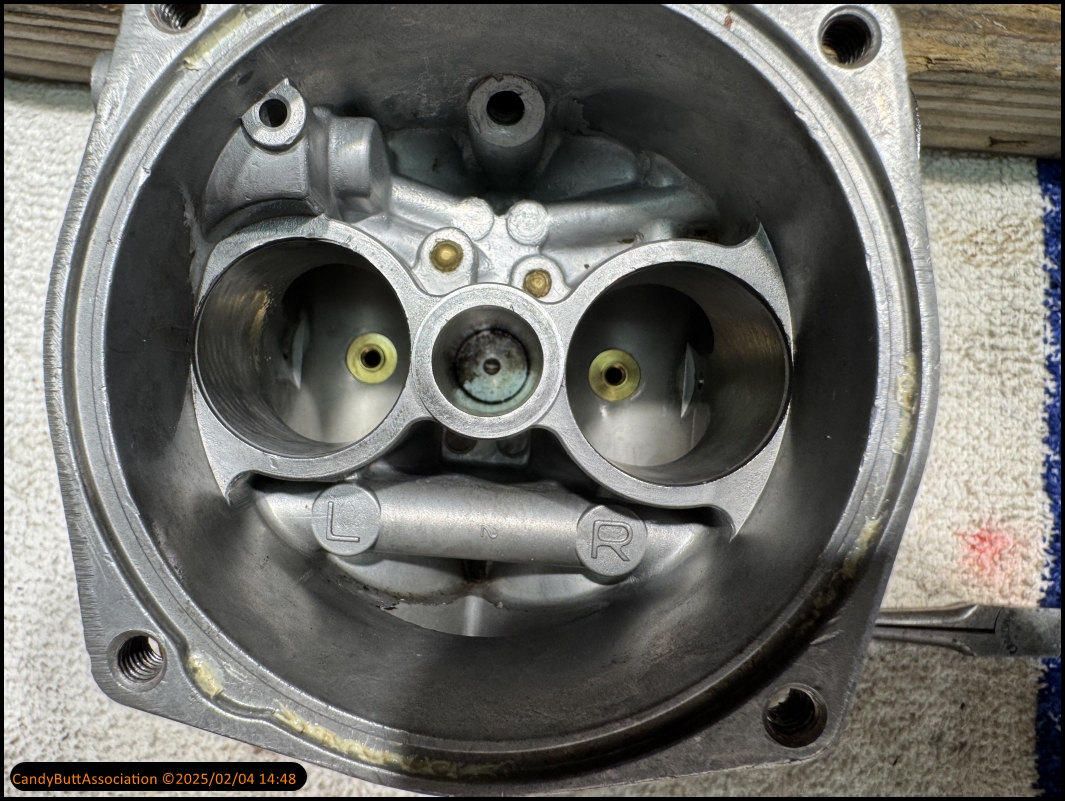
Removing main jets and emulsifier tubes.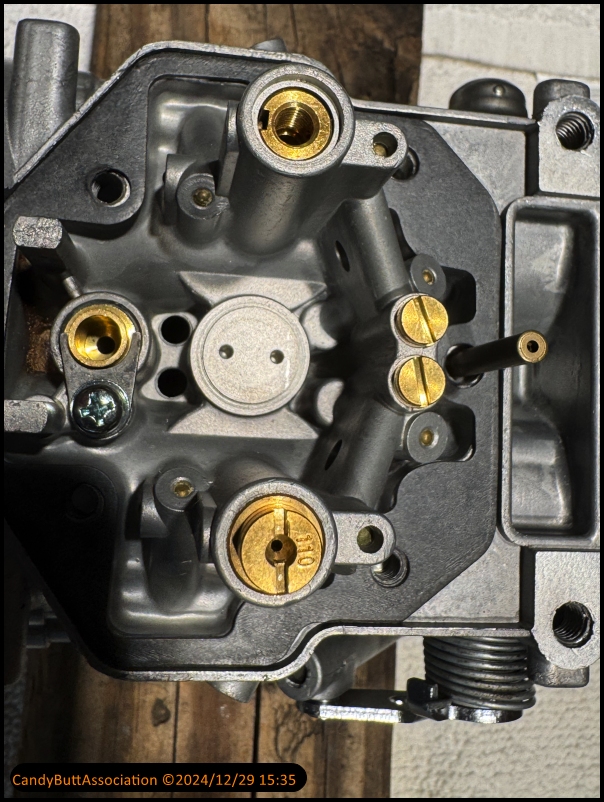
I need to consult the factory service manual. I believe these are fixed idle jets.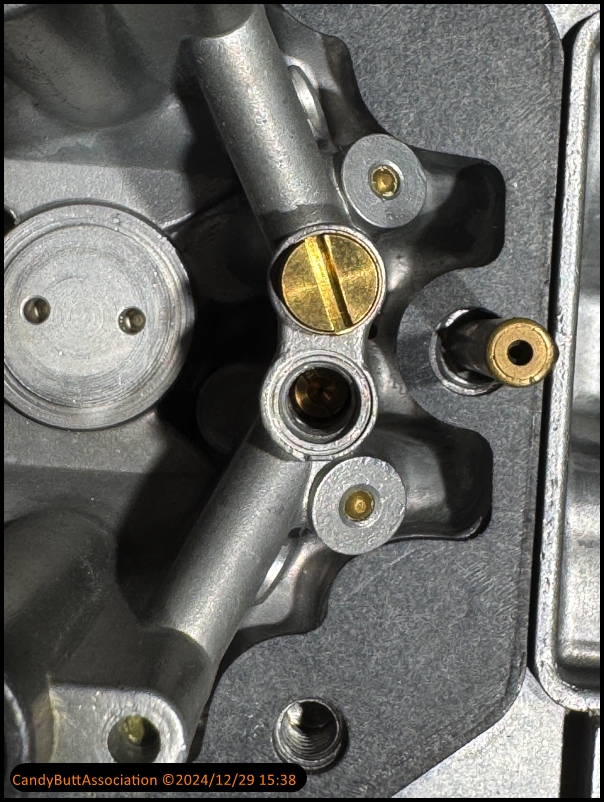
Emulsifier tubes have signs of being 'worked on' to fit? WTFO?
Removing fuel enrichner.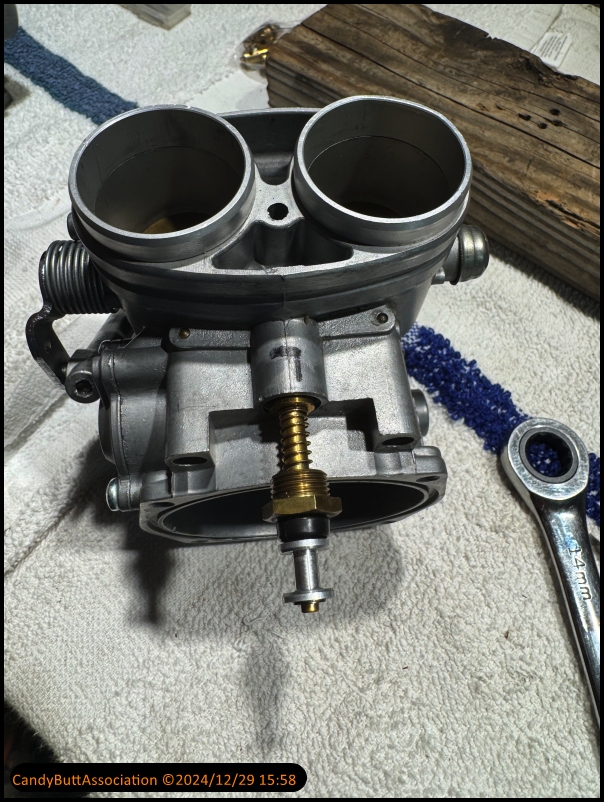
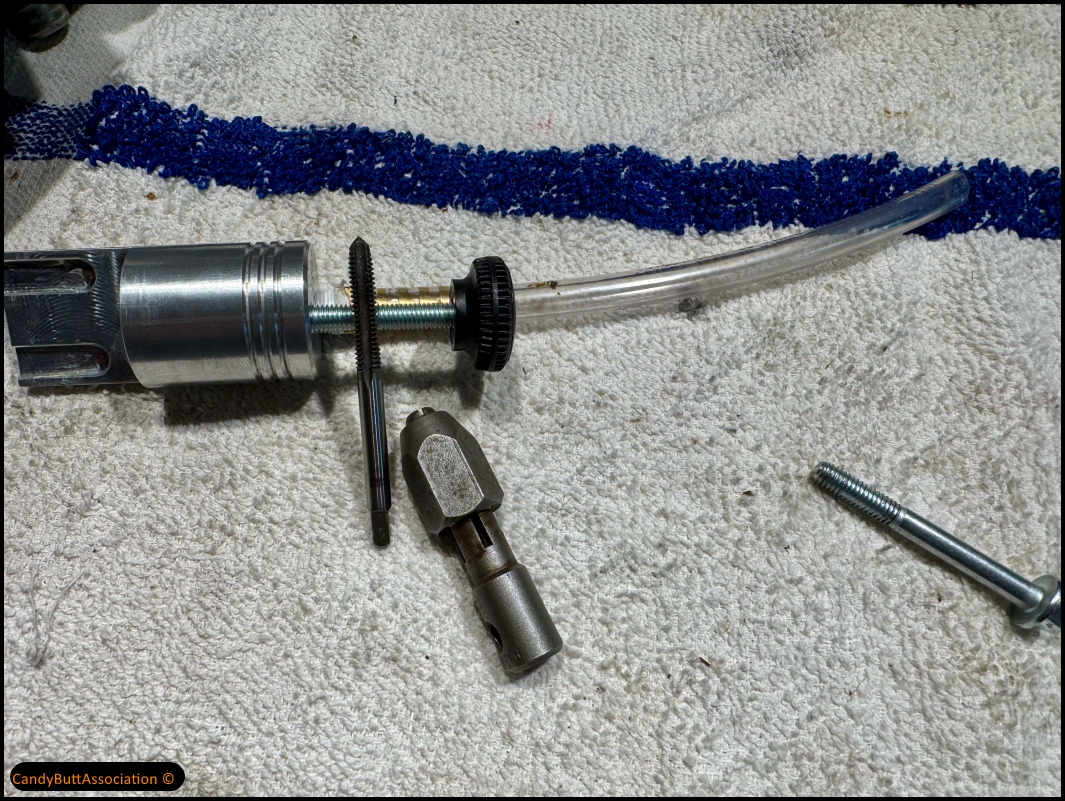
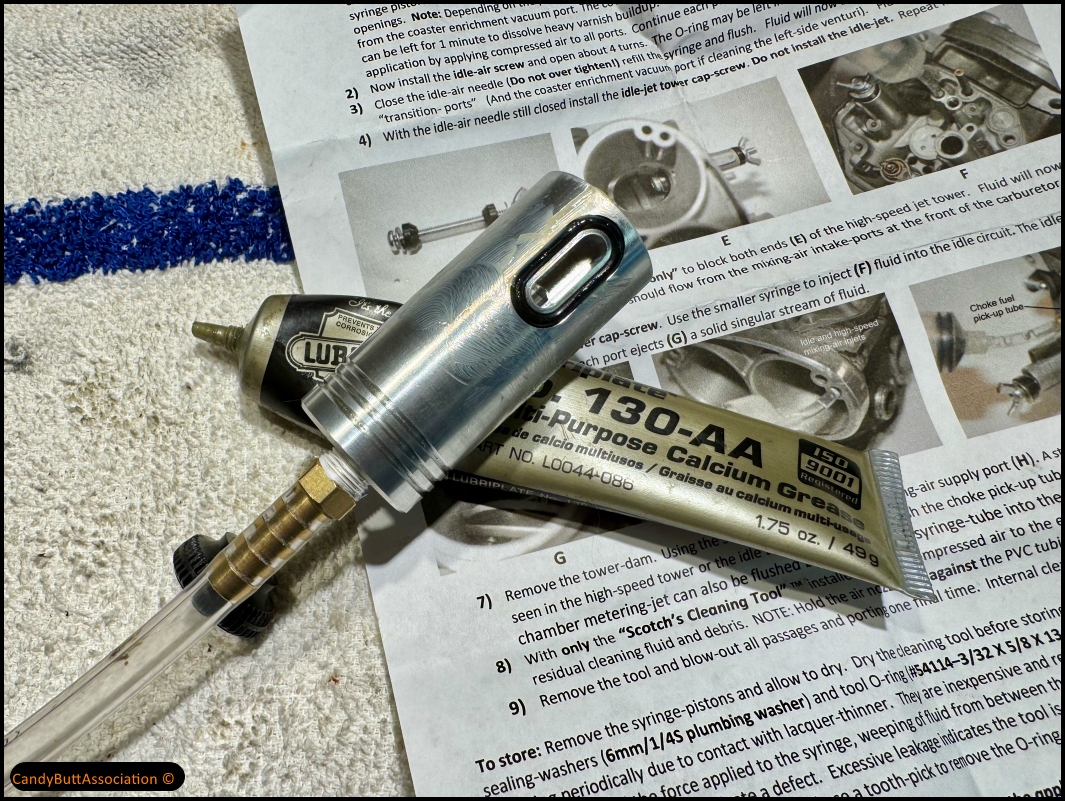
Scotch's flush tool... part one. 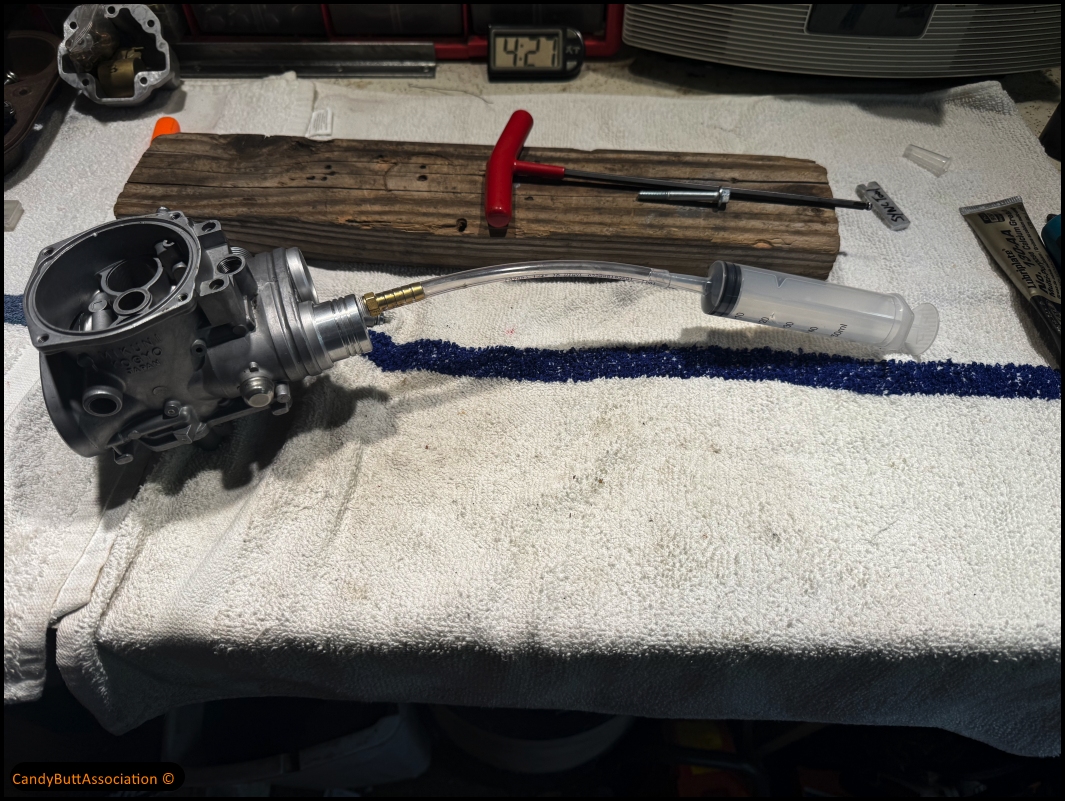
More to come. 

Theme by Danetsoft and Danang Probo Sayekti inspired by Maksimer
Diaphram Video
2024-12-30 More Scotch BlowJob
2024-12-30 More Scotch BlowJob
I found it hard to remove the Scotch tool. I thought it would be nice to have something to grab onto and they're already was a threaded hole, but I cannot find any thread that would fit a female. I tried M6x1 and M6x1.25. Also SAE. The M6x1 would engage 2, maybe 3 threads then get tight. Nothing worked so I tapped it with an M6x1.
Went to the hardware store by a nice little knob, what makes it a bit easier to remove the tool even with arthritic fingers.
Someday, I'll have a real shop. But not today. For today, I'm grateful for nice weather.
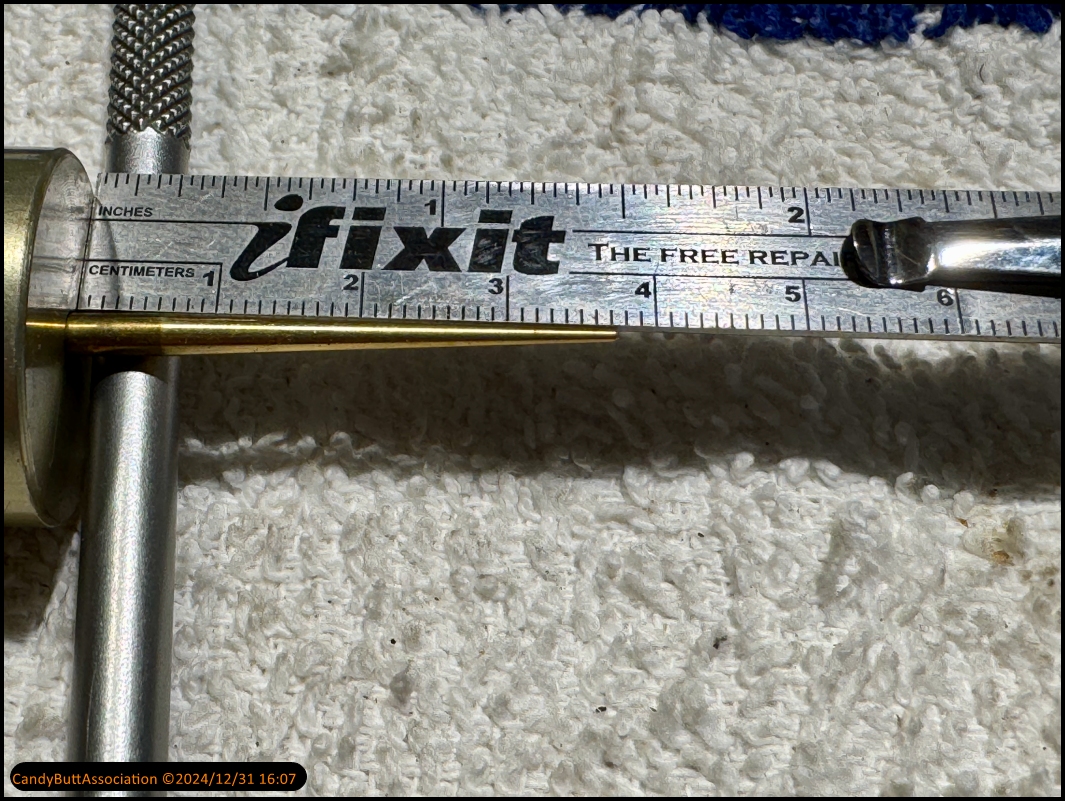
I think I got one of the last remaining scotch tools available. I don't ever recall seeing The stop plug in picture. So I went to the hardware store and figured it out. It's a M 5 x 50 mm wall with standard plumbing washers to make the seal.
55 mm would have been better, but this is the biggest M5 my hardware store I had.
Here she is all sealed up.

Inside view.
I use a little grease to facilitate an easier removal.
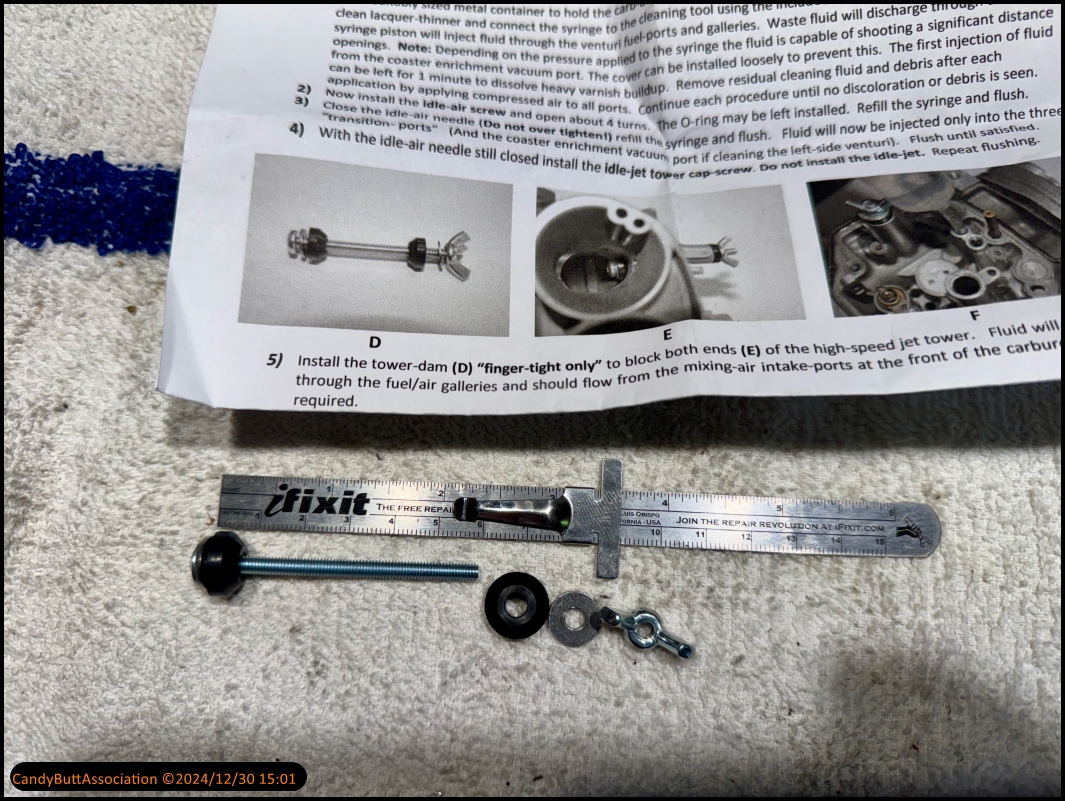
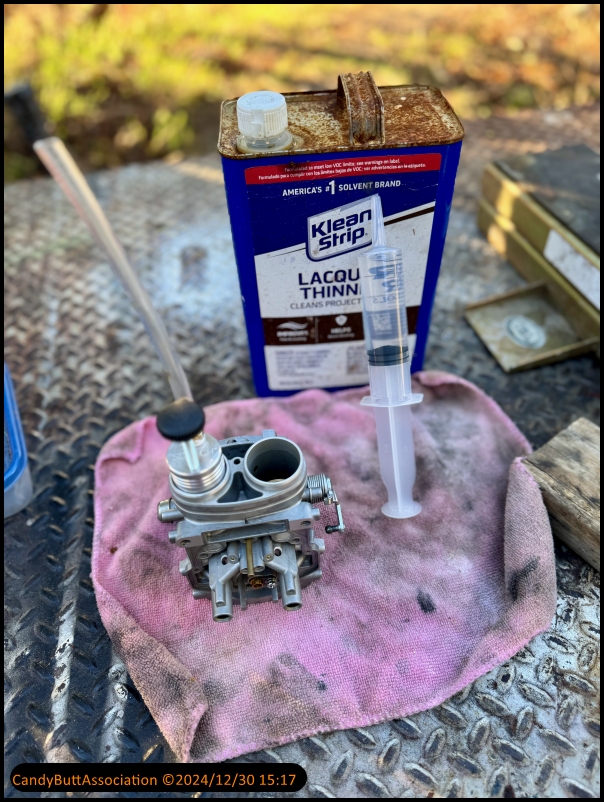
Ready to start the flushing process for scotches document.

I use the recommended salt, or thinner, with about 40 cc per flush.
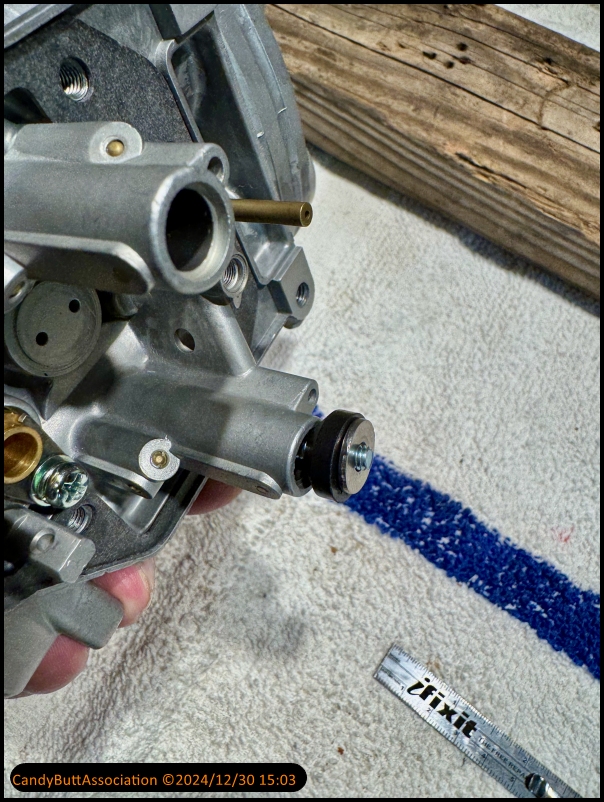
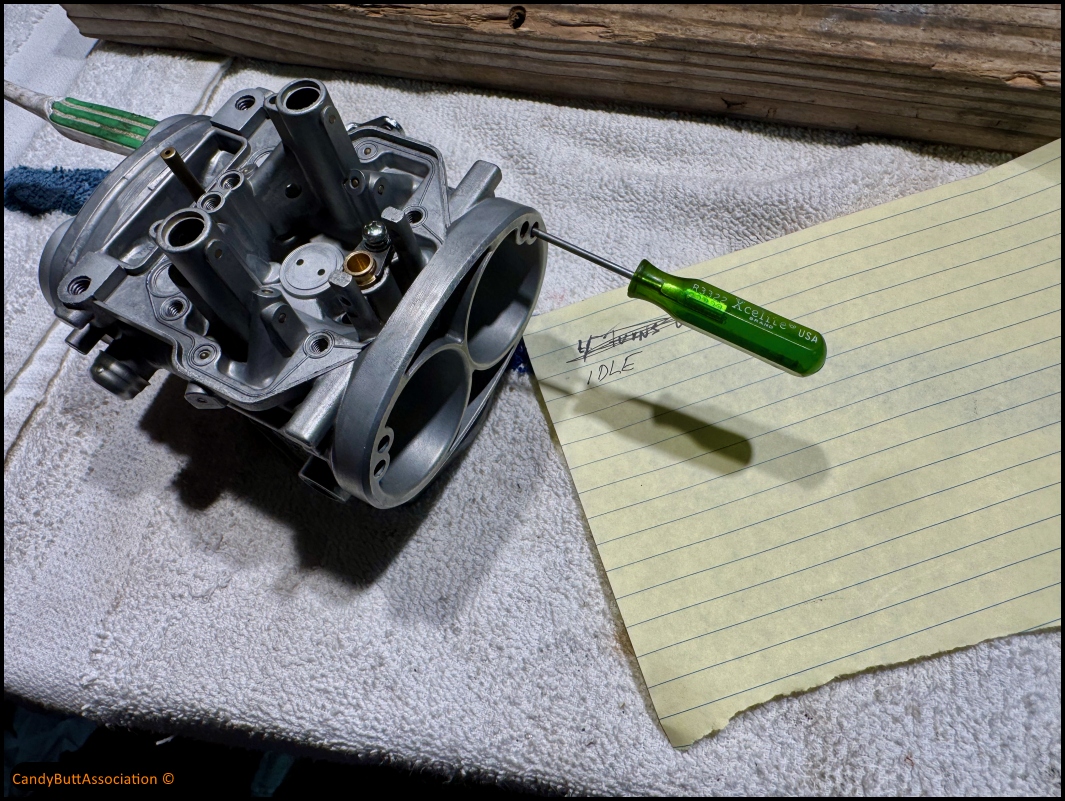
I do have a couple of enhancements for scotches document. When checking for clear passage ways of the four little passageways by the butterfly, the idle air screw must be turned about four terms out to allow the fluid to reach the four holes. I had flushed and flushed and flushed and flushed and flushed and flushed and still didn't have any flow through the three smaller holes. Only the larger hole had flow. Got to look at the passageways and saw that this needle would have to be open.
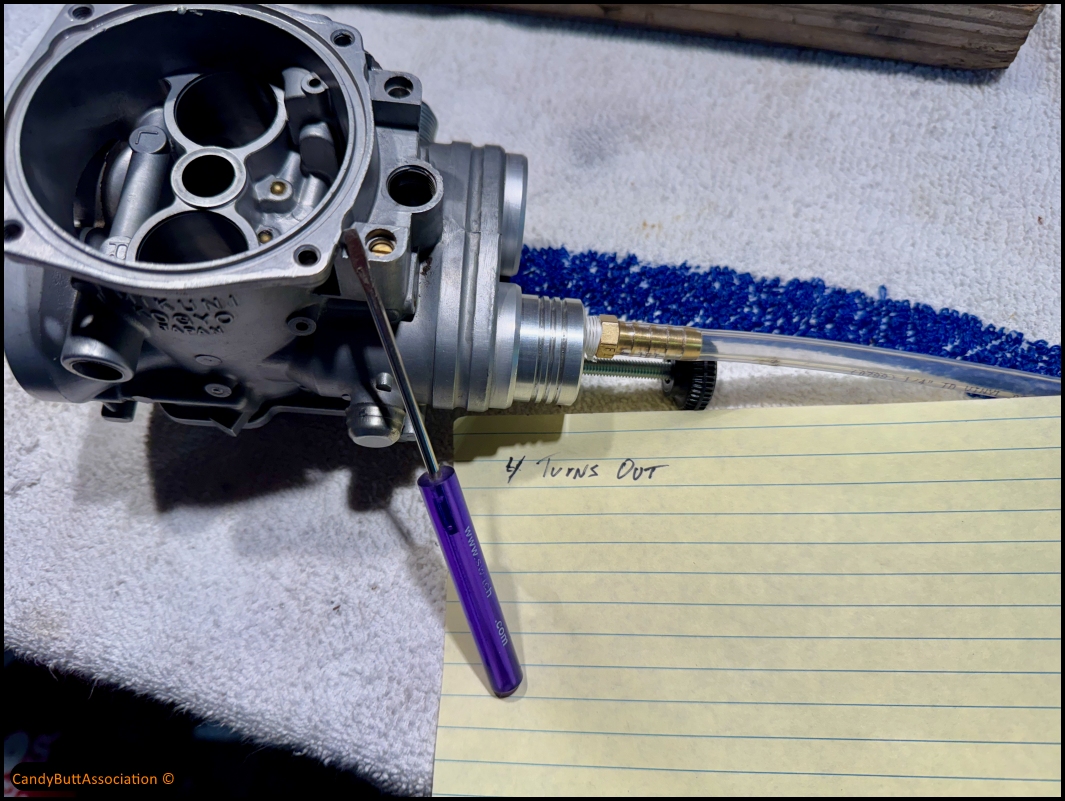
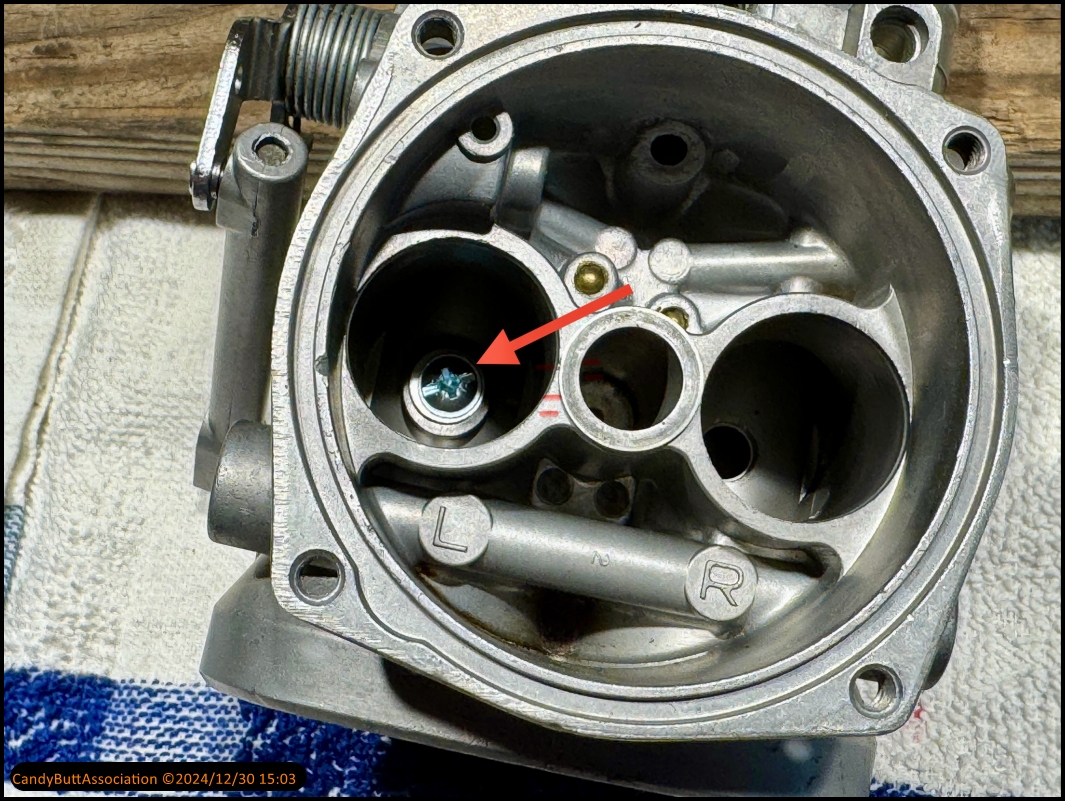
The top hole is for the idle circuit. Note that in this picture, the carburetor is upside down.
Conversely, the bottom bowl is for the high speed circuit, meaning the emulsifier tube and main jet.

x
2024-12-31 Scotch Blow Job OH SHIT
2024-12-31 Scotch Blow Job OH SHIT
Sometimes, well, sometimes.
Things go don't as planned.
As in 'Oh fucking Shit' wish I hadn't done that.
Started off working on carb #2, using the Scotch Blow Job tool. But first, I had noticed that at the recommended 3.5 to 4 turns out on idle mixture adjustment screw,
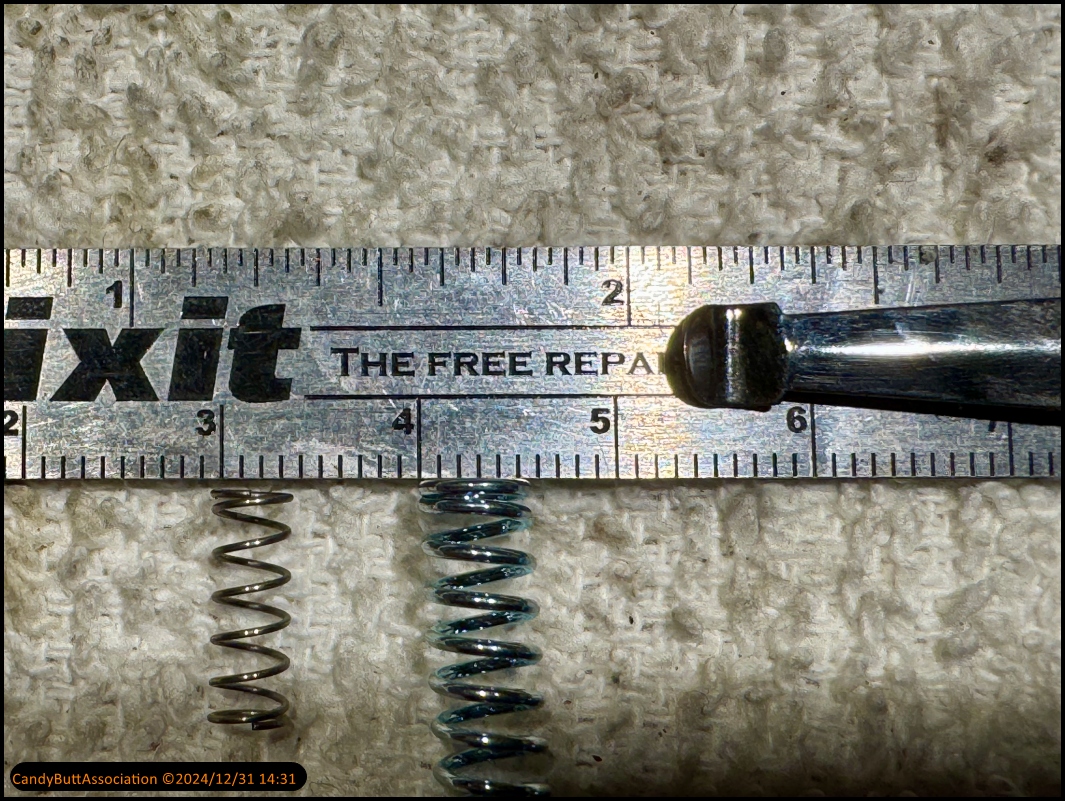
that the needle jet was loosey goosey. So went to anothe hardware store to find a longer spring.
Thought I had it.. but no.
Only a 3mm will fit into the recess the 5 mm OD spring I found.. won't work.
Should have taken this as a sign and stopped. but NOOOO..
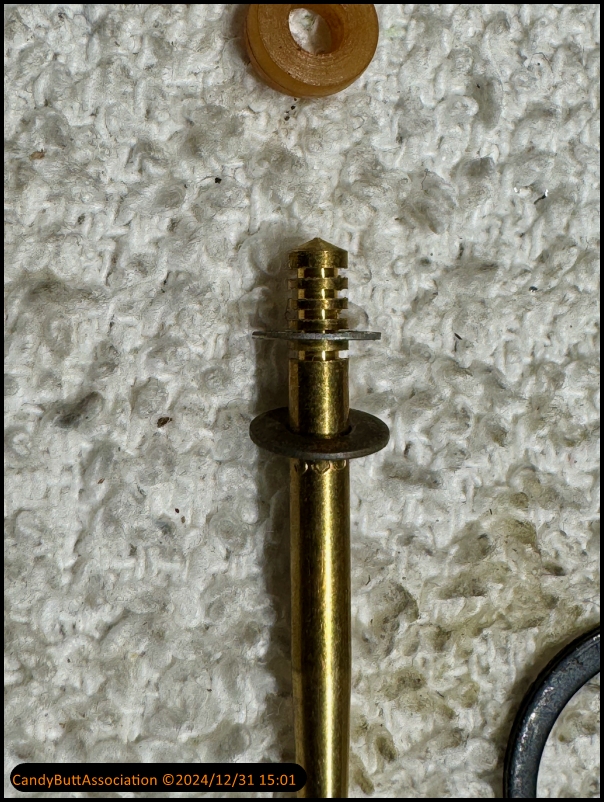
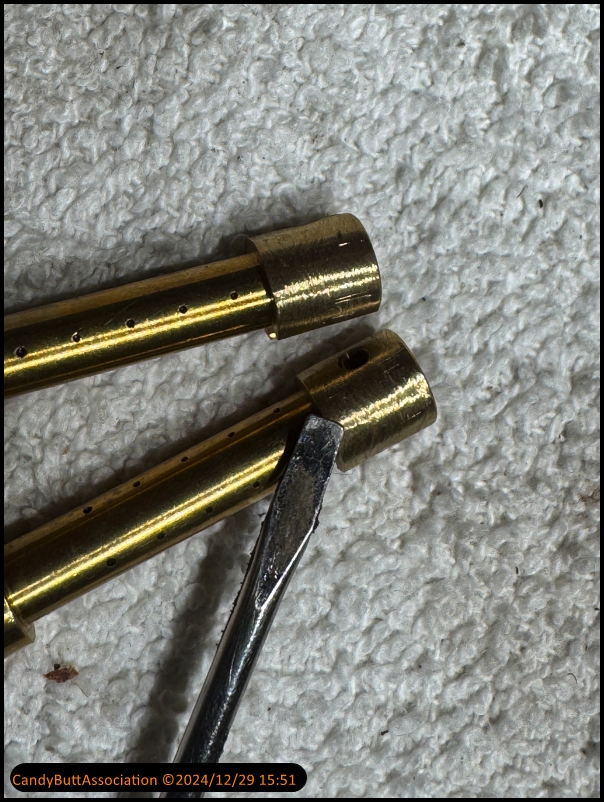
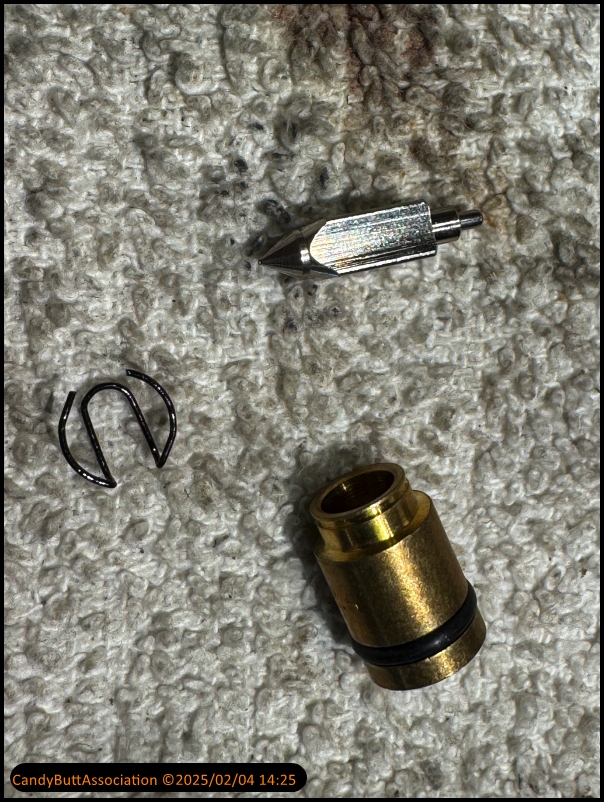
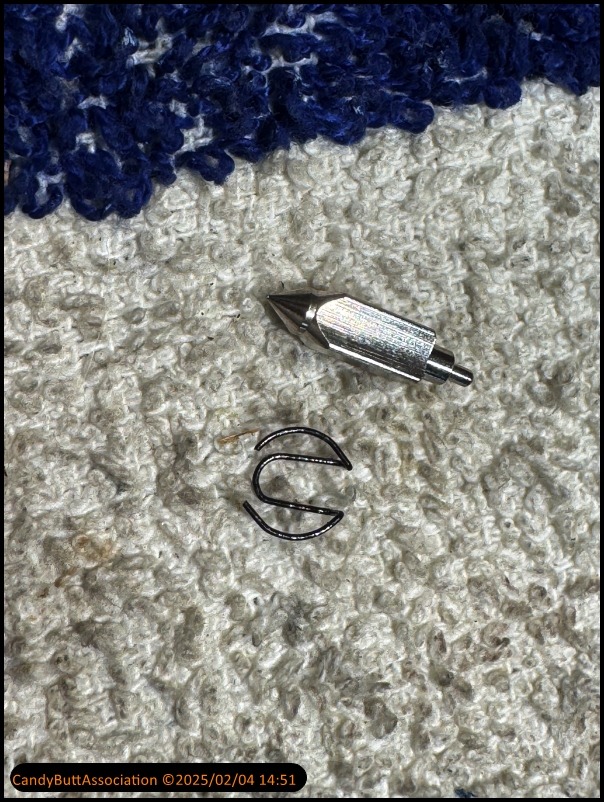
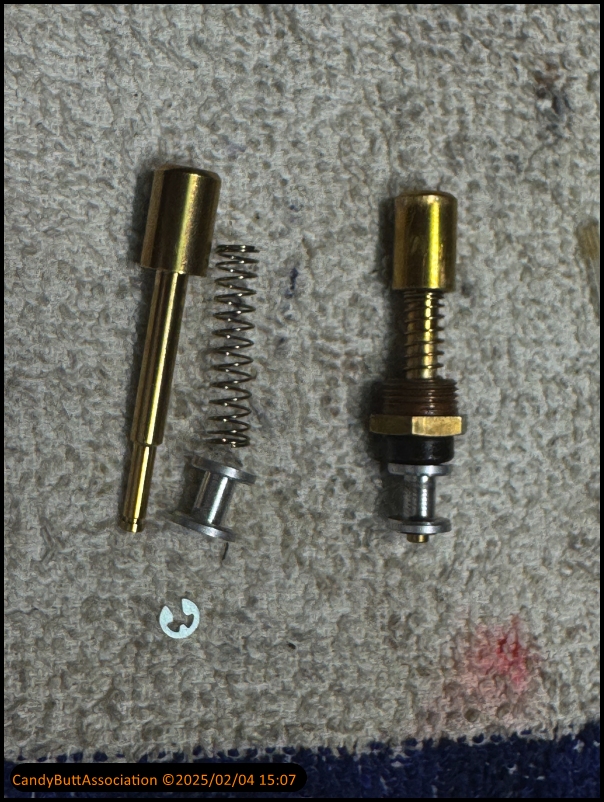
Pulled the needle jet to see settings and make measurements.. Little did I know this was soon to be the last I've seen of it.. sigh.

Circlip at 4th position.. with a shim washer to raise it slightly higher than a 'groove' setting.
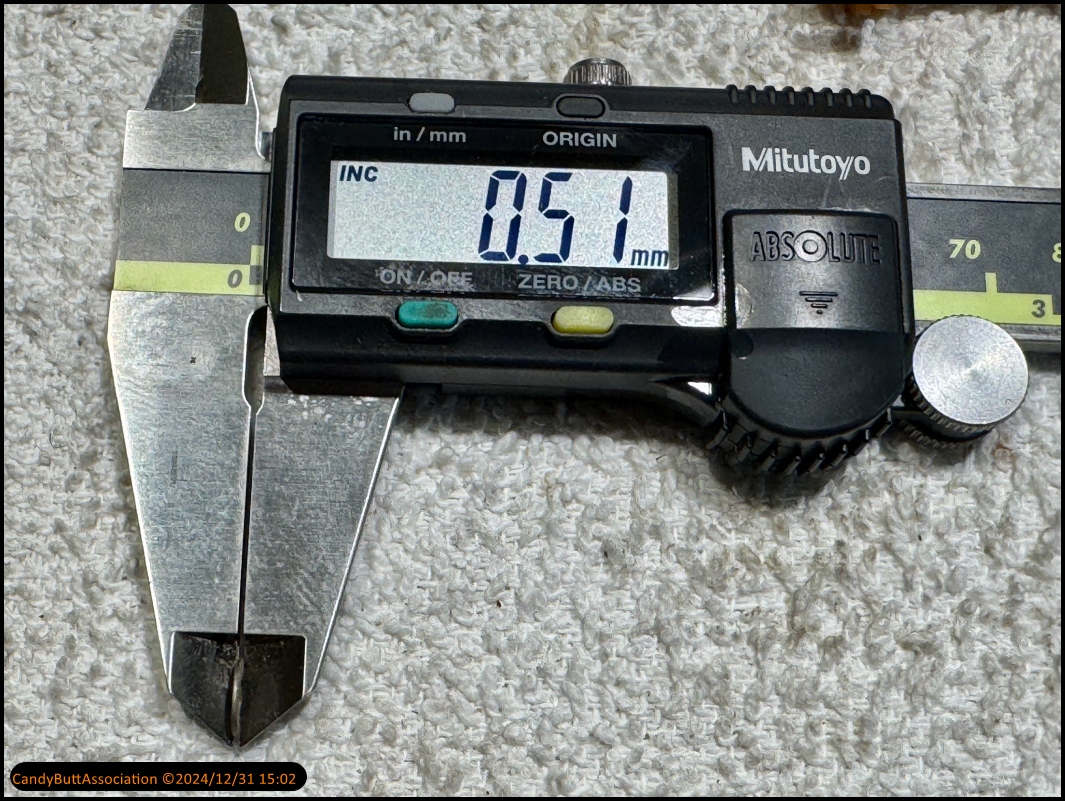
Shim washer thickness.
Needle jet stamping.

All brass is new after 'WiredGeorge' rebuild. Not sure what 'kit' he uses.
But the taper looks good.
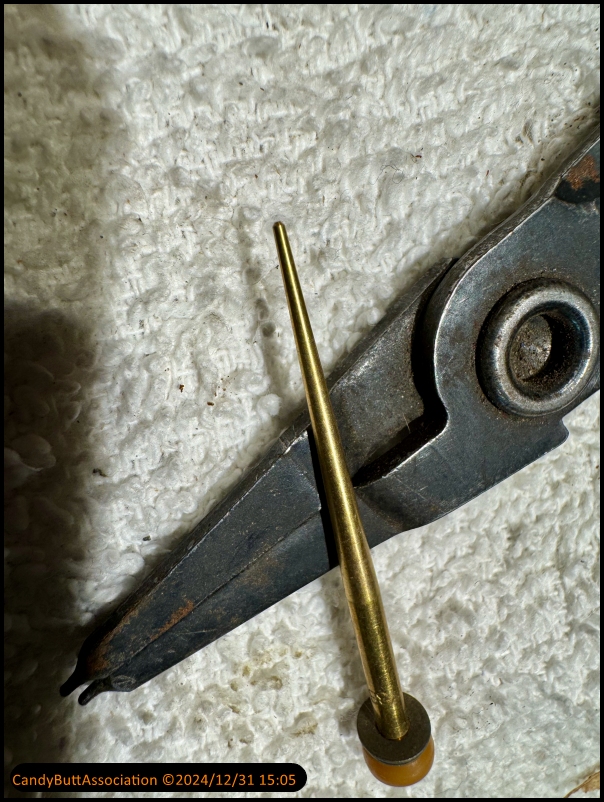
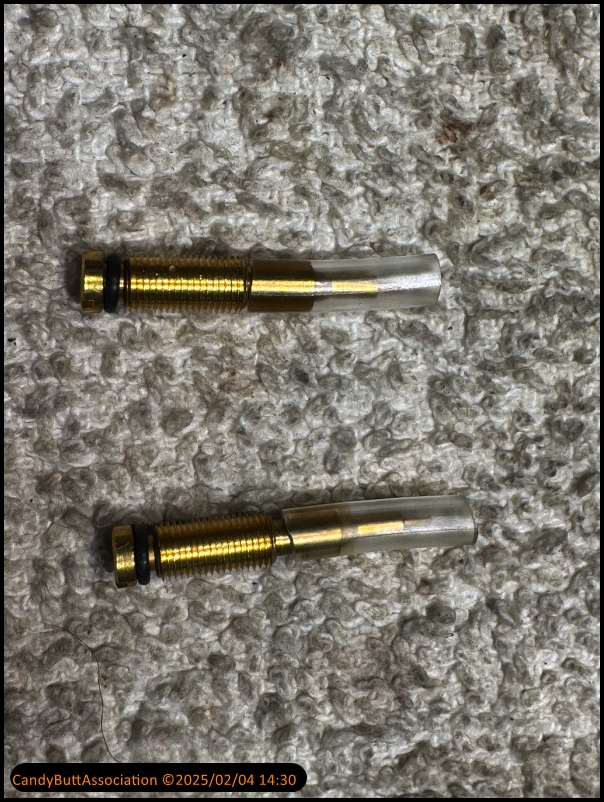
Thought I'd take a measurement of one.. then compare the other 5 to determine if length was the same.. To save time from pulling the slide circlip on
each and slide.. So far so good.
Off we go.. pics out of sequence..
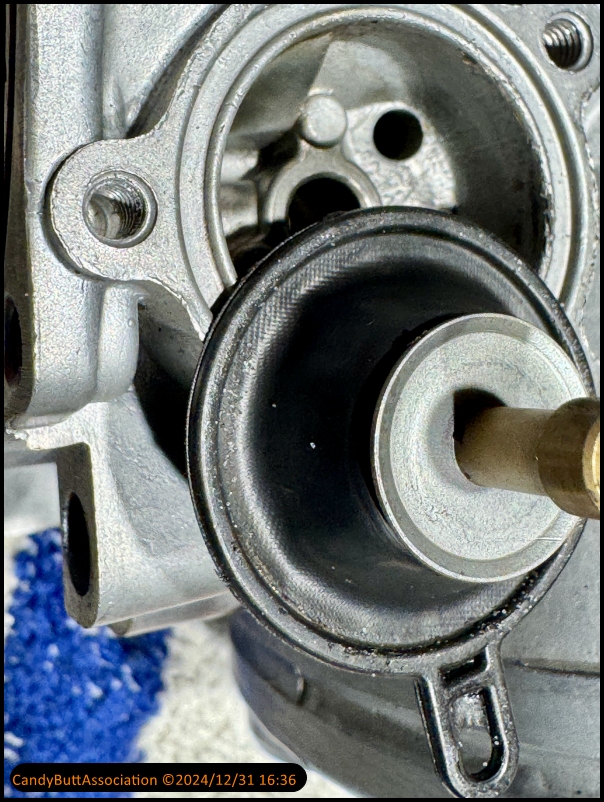
Noticed some metallic debri on the de-cell diphragm. WTFO?
Like the carb body I worked earlier (this is the middle carb) some crap in this location. Must be a 'drop' point with little to no fuel flow during use..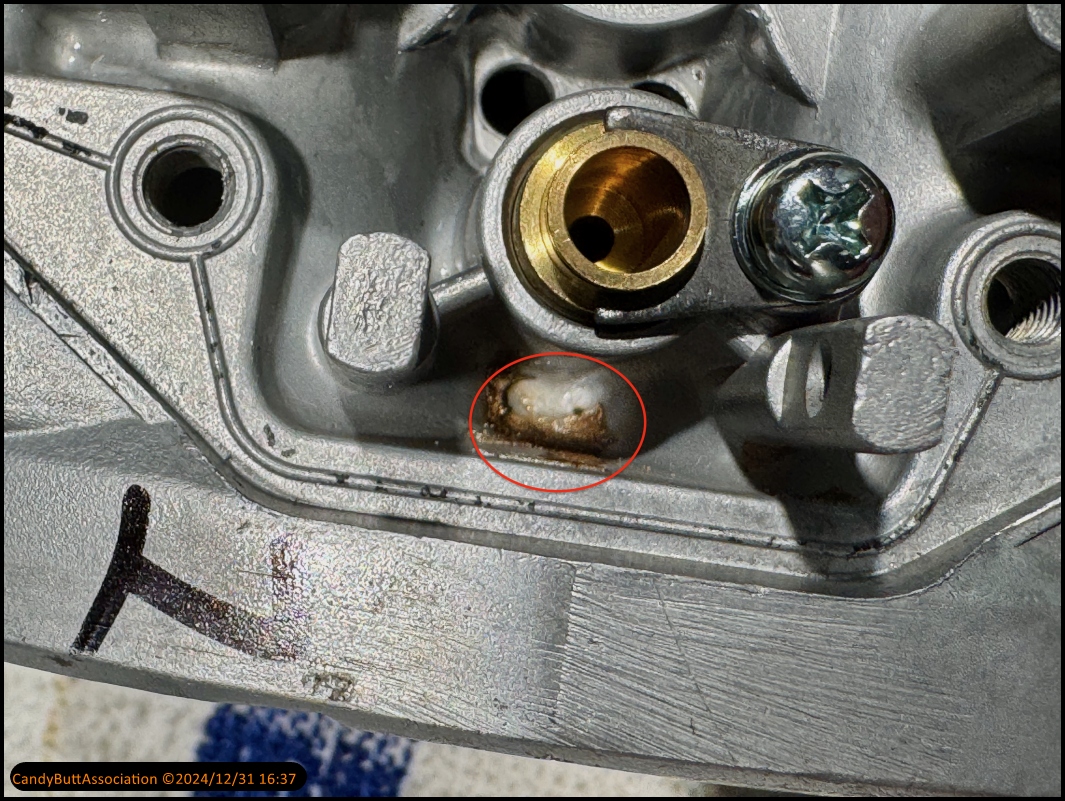
Noticed the emulsifer has a larger diameter passageway than the ones below it..

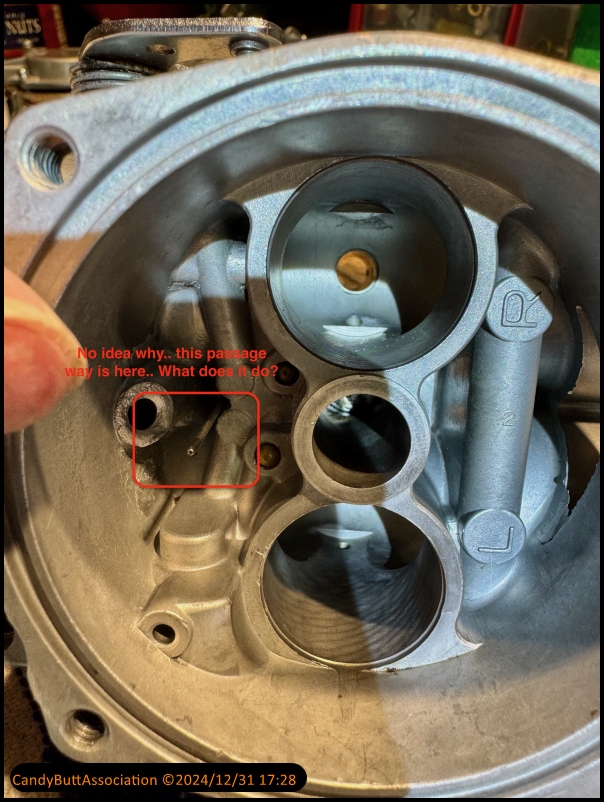
Then discovered this hole.. Where does it go? What does it do?
x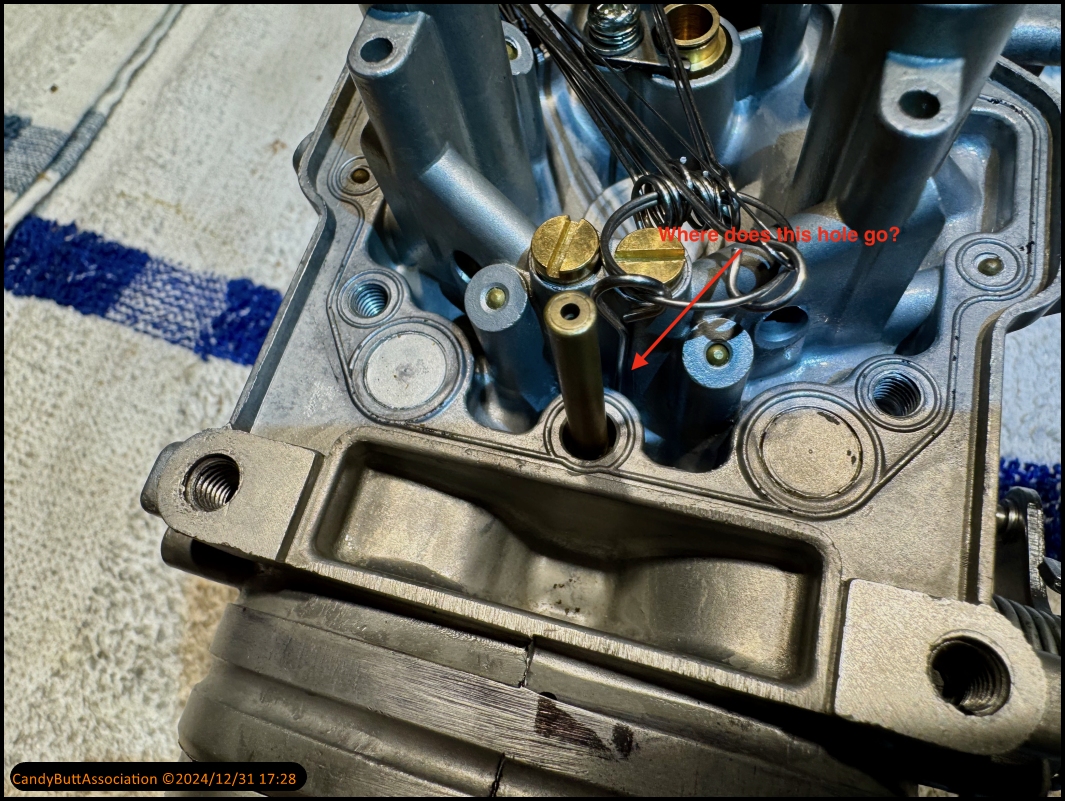
It simply goes through from top to bottom chambers..no idea why.
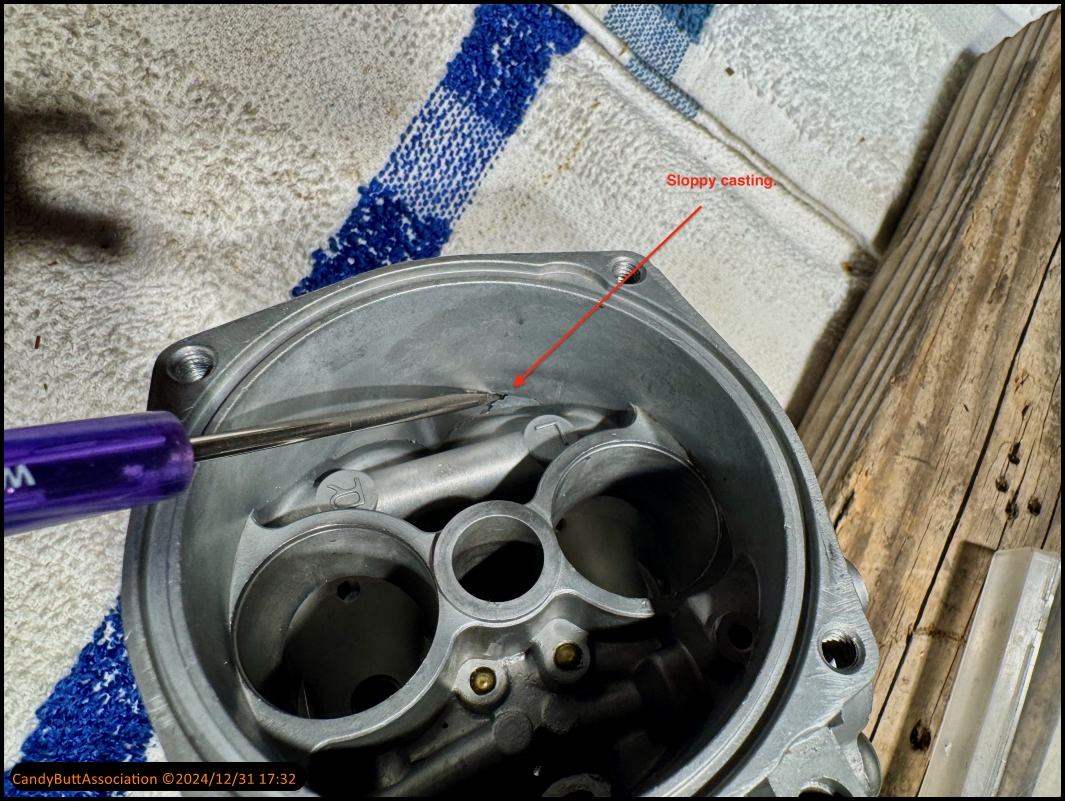
Carb casting flashing..the #1 carb had the same issue. Might clean it up, if nothing else to prevent vibration breakage and potential internal debri..
Now for the Oh Shit part..
Sigh. When attempting to reassemble the needle into the slide..my arthritic fingers gave way to the spring pressure, and the needle, spring, top cap spacer..
Are somewhere here..
I looked for over an hour, could not find.
Will have to remove contents from drawers on right hand, pull it out, and look behind.
Well, just Fuck Me.
What went airborn...
Well, fuck 2024. I'll find it next year?
2025-01-01 Scotch Tool Cleaning - Day 3
2025-01-01 Scotch Tool Cleaning Day 3
Hitting the homestretch now.
Another 3 1/2 to 4 hours and all three carbs have been cleaned using the scotch tool, given a blow job with the air compressor at 40 psi.

I still have the problem of the missing needle, spring, and top hat that went for a cruise into space somewhere in in the shop.
I am hoping that the carb kit has these parts, otherwise I will be searching for hours.
My little work area. Old-school stereo upper left-hand corner various old drivers licenses on the wall. Someday he'll become more organized.
As you can see, I have scotches instructions in the bar, right hand corner, and then following it verbatim. Well, actually, it's more like a procedure underneath a revision.
I disassembled one of these to see where the needle position was clipped. Upon reassembly, the spring loaded needle took like a rocket into space. I did, however, take measurements so I could measure the remaining needles without disassembling them. I have to find a better way to reassemble safely.
Here is the next one.

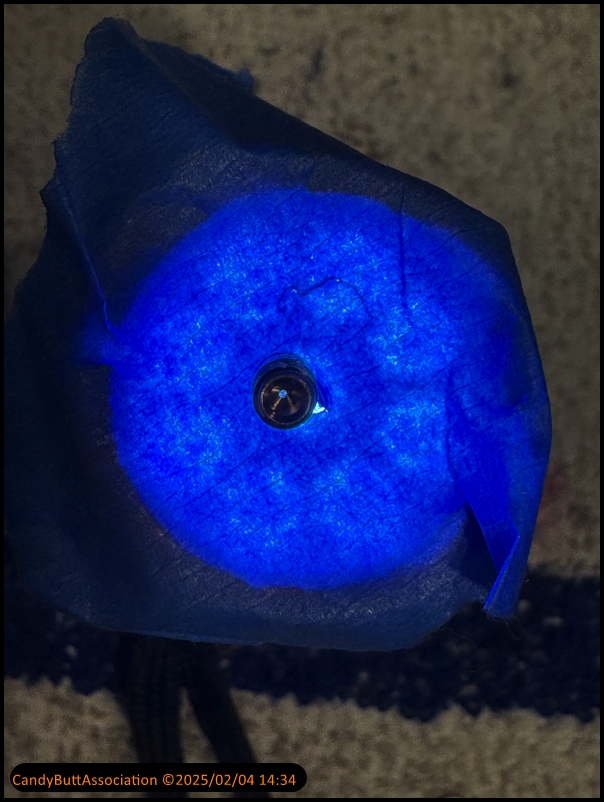
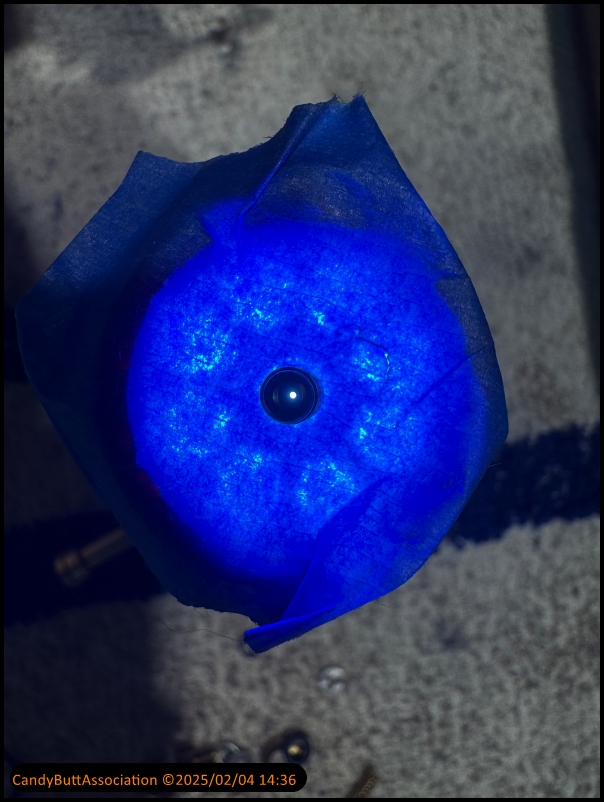
Speaking of diaphragms, I decided to try a little RuGlide to moisturize. I remembered working in a print shop with all set presses where we would treat the blanket with a rubber rejuvenator that extending blanket life, increasing print quality. Much to my surprise the root glides work fantastic on these diaphragms. How long it will last once exposed to gas and vapor I do not know but I will say there was a 80 to 90% improvement in the suppleness, flexibility after the treatment.

Of carbon silica. The last carpet that I worked on had evidence of carbon silica in the fuel coast enrichment diaphragm. Not good. Very disappointed with my so-called professional carburetor rebuilders, and it gets worse from here.

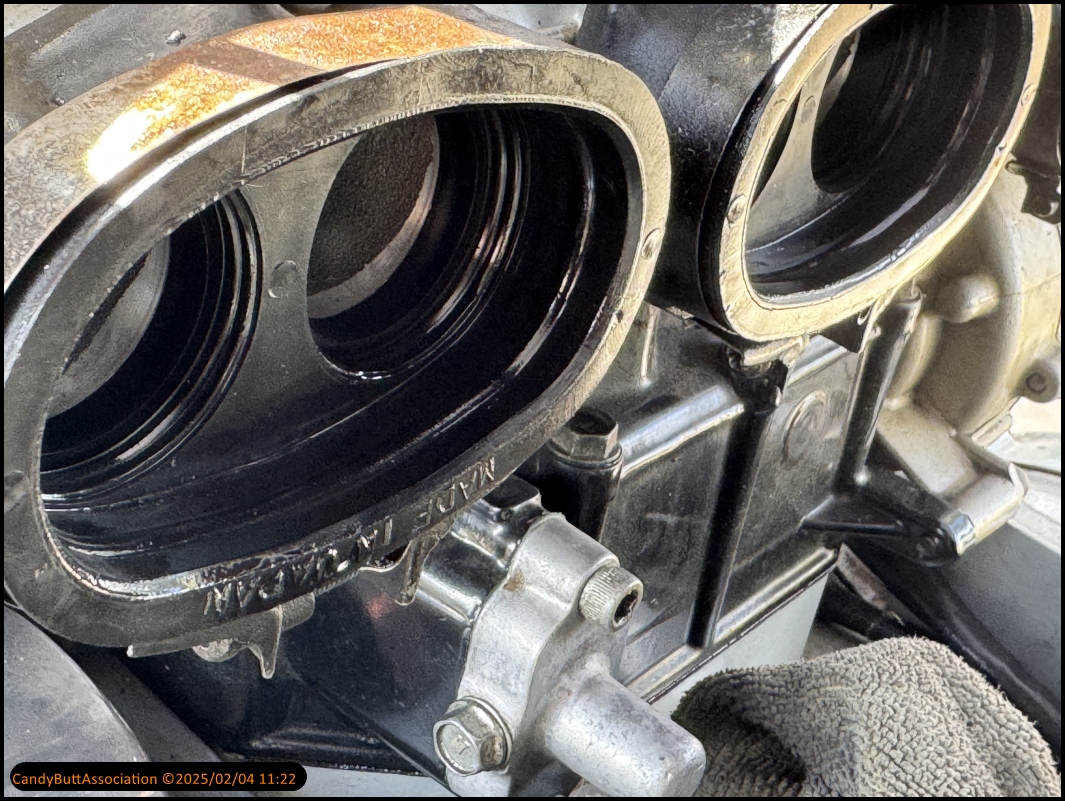
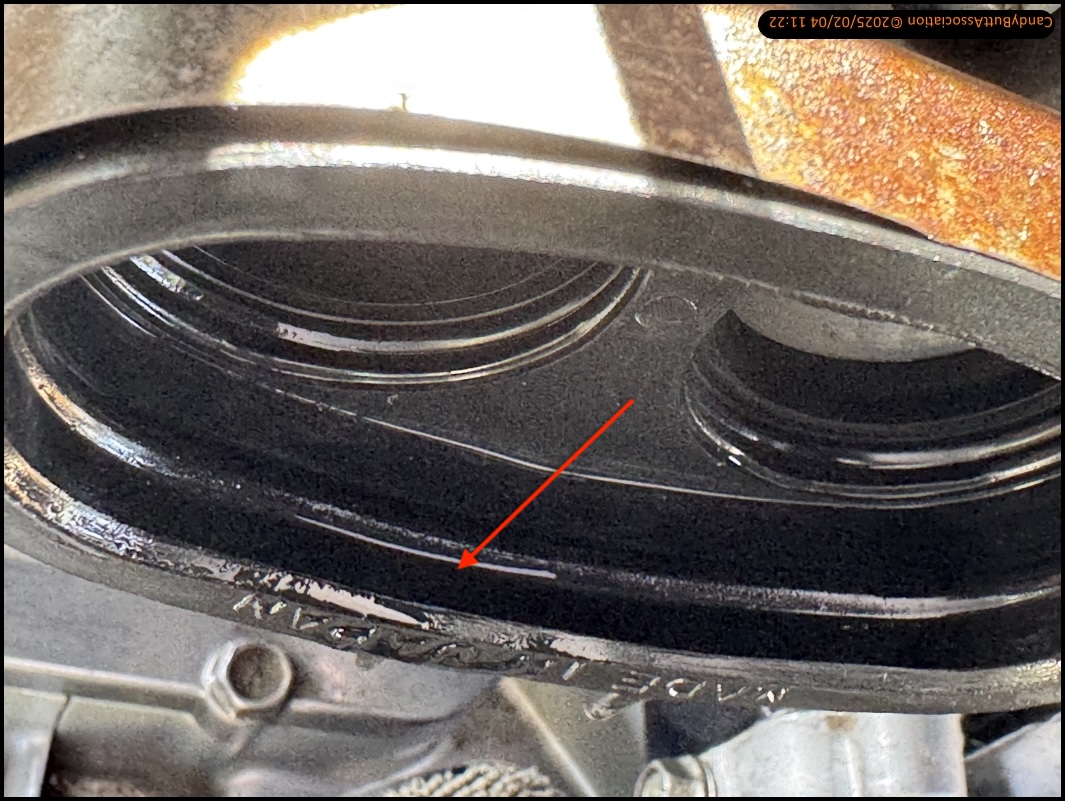
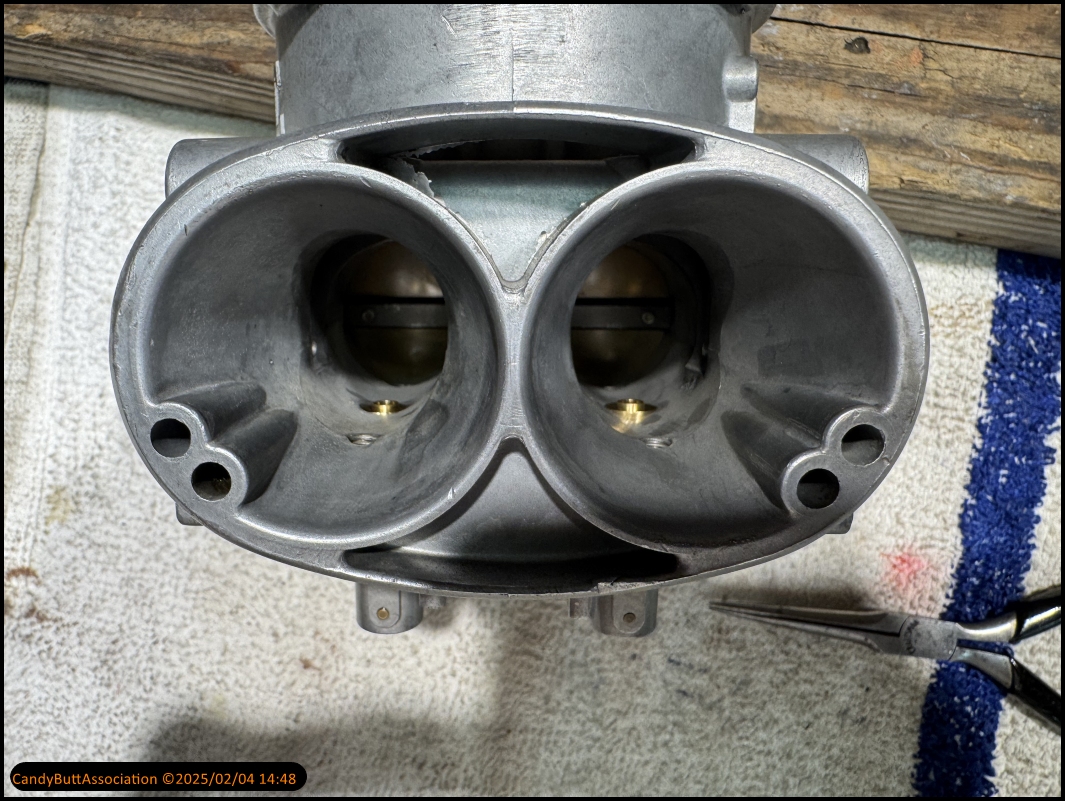
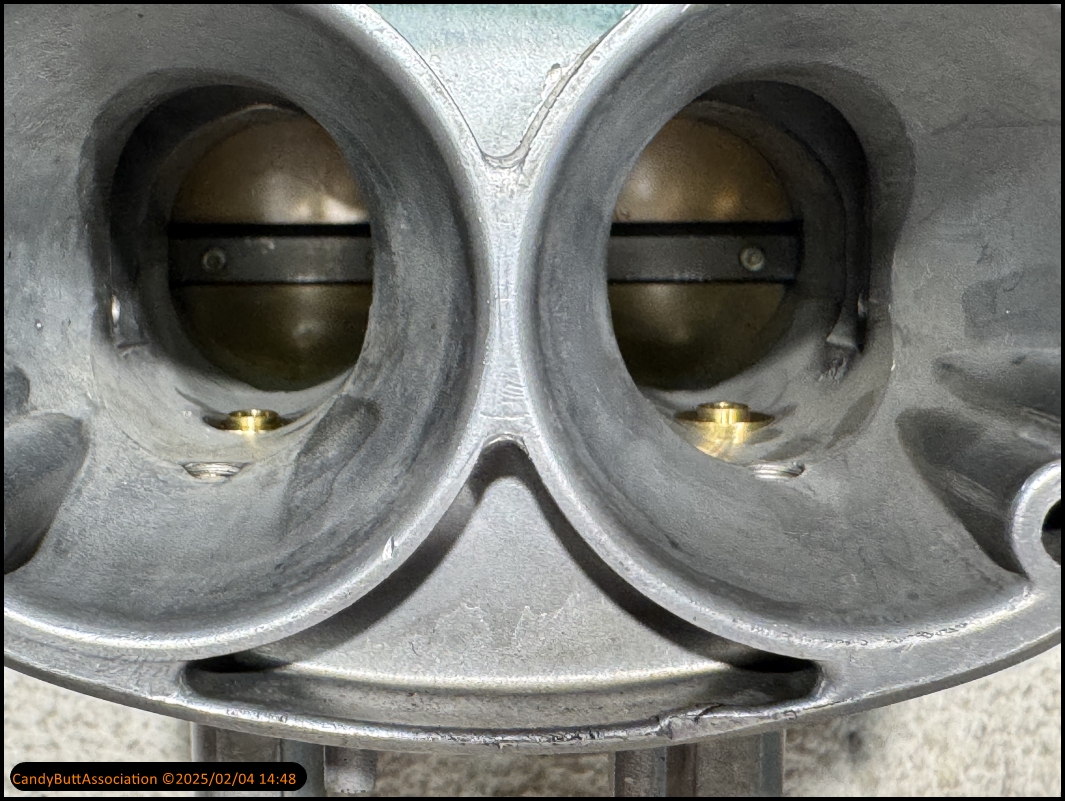
Look at this intake throat. It was so bad that the butterfly would not close fully on the spring alone.

This is unexcused. How much silicone did that cylinder just when I try to run these carbs?
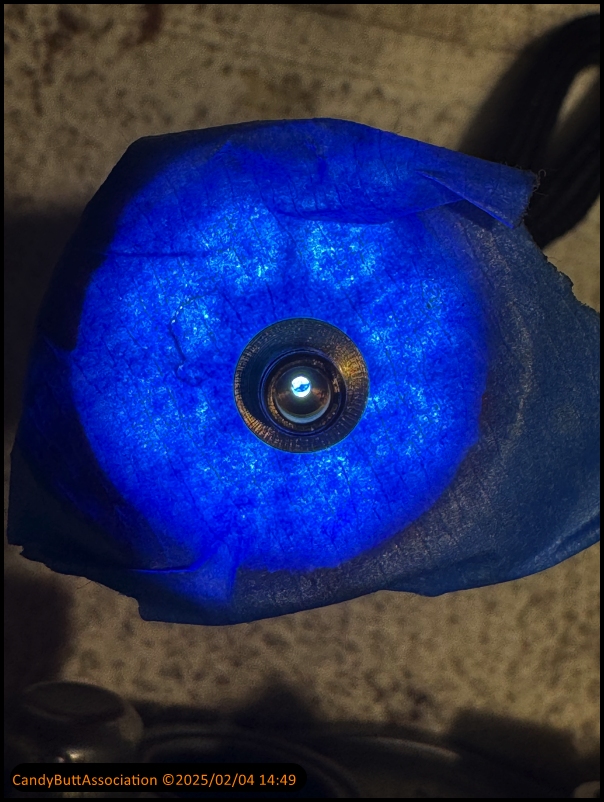
This picture is under four times magnification from the iPhone. To the naked eye, it was barely visible.

But I did notice a hitch in the get along when the butterfly was trying to close underneath the spring pressure, which got me to looking.
Then there is this on the emulsifier tube. All six had shown signs of heavy material removed to fit into the carburetor body. But this one was especially bad. I actually had to drive it out using a small hammer and drift punch. Once again, unexcuseable! Really shitty work.
I have new brass on the order and will install before putting the carbs back on the bike. Use my lathe and a scotch pad to remove the burrs.

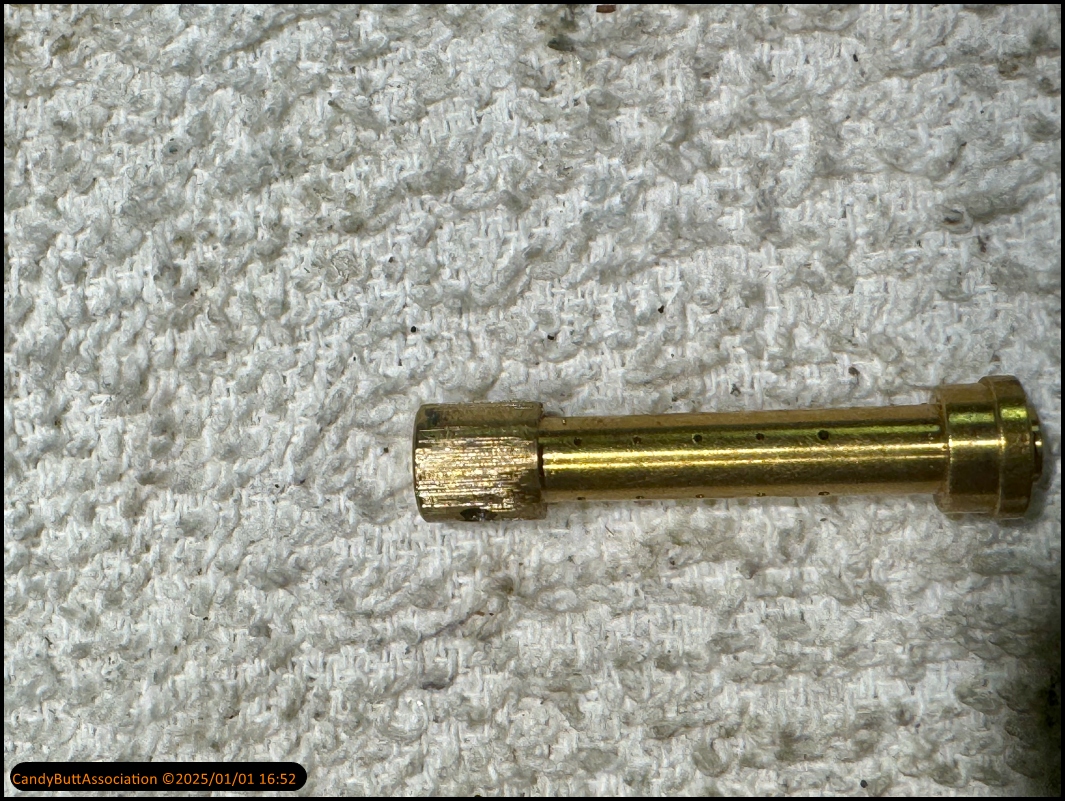
The last two needles get measured.

My measurement technique is crude, and when the new brass arrives, I will ensure they are identical in length.

This is the first diaphragm I applied RuGlide to. This was a substantial improvement.

The clock says 5:47 PM, it's dark and I am done for the day.

At this point, I have a much better understanding of how these carburetors work. I understand the idle circuit and passage ways, as well as the high-speed circuit and passage ways. The scotch tool is really a wonderful invention, well thought out and well made. I have already spent the time to learn how to synchronize on the bench so hopefully that process will go more quickly this time around.
Next up, install the new brass when it arrives, check the fuel level in each bowl and adjust as needed. I also would like to find new fuel transfer tubes that connect fuel delivery to each carburetor.
That's it for now, goodbye.
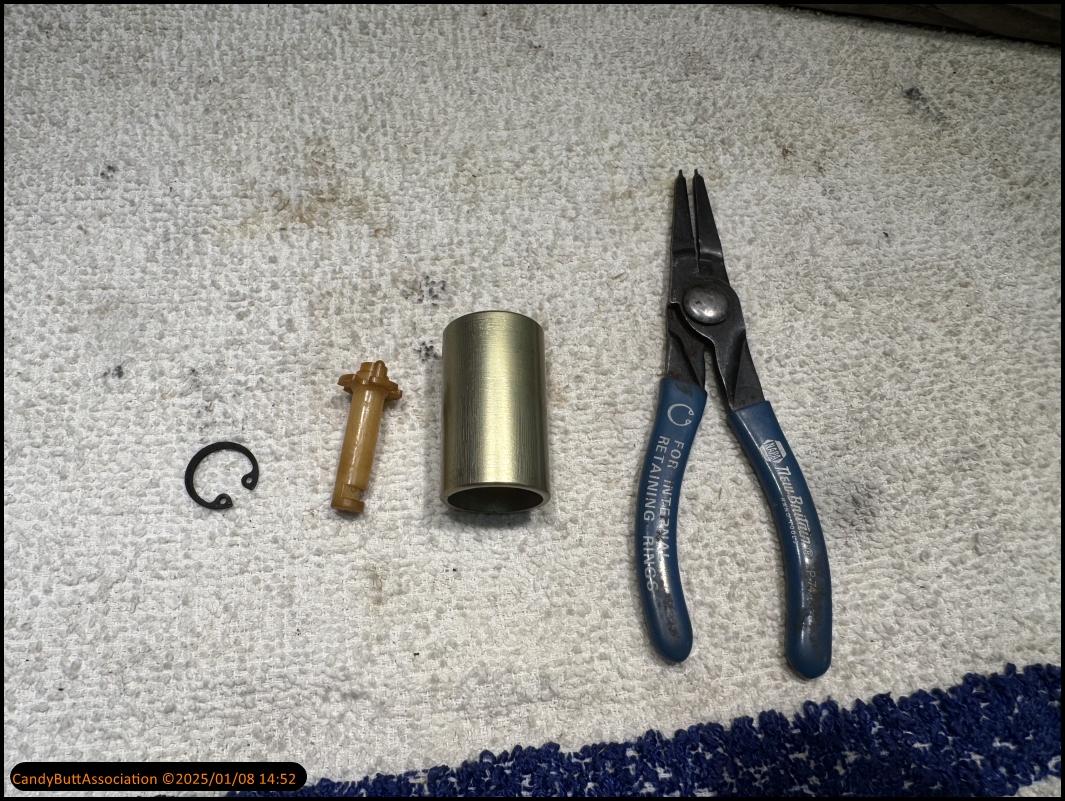
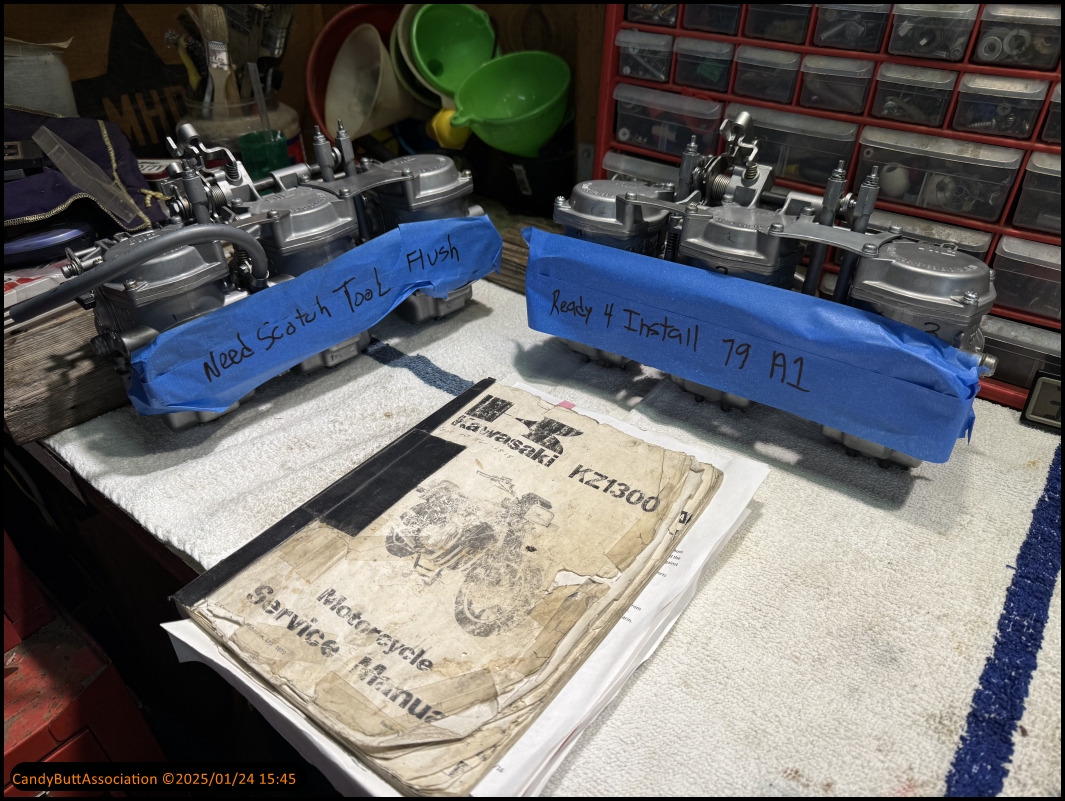
2025-01-08 Kz1300 Carb Reassembly
edit
2025-01-08 Kz1300 Carb Reassembly
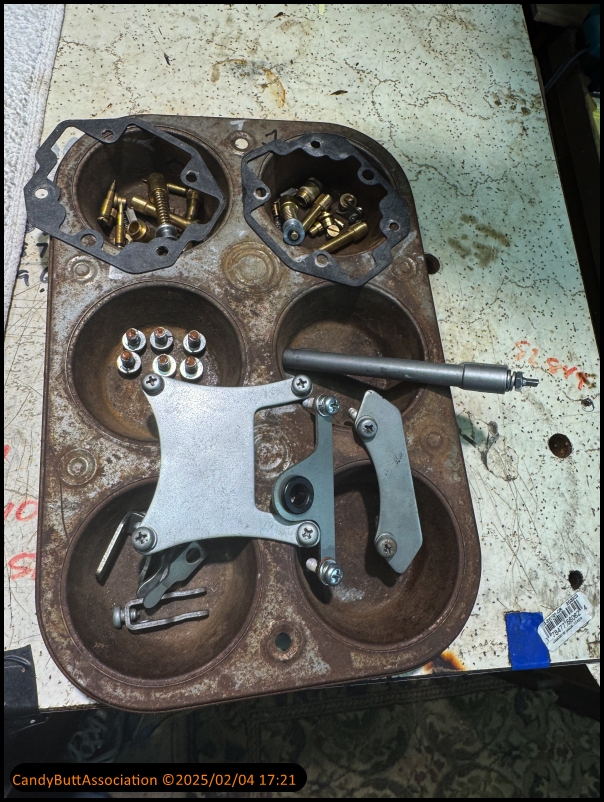
After cleaning the carburetors with the trademarked, and brilliantly designed and built scotch tool, it's time to reassemble the carburetors on the bench. I also received a carburetor kit with brand new brass, so I was able to replace the missing in action spring that went flying into outer space last week. After tearing the shop up from top to bottom, I was able to locate the needle, circle clip, washer, and plastic spacer. But the spring is long gone. Happy to see that the spring is part of the kit.
Went to Harbor freight and purchased a set of snapper ring pliers.
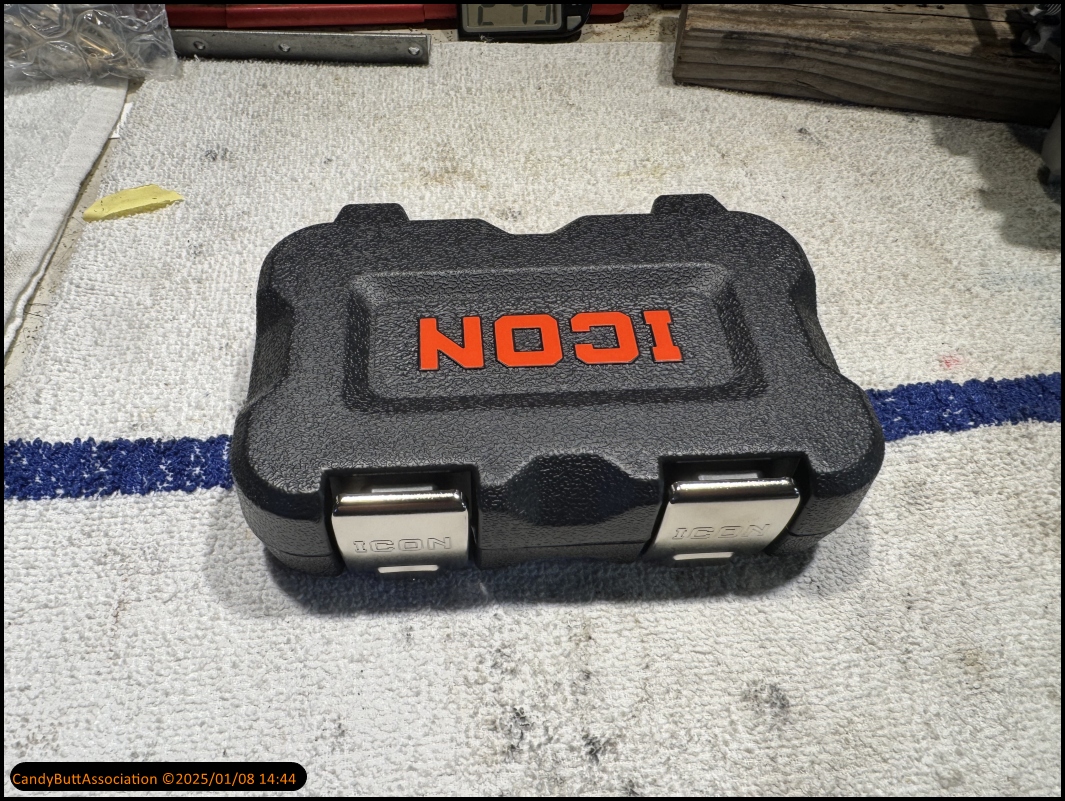
For the price point, these are pretty nice, even though they did not work in this application.

Let the games begin. This was the only pair of snapping players I had that would fit into the inner diameter of the slide and still access the circle clip.
Here is the carburetor kit from Damen Ding, China.

To facilitate indexing of the tab into the hole, I marked the tab so I could easily see how to place the plastic into the slide.

This time, instead of taking a chance of the needle and assorted parts taking a lift off into outer space, I used
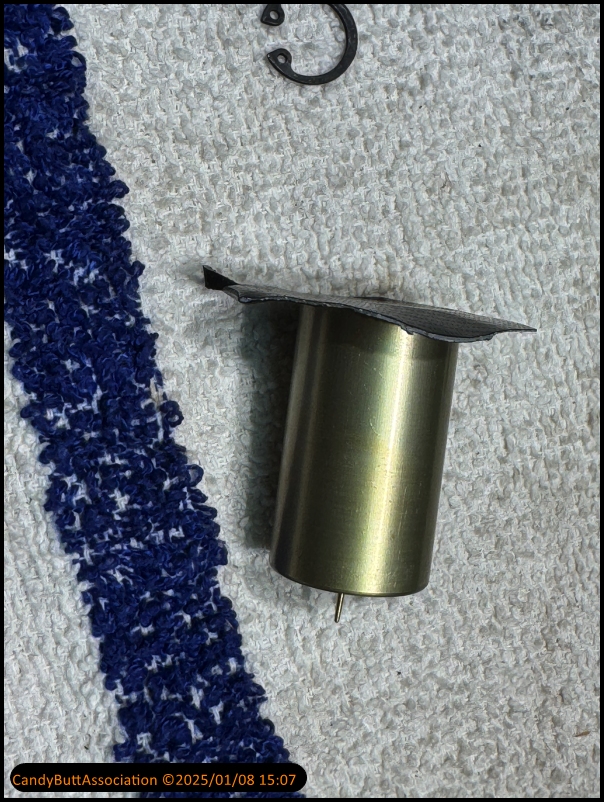
gorilla tape to ensure nothing would escape while I secured the needle underneath spring tension.
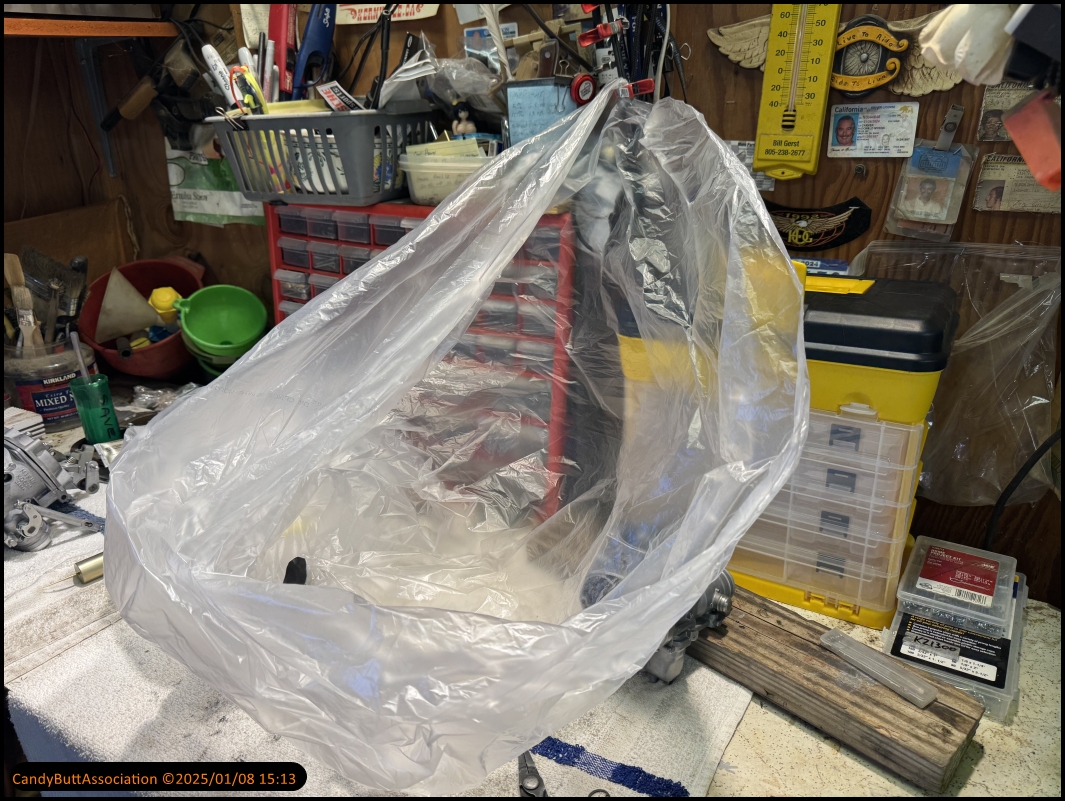
Years ago, a very good friend of mine, Hal Risser, talked me into buying a set of hemostats.

This is a very incredible useful tool.
Another friend of mine, a neighbor, Gary, former high school, shop teacher, said he sometimes used plastic to ensure flying parts were contained.

This is a great idea.
Sure, it's a little awkward to work inside the bag, to have visibility, but it sure is easier than tearing the whole shop apart looking for missing parts.
Glory is mine. Reassembled and no space junk.
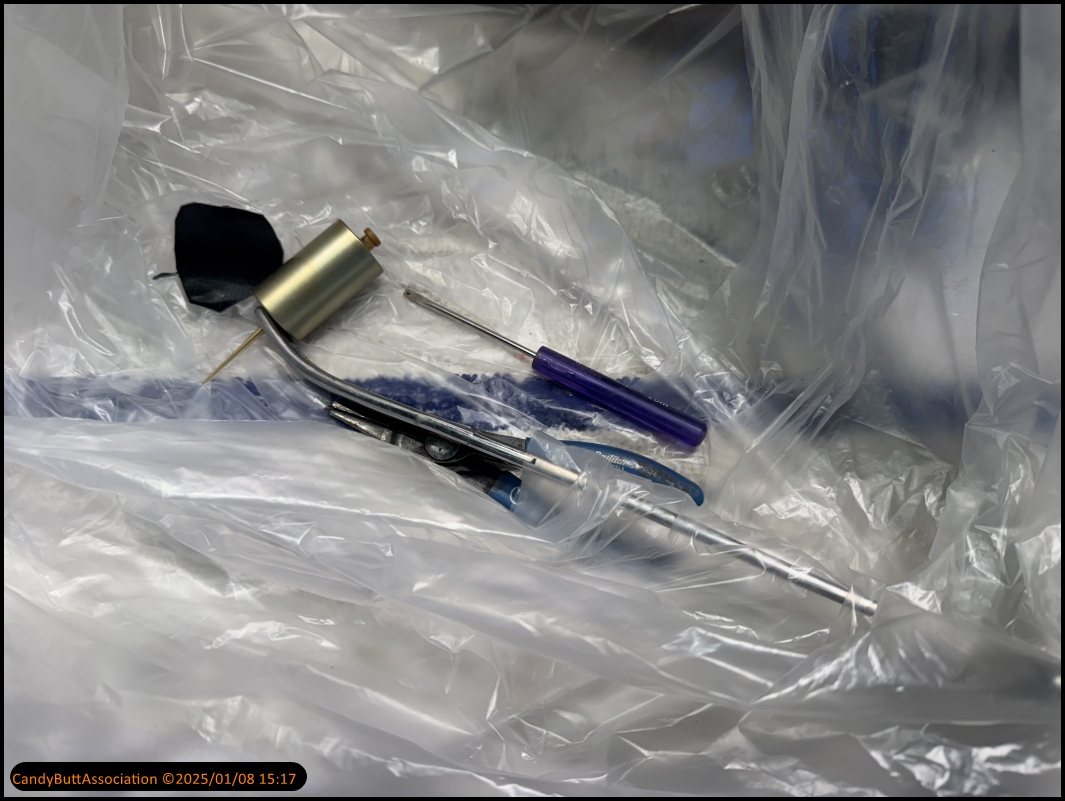
I have new fuel transfer tubes on order, but thought you still might be OK to use.

I use Parker O-ring seal to keep the O-rings fresh. It is good stuff.
The rest is pretty straightforward, now to check the fuel level, perform a bench synchronization, and then hopefully have a good install with better results.
x
2025-01-23 Kz1300 Carb Fuel Level Prep
2025-01-23 Kz1300 Carb Fuel Level Prep
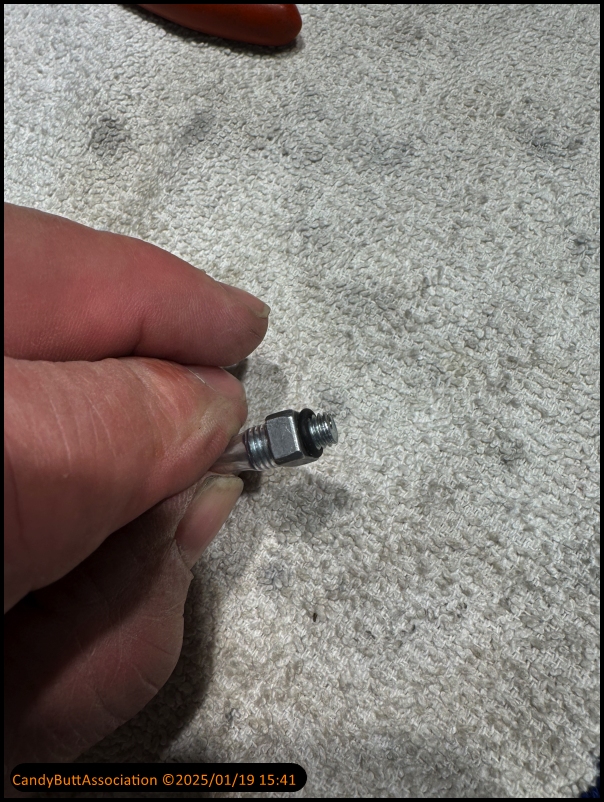
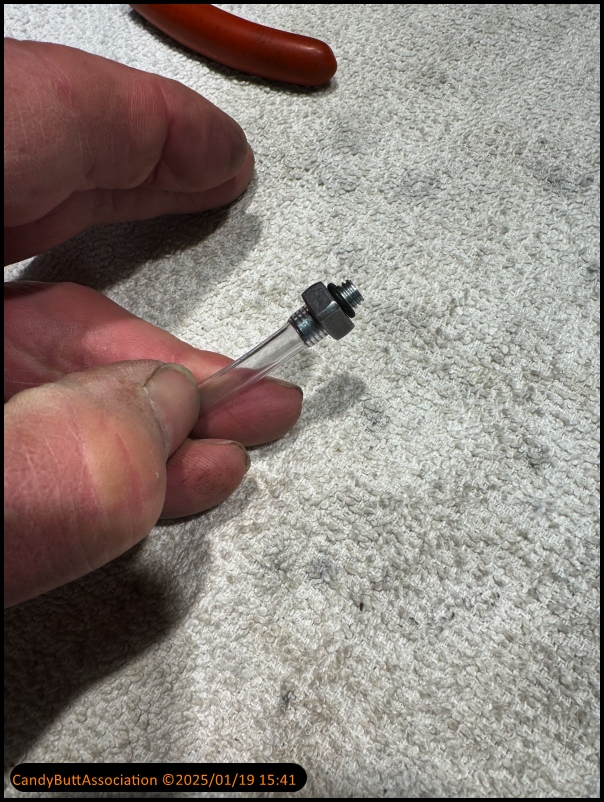
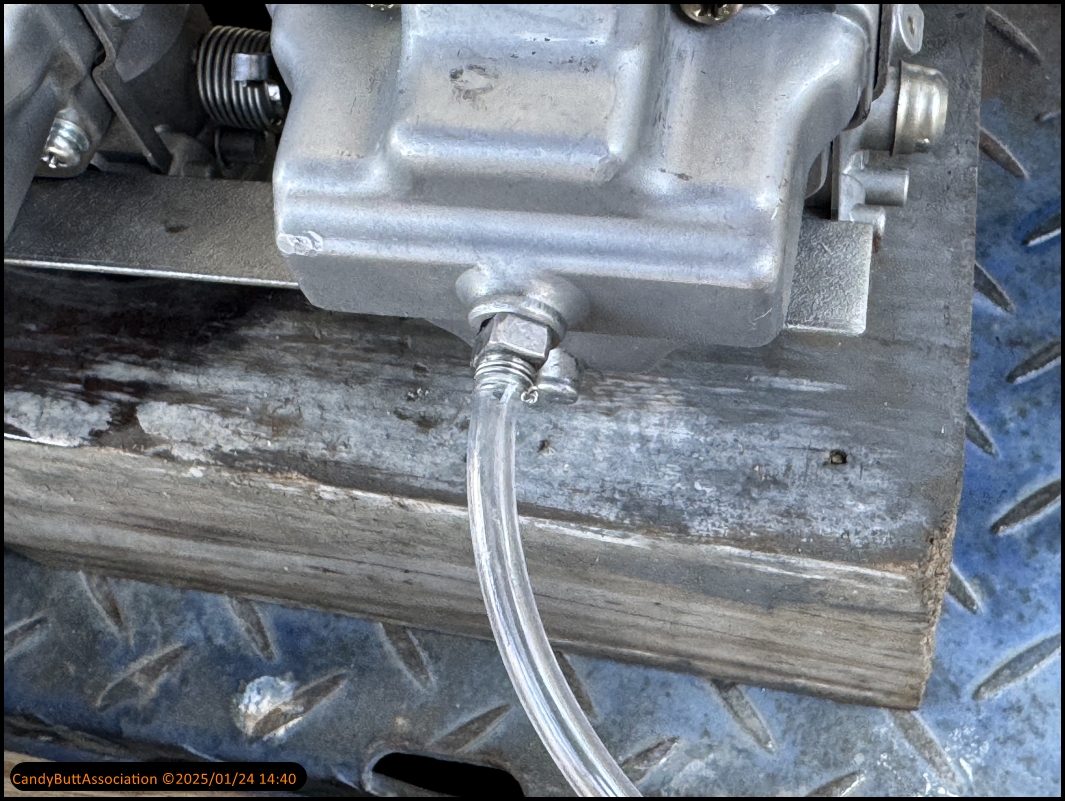
Made an adapter so I can't check the fuel level in the carburetor bowl.

It is a bolt of the right size, drilled a hole in it.
Added an O-ring.
Some Tygon tubing.
Replaced the newer style float bowl with one from the 79. Testing purposes only.
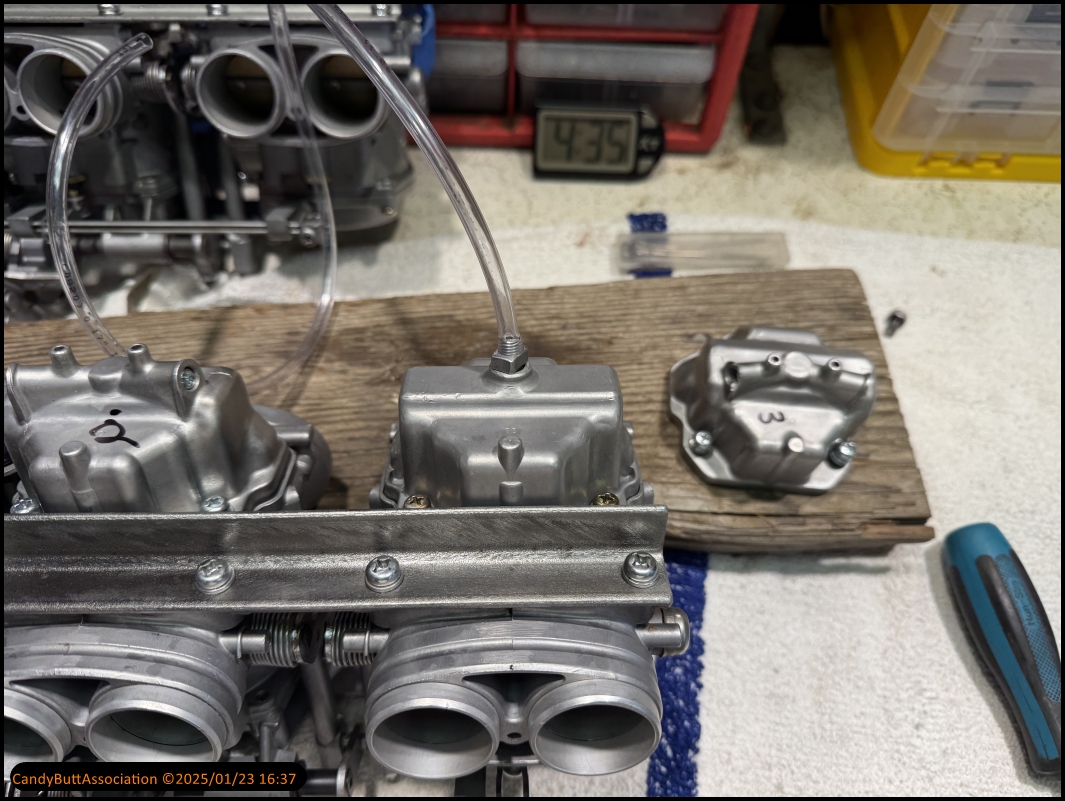
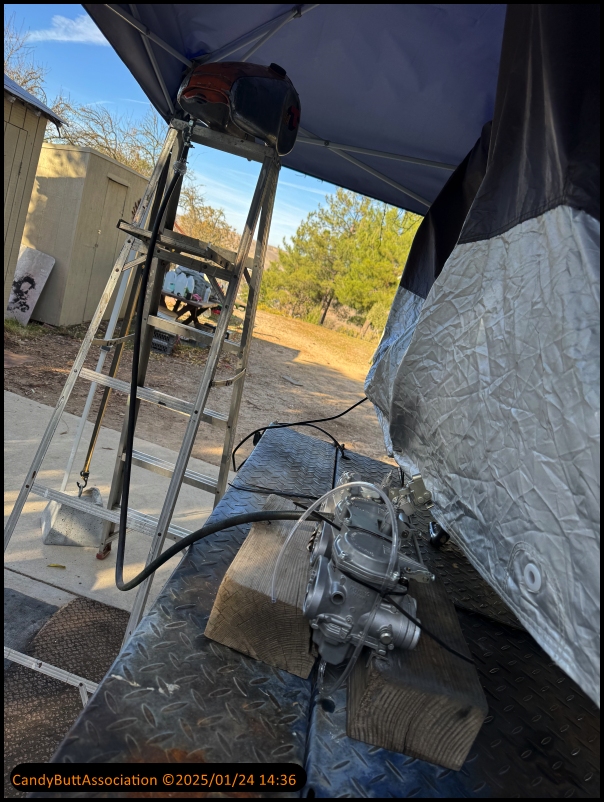
Replaced the petcock on my TT 500 auxiliary gas tank. It will sit on top of a ladder and gravity feed the carburetor rack.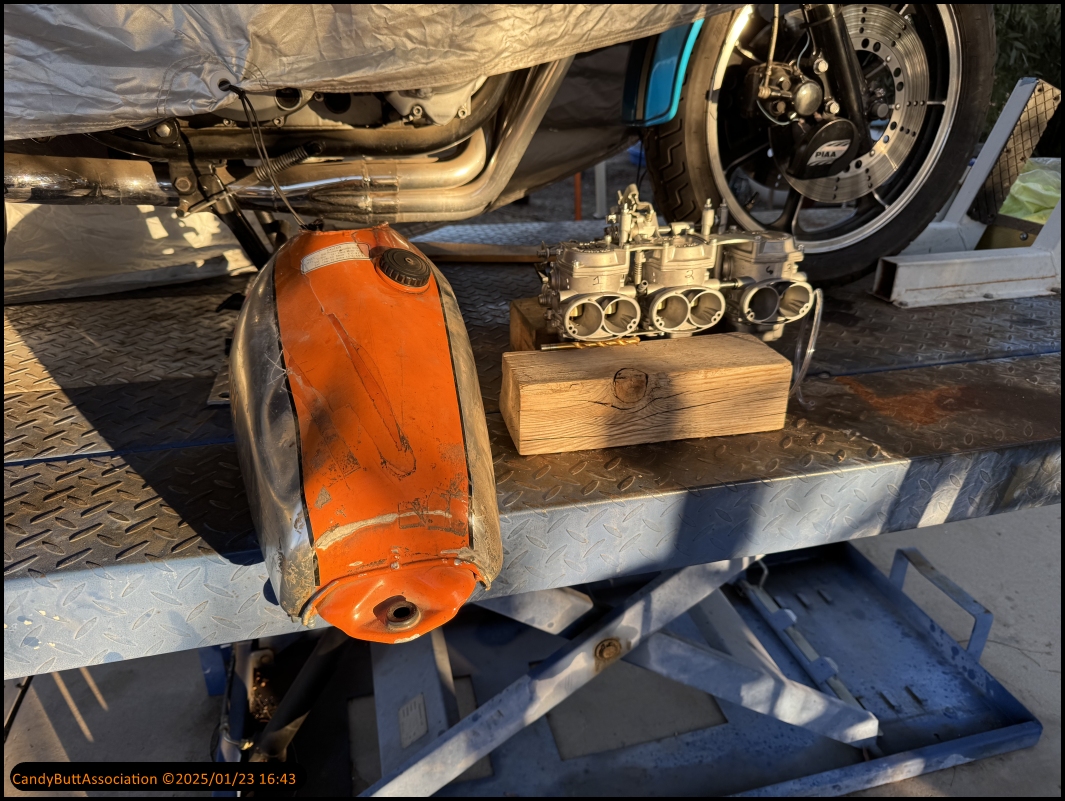
For now, I am out of time and daylight. So tomorrow is another day.
2025-01-24 Kz1300 Float Bowl Height Check
2025-01-24 Kz1300 Fuel Height in Float Bowl Check
Here is the test set up. A 1976 Yamaha TT 500 gas tank with a new petcock up on a ladder.
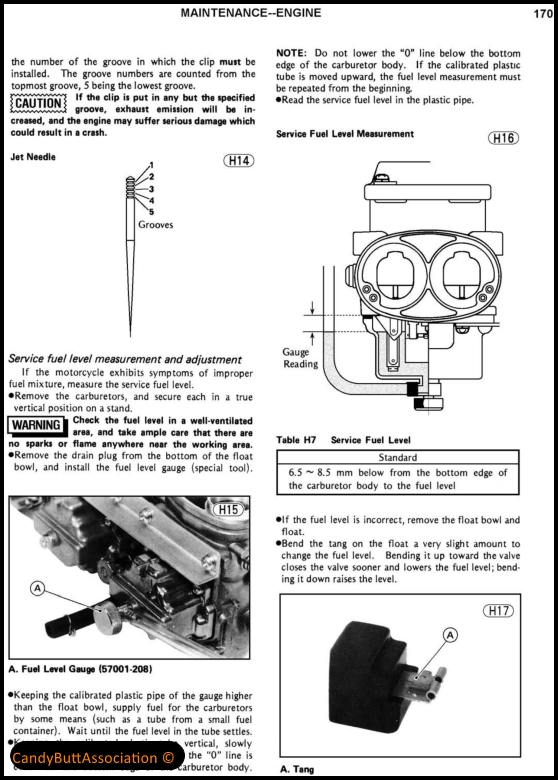
Acceptable range per the factory service manual.
I do not know what they're talking about when they say the zero line.
Had to add safety wire to keep it from leaking.
Everything nice and clean. However, I did notice small, very small, particulate matter from the black ceiling gasket.
I always use anti-seize on all my fasteners.

One very well used factory service manual.
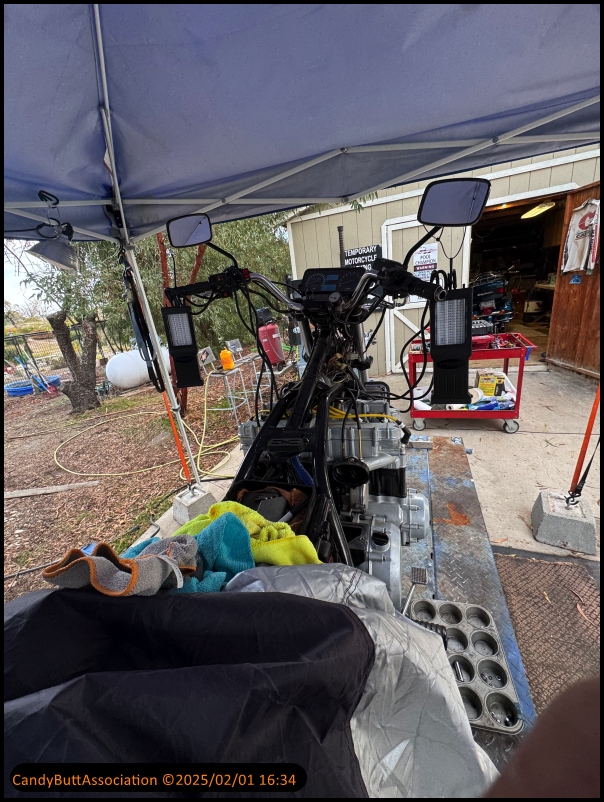
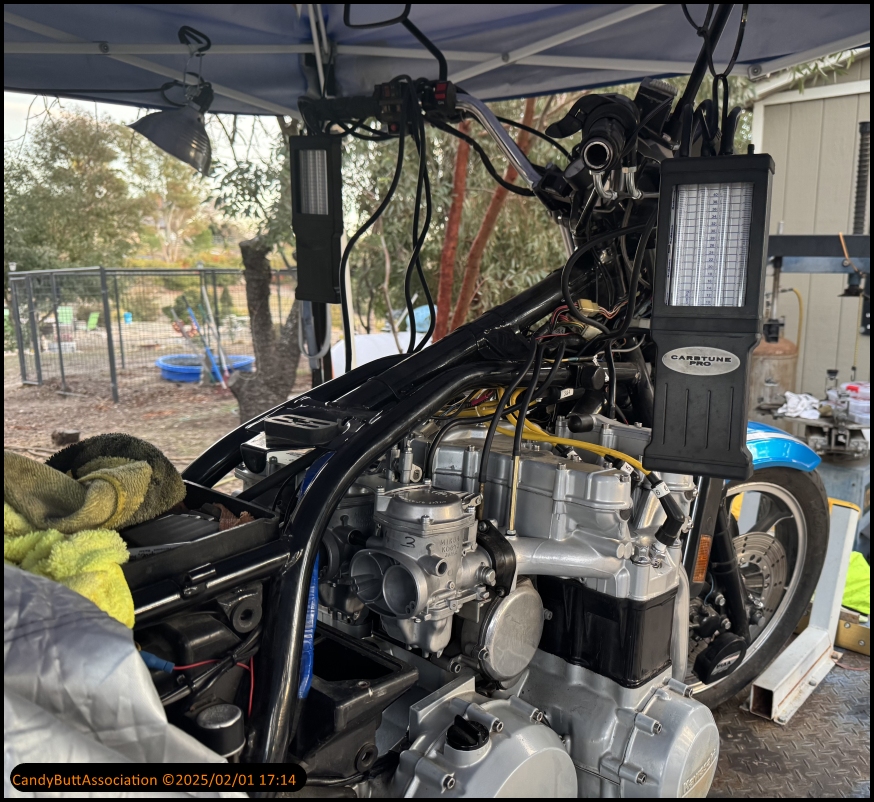
2025-01-31 Kz1300 Install Carbs
2025-01-31 Install Rebuilt Carbs
Before installing, check that all screws were tight, but the bench synchronization was correct.
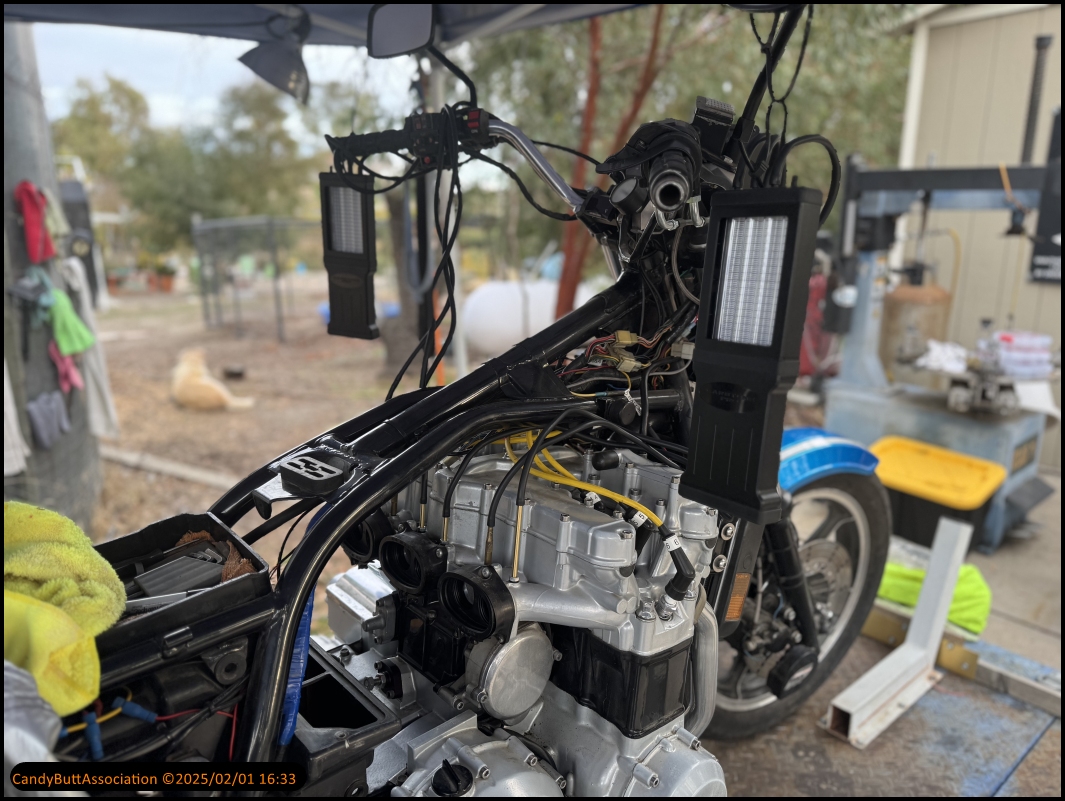
Installed the vacuum extensions before plugging the carbs into the boots. Easier that way.
Manometers hung. I even checked that the restrictions in the tubing were the same for all six.
Pulled the spark plugs they all look good.
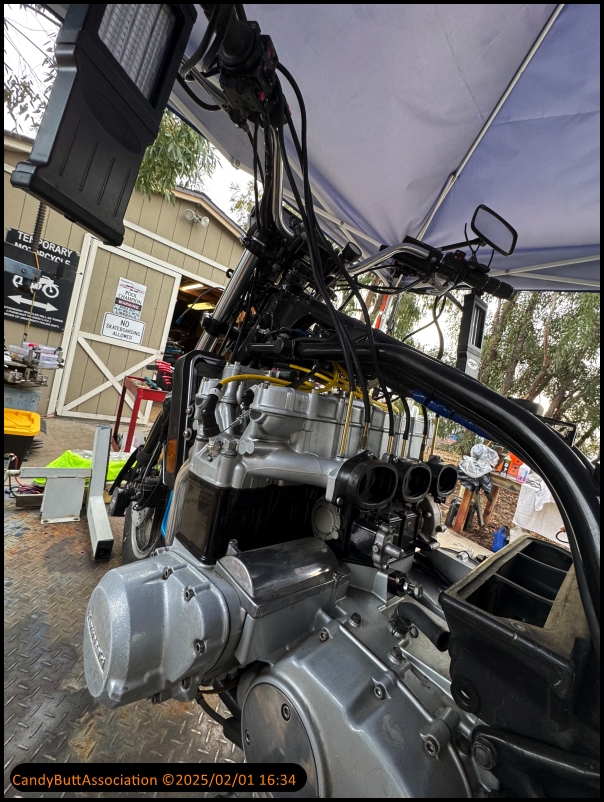
Installed. And clamped down.

I sure hope this works.
I would like to ride the bike while the weather is still cold..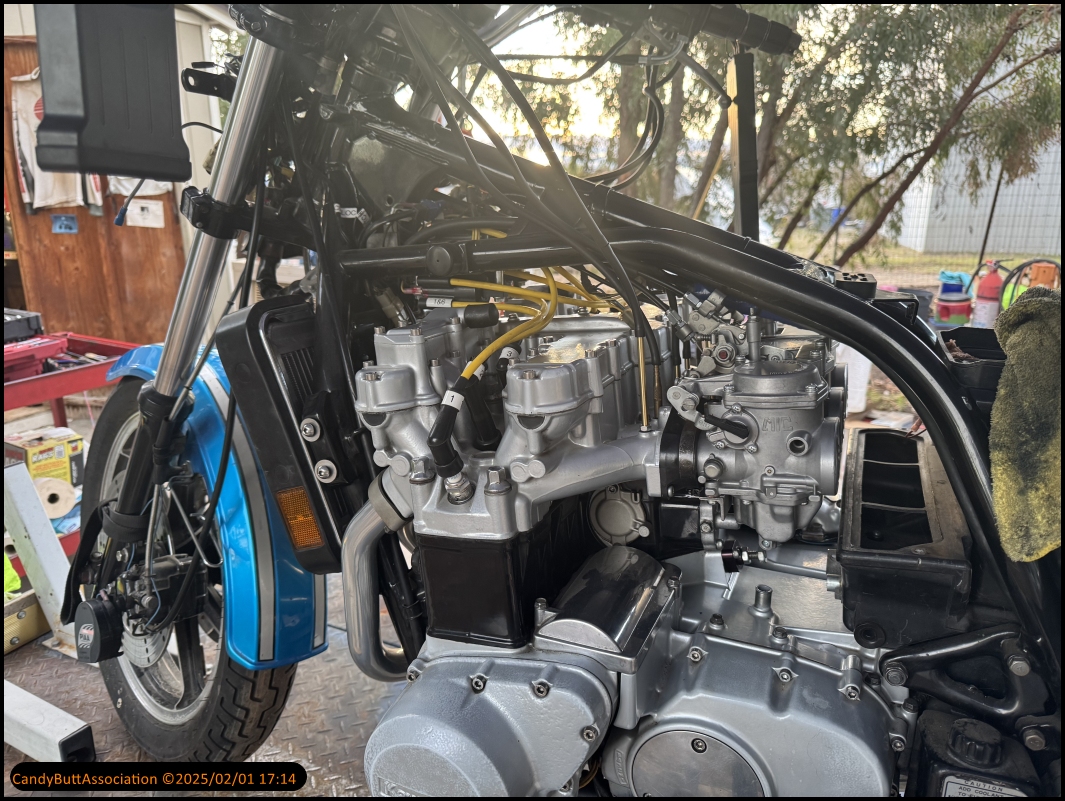
2025-02-03 No Fuel Air Adjustments on carb 1, 2
2025-02-03 No Fuel Air Adjustments
Today was the big day. Going to fire the old girl and see if all my carburetor work works.
As you can tell by the title, the answer is no. I still have work to do.

An initial fire up was running very poorly. Pulled the spark plugs and one and six were very wet, indicating no spark.
Check all the connections, latest sport plugs across the head and spin the motor and they all are sparking. What the fuck?
I noticed that one and six has a slightly weaker spark than the others. But for now, she is hitting on all six so let's adjust the fuel air mixture.
I made a tool to access the jet for the inner cylinders.
Unfortunately, the only carburetor that has response to the fuel idle Jeff being adjusted his number three.
Carburetors one and two the jet can be fully inserted or fully out and no change in engine response.
Carburetor three, running it in the engine, stumbles. Turning it out it RPM raises.
Three turns out seems to be the sweet spot. This is for both adjustments on carburetor number three.
I thought perhaps because I had not done a running securization perhaps the fuel air idle circuit was not yet in play.

So I performed a rough running synchronization. Here are the results.
At this point, the bike is idling very well, and is very responsive to throttle. I am kind of debating whether to mess with it or just let it be.
I pulled the sparkling plugs. Here is the result. One through six left to right.
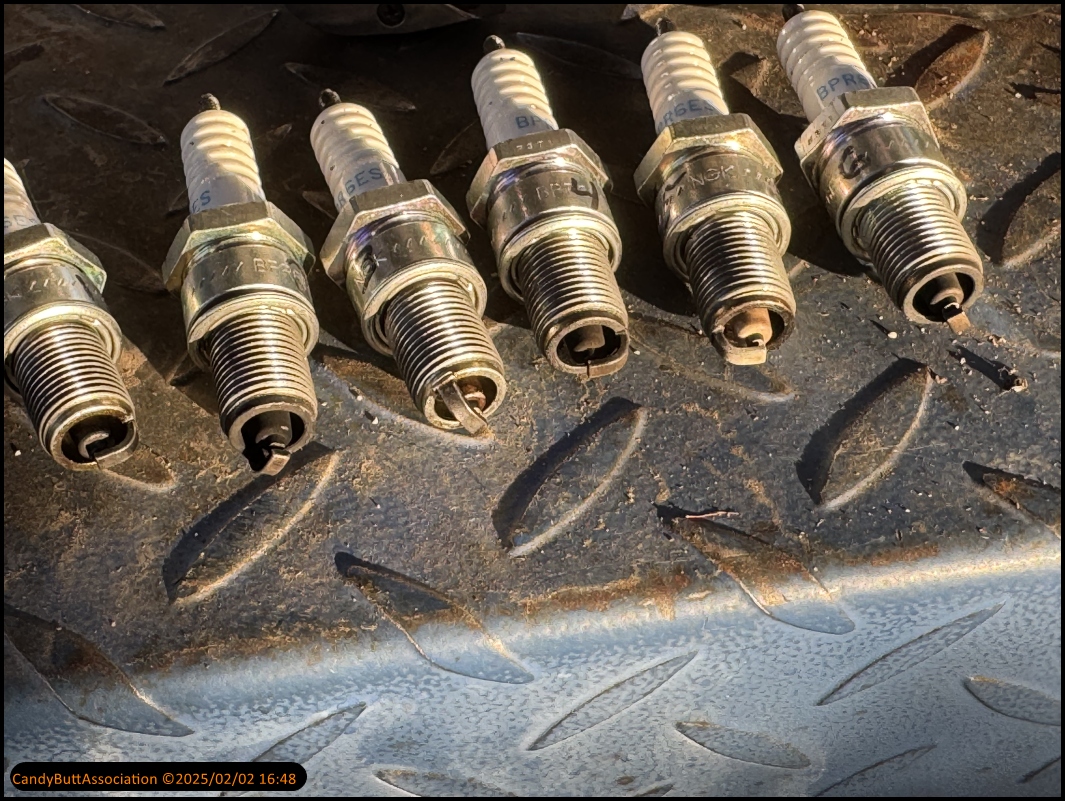
I don't know why, but the picture makes the plugs. Look better than what they are.
Number one looks a bit oily, to a bit sooty, three is wet, four is sooty, five and six look great.
Is it a coincidence that five and six had the carburetor that adjust correctly?
2025-02-04 Consulted Herb of C&H Cycle
Decided to talk to Herb Varin at C&H Cycle. He was very nice, spent about an hour with me discussing what it might be.
Herb suggested that I start first by lowering the fuel level in the float bowl by 2 mm. When I set the level, perfect service manual, it was using brass floats, not OEM. Not sure if this matters or not, probably not.
Herb's theory is that a little bit of fuel is dribbling into the Venturi and into the combustion chamber. Even though it's just a little bit, it is much more than the idle circuit provides, rendering the circuit in operative.
I think this is worth a try.
Additionally, I am going to replace the emulsifiers that wiredgeorge provided, the ones that had to be turned down to fit.
My theory is that fuel might be passing from the float bowl and oversaturating the pilot jet circuit.
My plan of action is to perform the following steps.
Fortunately, we have a storm coming in and this is work. I can do indoors.
Persevere to persevere!
2025-02-04 Carb Rebuild Rev2
edit
2025-02-04 Carb Rebuild Rev2
"If you do not succeeded, try try again."
'The definition of insanity is doing the same thing over and over and expecting a different result."
I am starting to wonder which one of these quotations apply to me right now.
After the first rebuild, carburetors wanted to have no idle circuit adjustment. Spoke to Herb Varin. He suggested lowering the fuel level 2 mm.
Here is what I found after pulling the rack. Wet intake, boots, indicating either a fuel leak or too high of a level.
It kind of makes sense
. If I have fuel dribbling into the cylinders, it would overpower the idle circuit.
I decided to install all new brass. I had bought two kits from Damien Ding and I have one kit from Keyster.
The brass that was installed by wiredgeorge, the emulsion tubes have been grown down to fit the ID of the carburetor.
This is pilot jet number one.
Pilot jet number two. The camera angle is a bit off, but you can see the

jet is clear and that both jet diameters visually are the same diameter.
The new diaphragms from Zed-Parts have settled in nicely. No wrinkles!
New fuel inlet valve. I would prefer the needles to be some form of rubber metal.
New idle jets came protected with plastic.
The overall quality of this kit is very good.
Main jet number one.
Note to self, be sure to install the washer.
Main jet 2.
Beautiful.
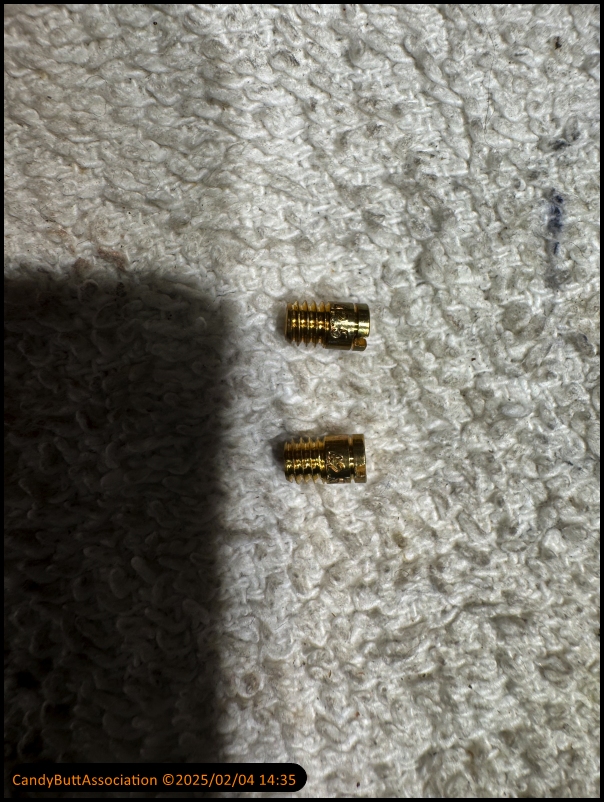
Idle jets installed.

New emulsifier tubes. On carburetor number one, the left-hand side is snug.
A bit tighter than I would like, but no need to perform machining!!
Installed.
Both are seated, the picture makes it look like the right hand side is a little bit taller, but it is not.
Or is it?
I have to look again.
OK, then, no wonder the main jets have not yet sucked the emulsifier tubes down to the seat.
Main jet number one.
And number two.
Fuel inlet valve and clip.
Ready for the float bowl.
Choke plunger. OK, enriching system plunger for purists.
Old and new.

One final look.

Nice and clean.
Still need to lower the fuel level by adjusting the float.
This completes carburetor number one.
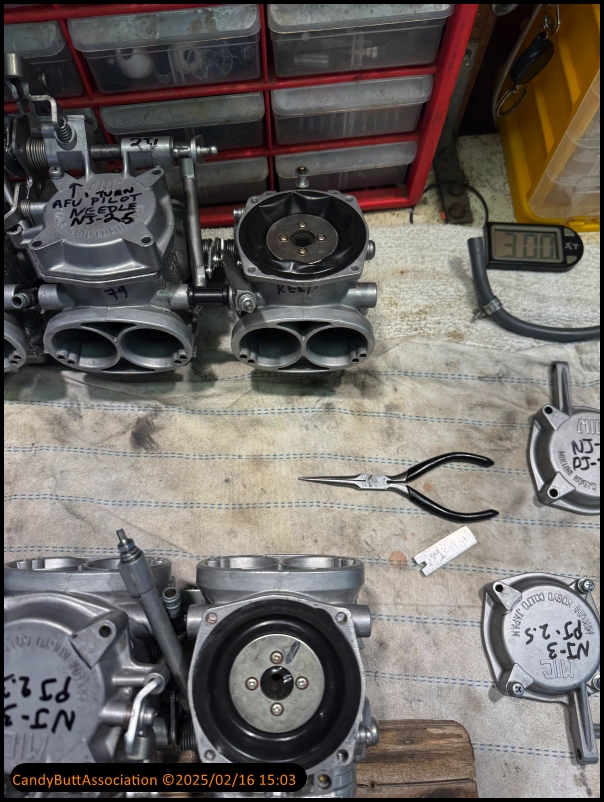
Next step, carburetor number two. Carburetor number three seems to be working so I'll leave it alone.

If it ain't broke, don't fix it.
A pile of brass.
2025-02-05 Carb Pivot Point - Why?
2025-02-17 of carb sync and pilot jet adjustments?
Need help. I'm obviously, not capable of figuring this out on my own.
I have two carburetor racks. One is original equipment, the other one from eBay.
I have cleaned both numerous times using the scotch tool, syringes, compressed air.
The best I can tell, all passages are open, including the pilot jet transfer, the ones that run at a 45° angle to the pilot jet from the bottom of the emulsifier fire tube.
Having said all that, I still don't have any real adjustment, if any when adjusting the pilot jets.
I have had both racks on and off at least a half dozen times now.
One lucky time, everything worked great! Every pilot jet had adjustment, the engine would stumble when closed, and in RPM would pick up when the chat was open to about 2 3/4 turns.
I removed the carburetors to see where the butterfly valves were when the bike was adjusted and running great.
Here's a short video.
Me, not good enough to leave alone, decided to replace the OEM diaphragm on this working rack, and also to change out the float bowls with 1980 screw type drain instead of 1979 remove the bolt type.
In hindsight, WTF was I thinking? "If I could only get it back to where it was when I started, I'd be happy!"
Did the bench synchronization, installed on bike.
The synchronization was close on the running bike, made some minor adjustments within factory service manual specs.
Went to adjust the pilot jets and now none of them, none, have any impact on the engine performance across the entire adjustable range.
In a earlier post, scotch was nice enough to reply and provide insight about the difference in vacuum levels between the engine side of the butterfly, and the air box side of the butterfly. If I understand it correctly, the engine site has much more vacuum for running the needle, jet and main jet. This value is measured in inches of mercury. The other side, of the butterfly, which creates a siphoning effect is what provides the pilot jet circuit with fuel.
Finally to my question, is it possible I have the synchronization incorrectly set, which is preventing adequate inches of water vacuum to enable the pilot jet circuit to provide fuel? I know that the air passages are clear and open as proven by spraying wd40 from the pilot jet and can see it escaping from the inlet passage at carb mouth, air box side. IIRC, the bottom hole.
At this point, the bike is running great, idles smooth and nice and has beautiful response from idle to redline, so I am reluctant to mess with them much more. Even at that, I'm very curious about why that one time I had pilot jet response across all six, other times I've had four out of six or five out of six, and now, zero out of six???
Short video of current running condition..
Hoping for responses.. sorry to bother everyone yet again...
2025-02-17 Needle Jet Measure, Tower Circlips, Make Best Rack
edit
2025-02-17 Needle Jet Measurements and Tower Circlips
Last attempt failed miserably. Bike ran bad. One of the slides was disconnected from diaphragm. Sigh.
It's about attention to detail. Or lack thereof.
Wanted to install my only set of Zed-Parts new diaphragms to make one 'best' rack of carbs.

Internal thoughts.. Easier to simply replace entire unit, slides and all?
Or should each slide stay 'married' to original bore?
Test fit the slides between racks, decided ok to transfer as a unit.
New diaphragm.
Old, stiff, wrinkly diaphragm.
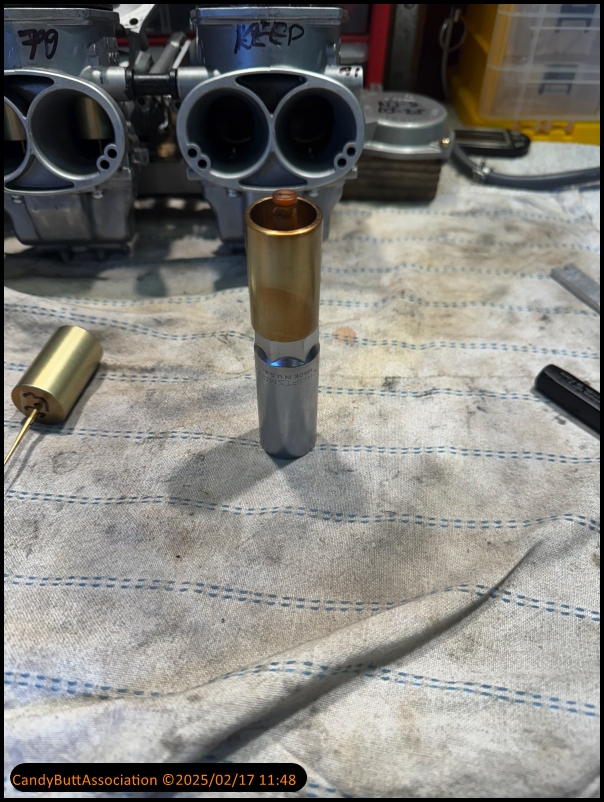
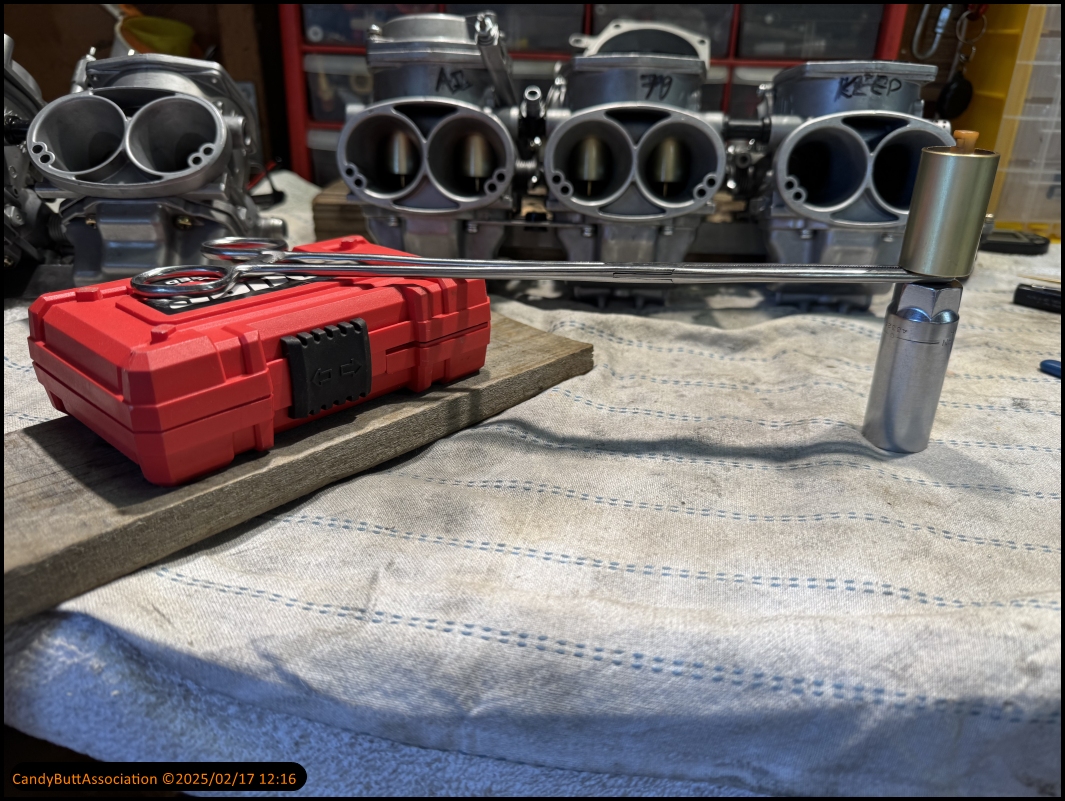
After previously launching a needle into outer space, started using a sparkplug socket.
The Damen-Ding kit circlips don't fit properly. This allows the tower, some movement. If wiggle enough, the tower will become completely loose.
Separated from the slide. This happened on two of the six.
Kawboy keeps talking about form, fit, function.
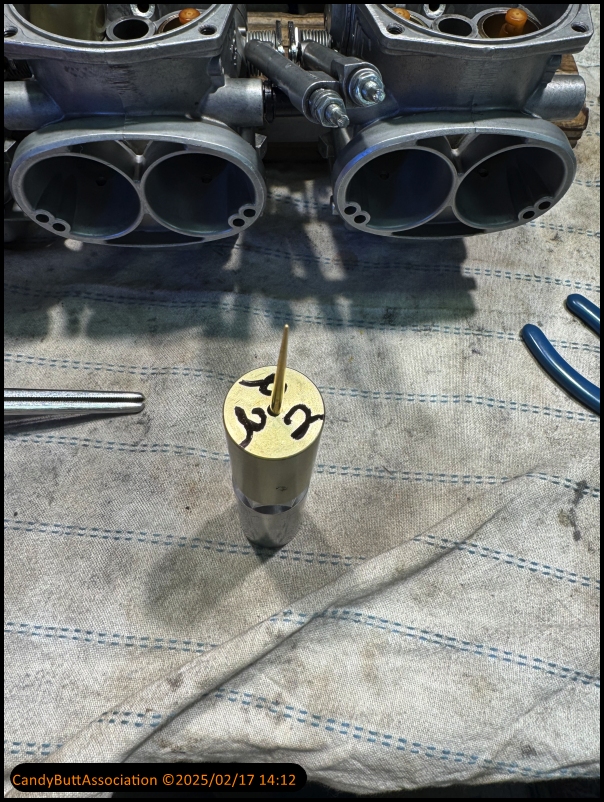
Found a easy way to determine if the needle links were the same given identical clip positions.
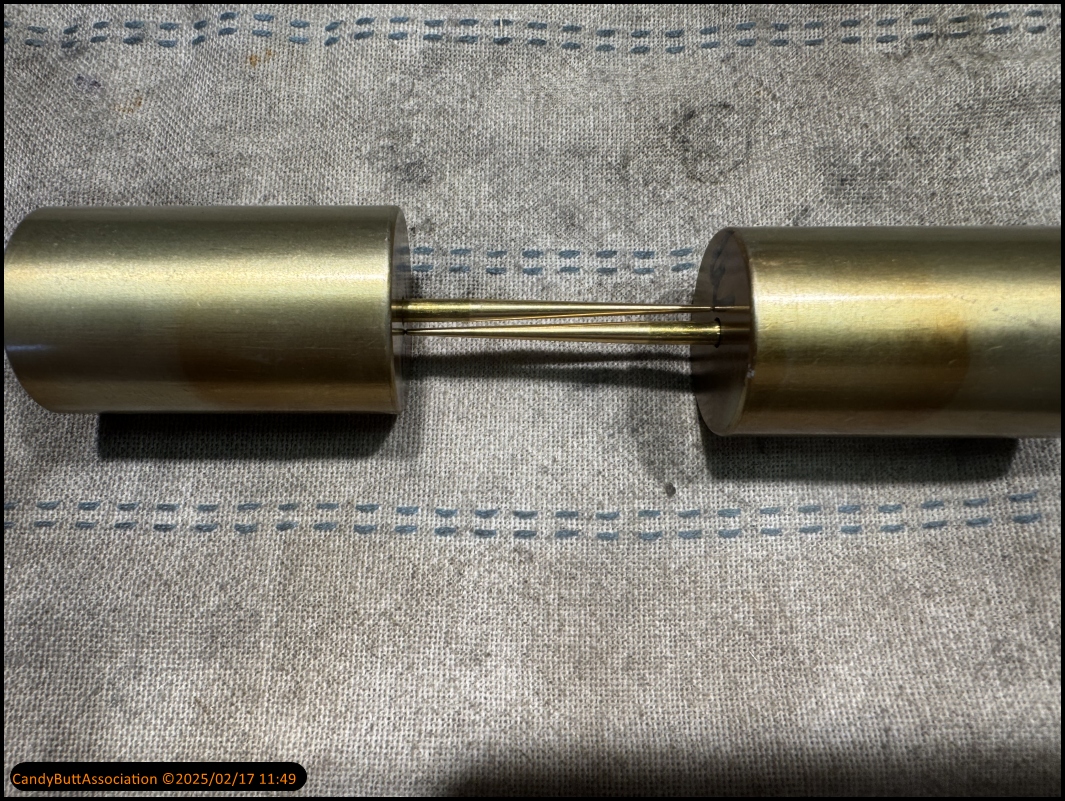
This little technique works well.
Built a test fixture for installing circle clips. These carburetors have been rebuilt by wiredgeorge. I do not know what kit he used.
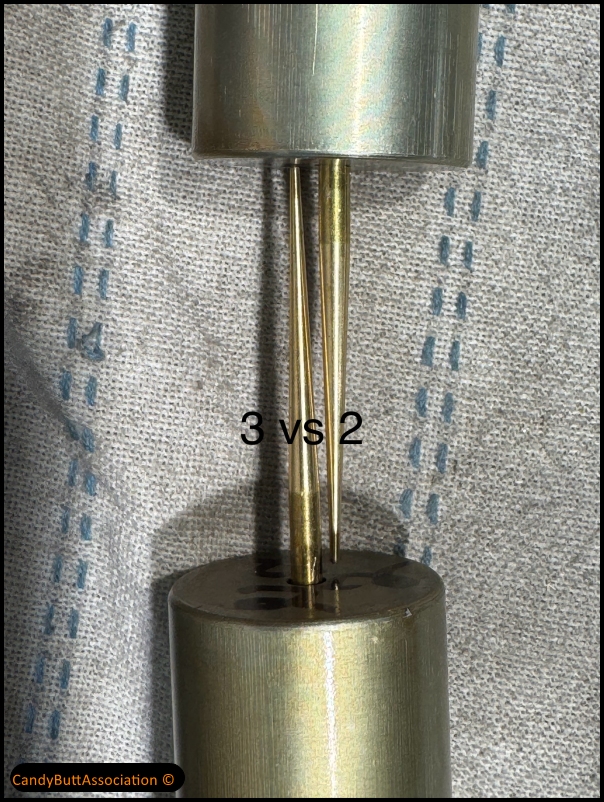
I decided to set one rack at the second position, one rack at number three, which is what the factory service manual specifies.
The difference between position three and position two.
An improper circle clip will not position the tower correctly, resulting in drag. This prevents free movement for the slide to move downward.
x
Final Bench Sync
Final Bench Sync
After making one best rack, using the best parts from two racks performed a final bench sync.
2025-02-17 Got Carbs installed and Sync'd
2025-02-17 Got Carbs installed and Sync'd
... And five of the six pilot circuits are working. Only cylinder for does not have response.